> For the complete documentation index, see [llms.txt](https://help.clausebuddy.com/llms.txt). Markdown versions of documentation pages are available by appending `.md` to page URLs; this page is available as [Markdown](https://help.clausebuddy.com/smart-templates/how/in-depth/smart-templates-in-depth/conditional-rows-columns-sections-and-blocks.md).
# Conditional rows, columns, sections & blocks
## Conditional table rows
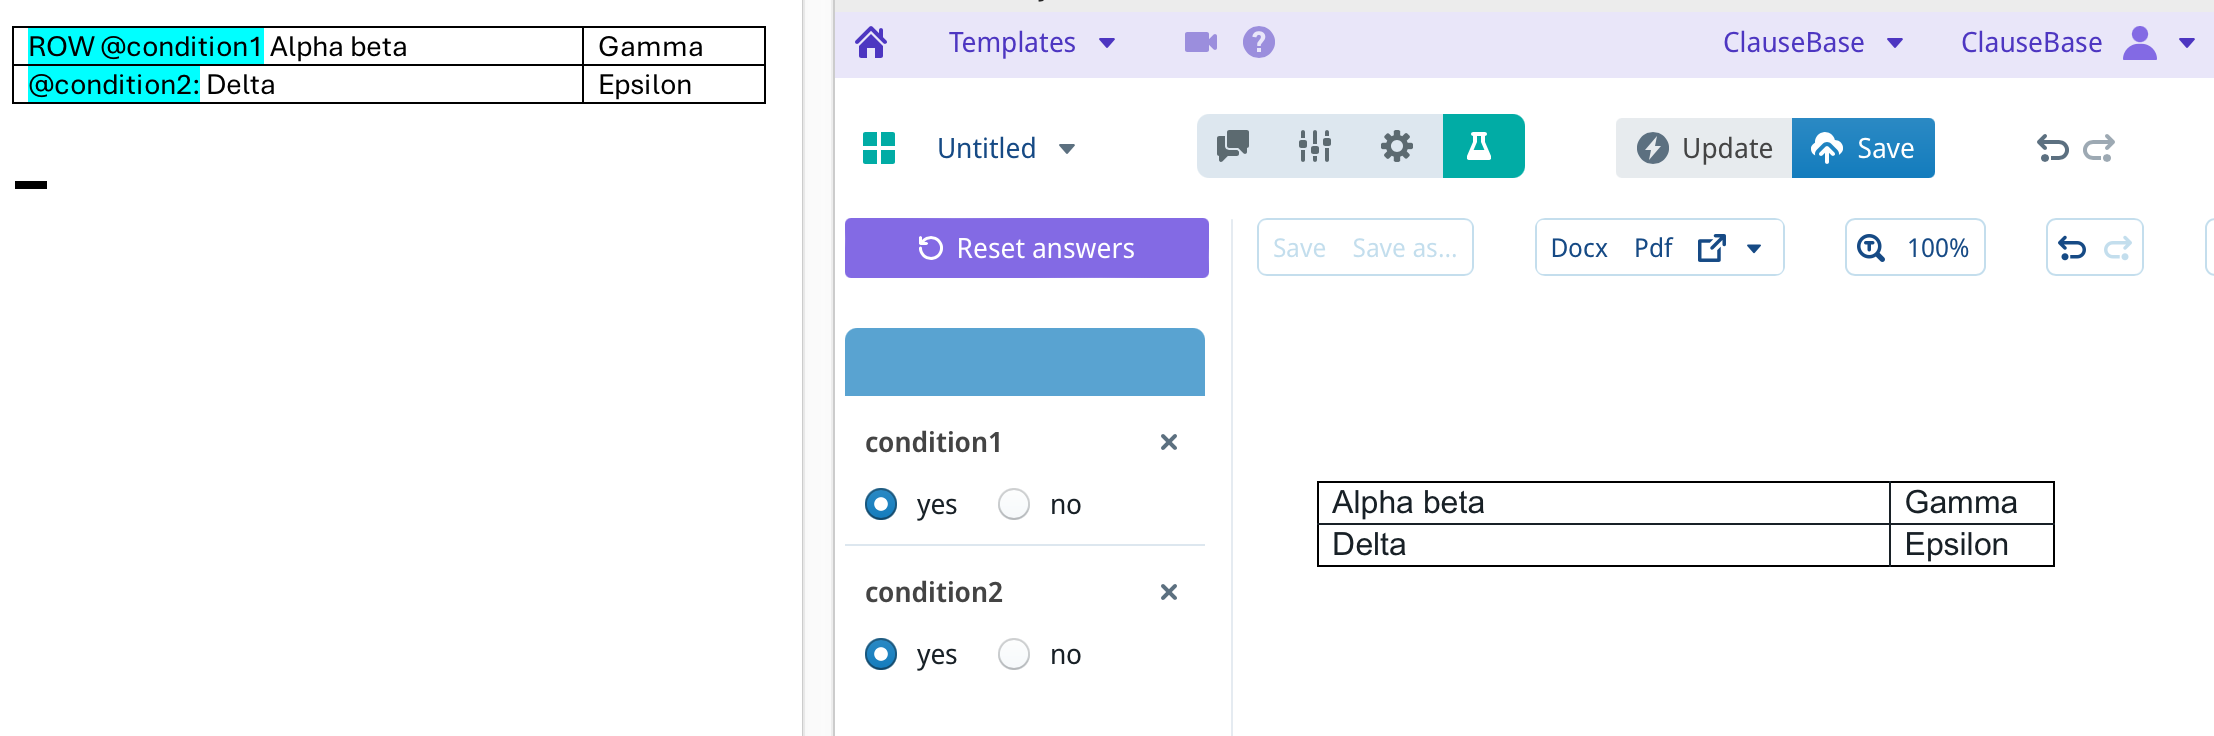
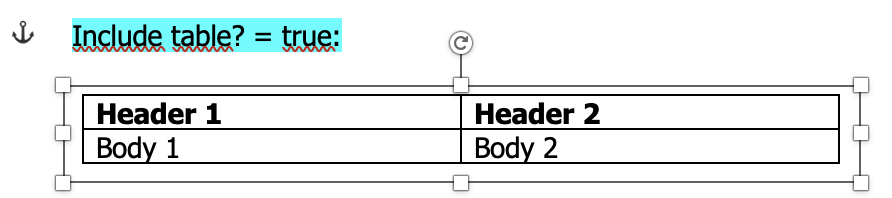
You can make table rows conditional by preceding a condition with *ROW* anywhere in the row. For example:
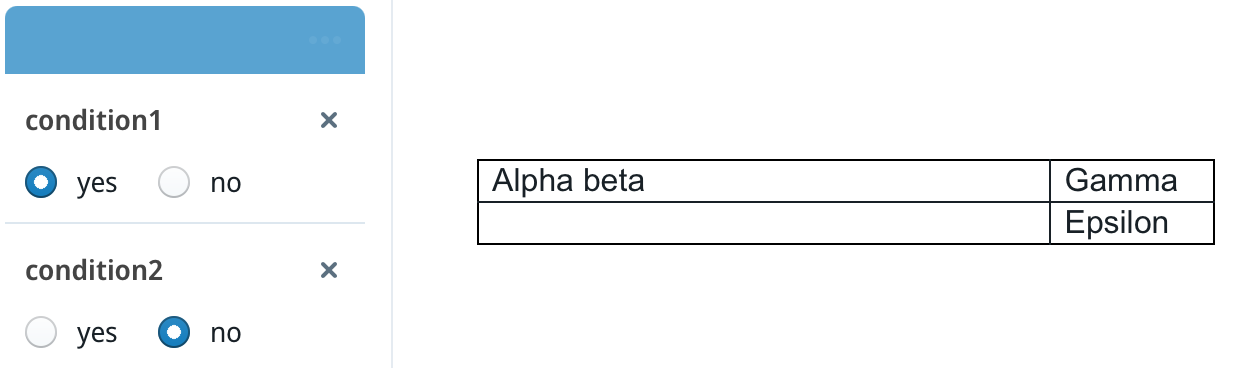
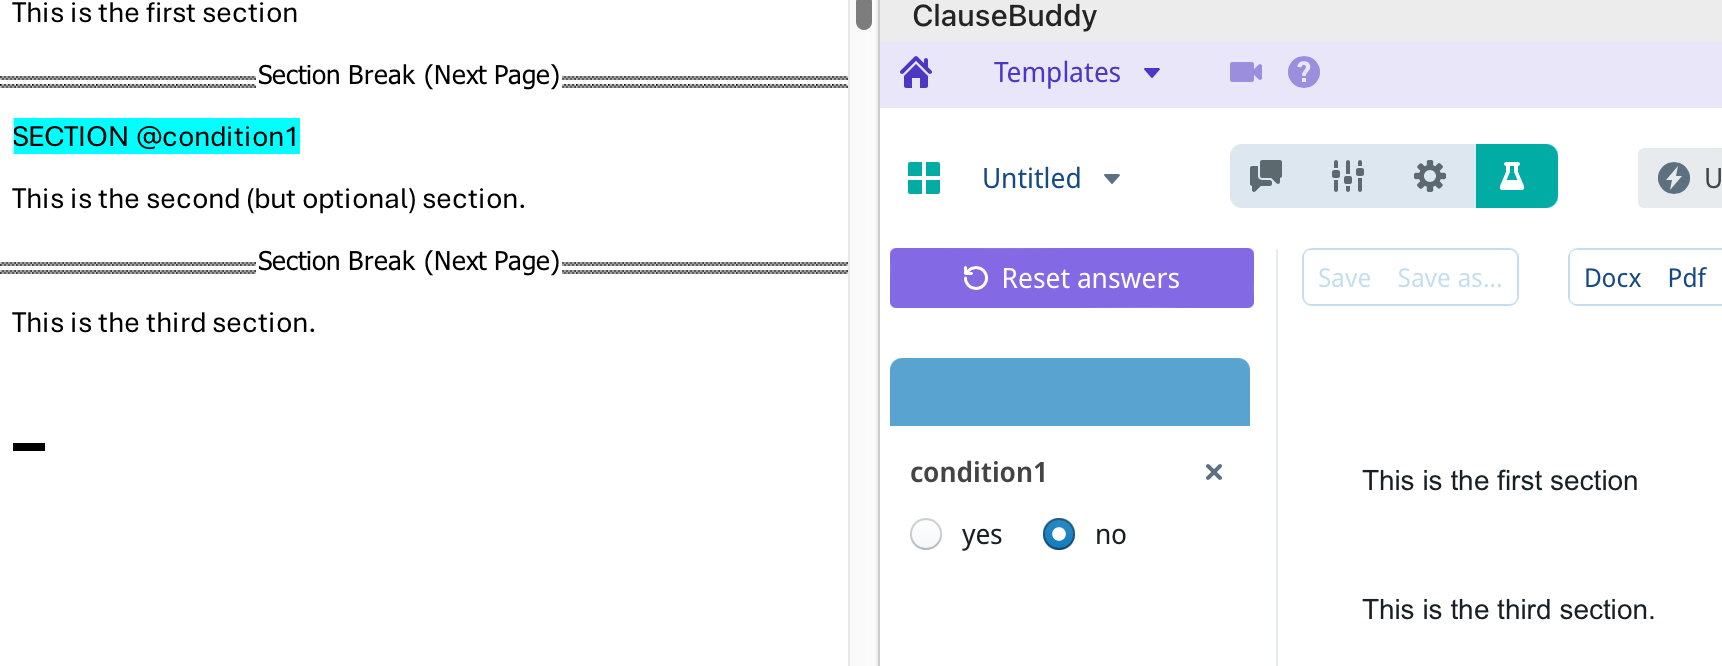
When *@condition1* is set to "no", the first row gets hidden.
{% hint style="info" %}
The condition can be as complex as you like, invoking special-functions and combinations with AND/OR/NOT if necessary. But for the sake of simplicity, we'll stick to simple conditions on this web page.
{% endhint %}
It does not matter where the ROW condition is located. So the following would work equally well, as opposed to having the ROW condition in the beginning of the first cell of the row.
Note that you should differentiate between a *row condition* and a *condition inside a row*. For example, the second row in the first screenshot above contains a @condition2 within the row, not preceded by *ROW*. Such condition works in the normal way, disable the paragraph within the cell, but not removing the row. For example:
## Conditional table columns
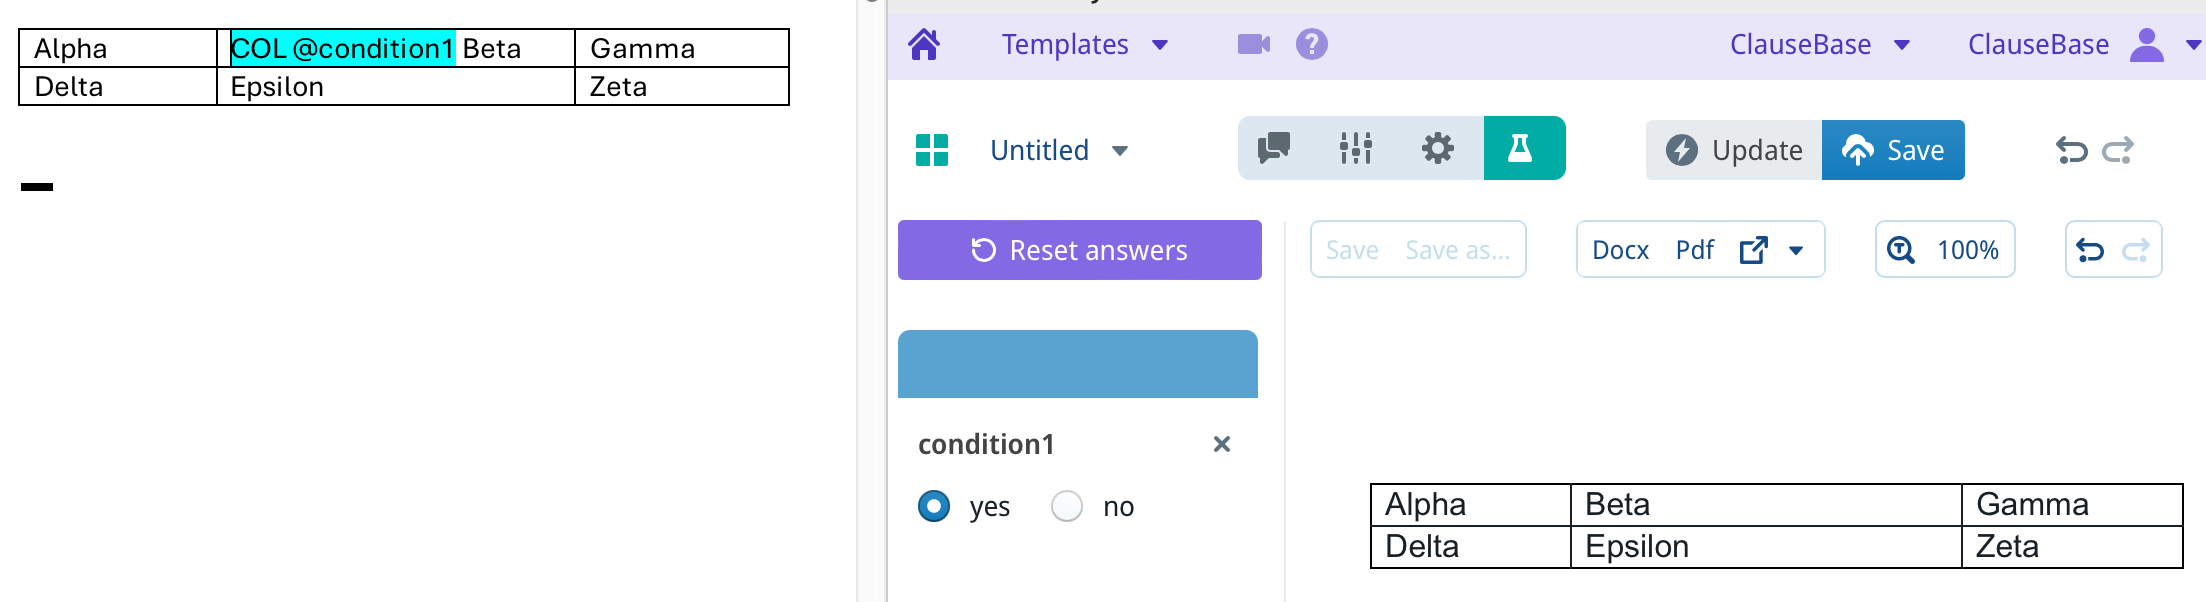
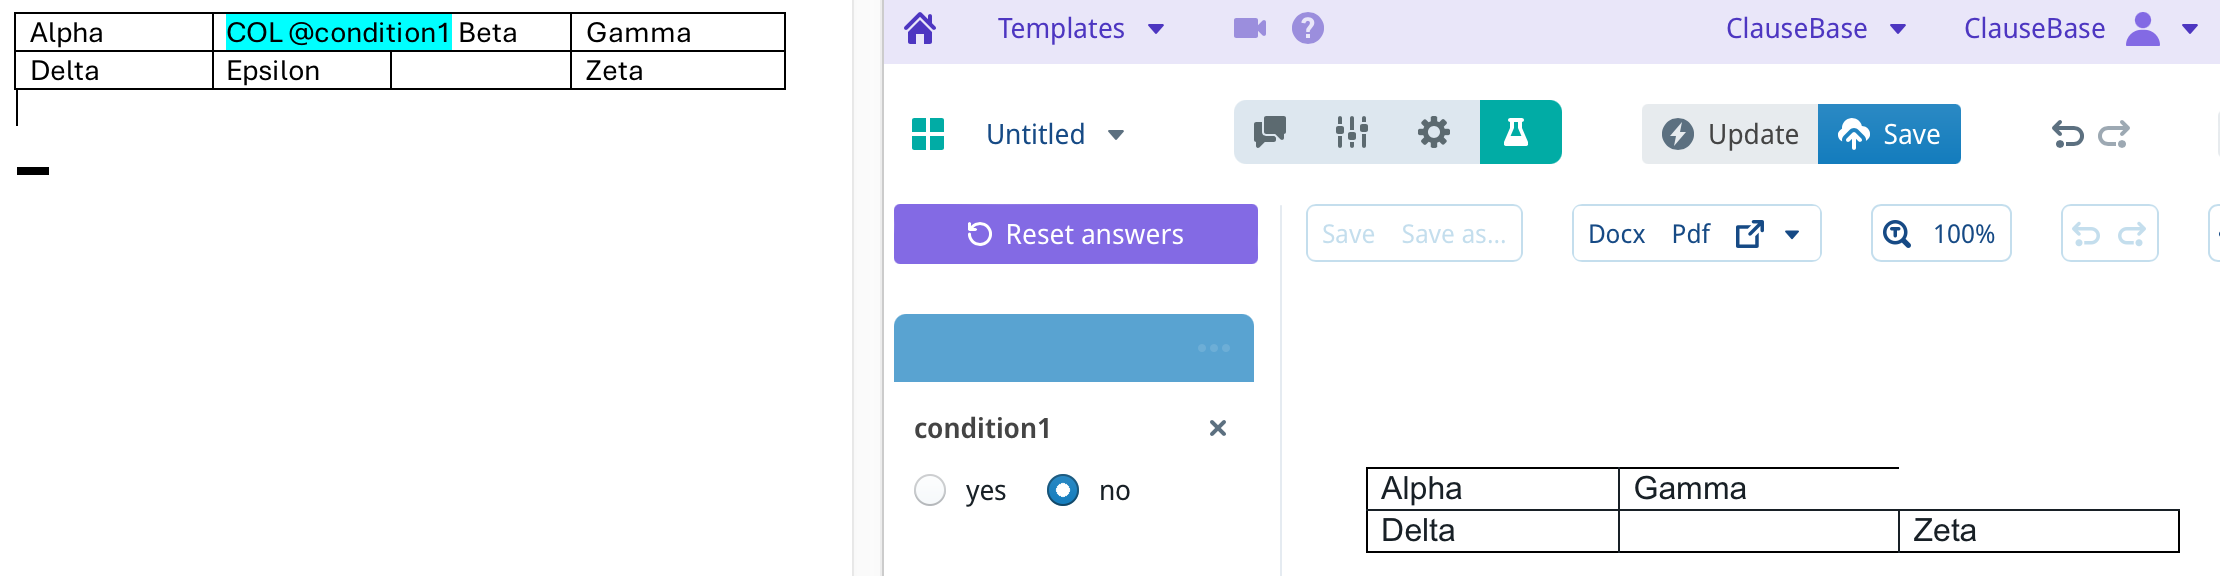
Making table columns conditional is similar to making rows condition: you prefix *COLUMN* or *COL* in some condition within the cell. For example:
When *condition1* is set to "no", the column will disappear:
Similar to the rows, it does not matter in which cell you put the column-condition, so the following will work equally well:
Note that strange things may happen when your table contains merged/split cells. This is currently not supported.
## Conditional sections
MS Word documents are subdivided into "sections", divided by *section breaks*. Each section can have its own page settings, numbering, and so on.
In practice, in legal documents, new sections are often created to host annexes, schedules and so on.
It is possible to make an entire section optional by prefixing a condition in one of the section's paragraphs with *SECTION,* e.g.
## Conditional blocks
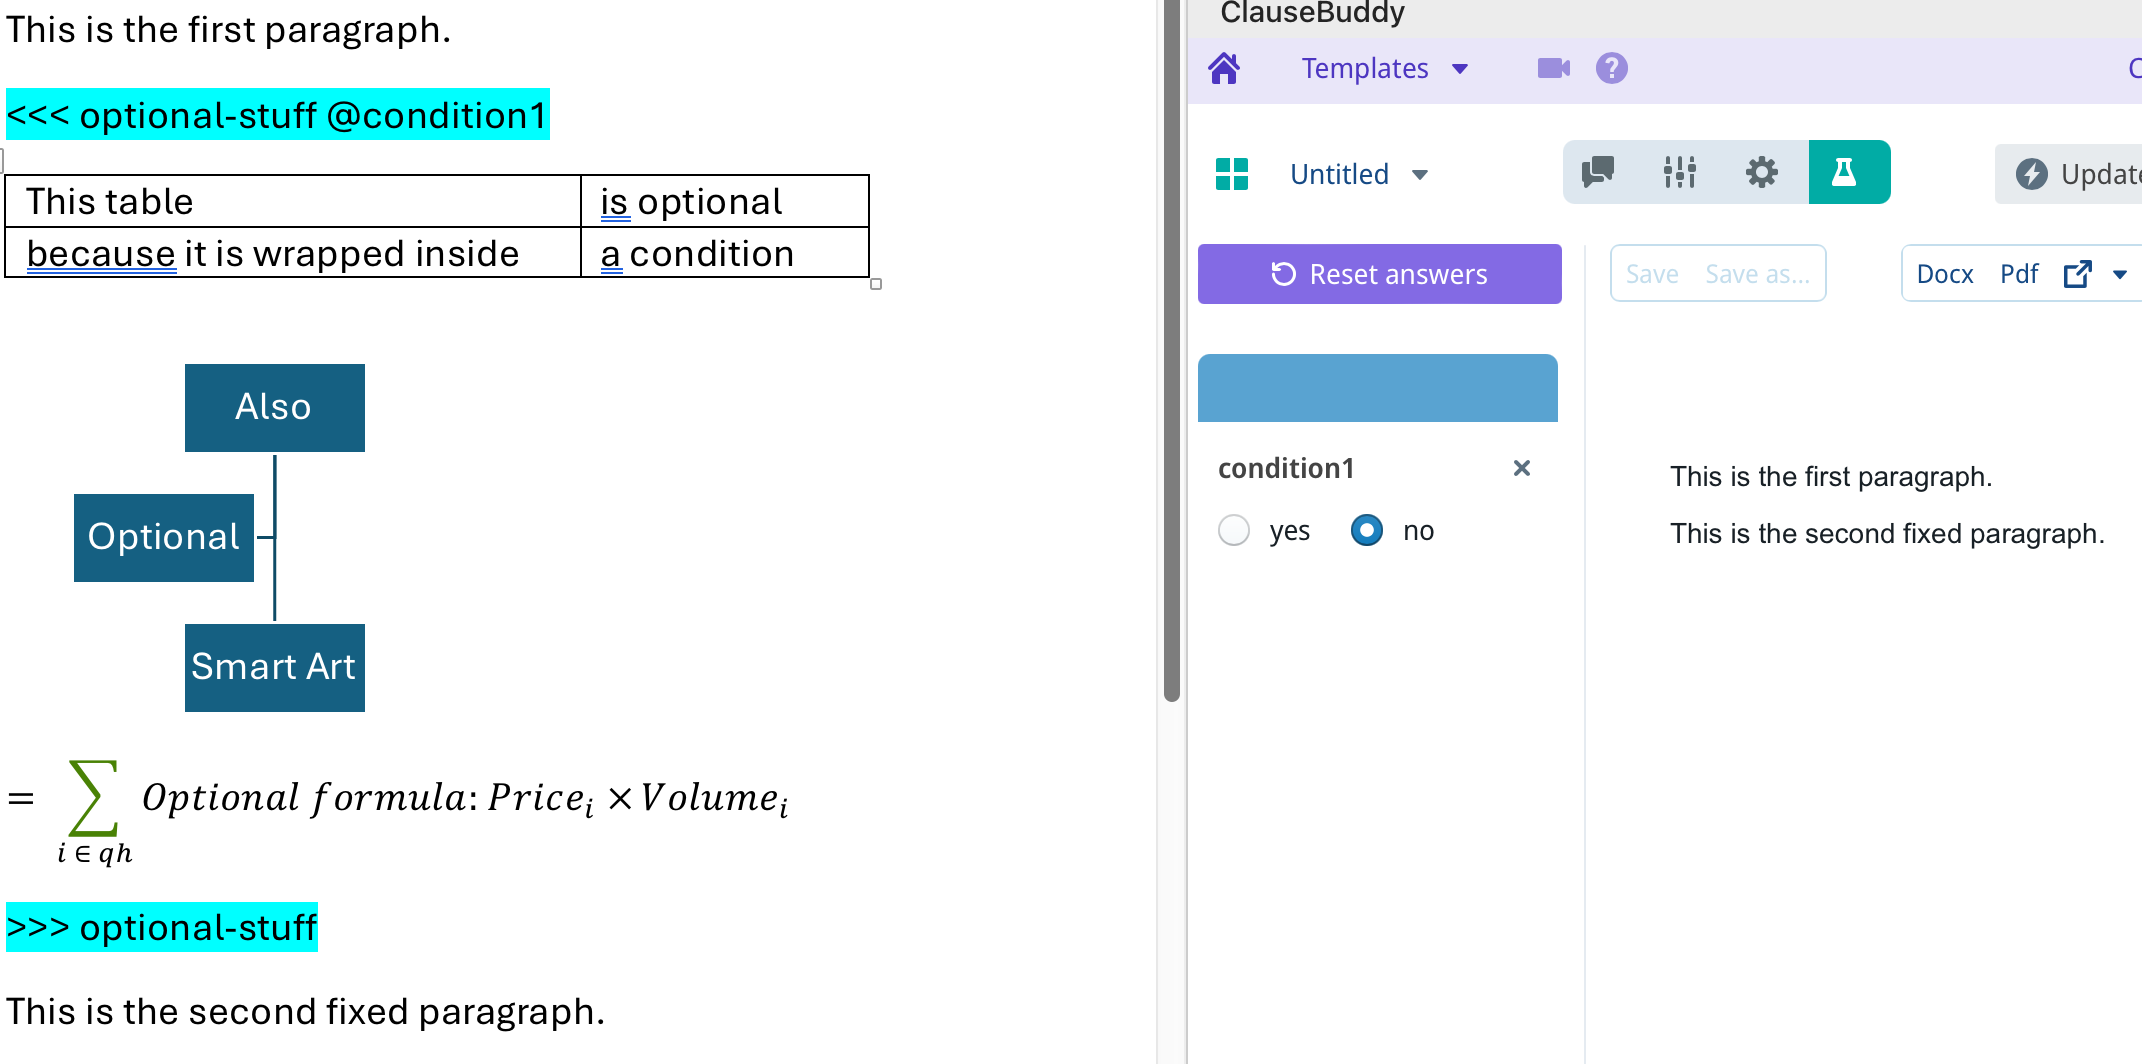
You can also make multiple document elements conditional by wrapping those elements within <<< and >>>. For example, in the screenshot below, you can see that a table, some "Smart Art" and a mathematical formula are wrapped inside of a conditional block.
Each conditional block must have an identifier, right after the <<< and >>> (in the screenshot below, the identifier is *optional-stuff*). The identifier must not contain a space, but can contain hyphens, numbers, etc.
{% hint style="danger" %}
Importantly, the <<< and >>> and their respective identifiers and conditions should be included as a separate line, with no text before or after them.
{% endhint %}
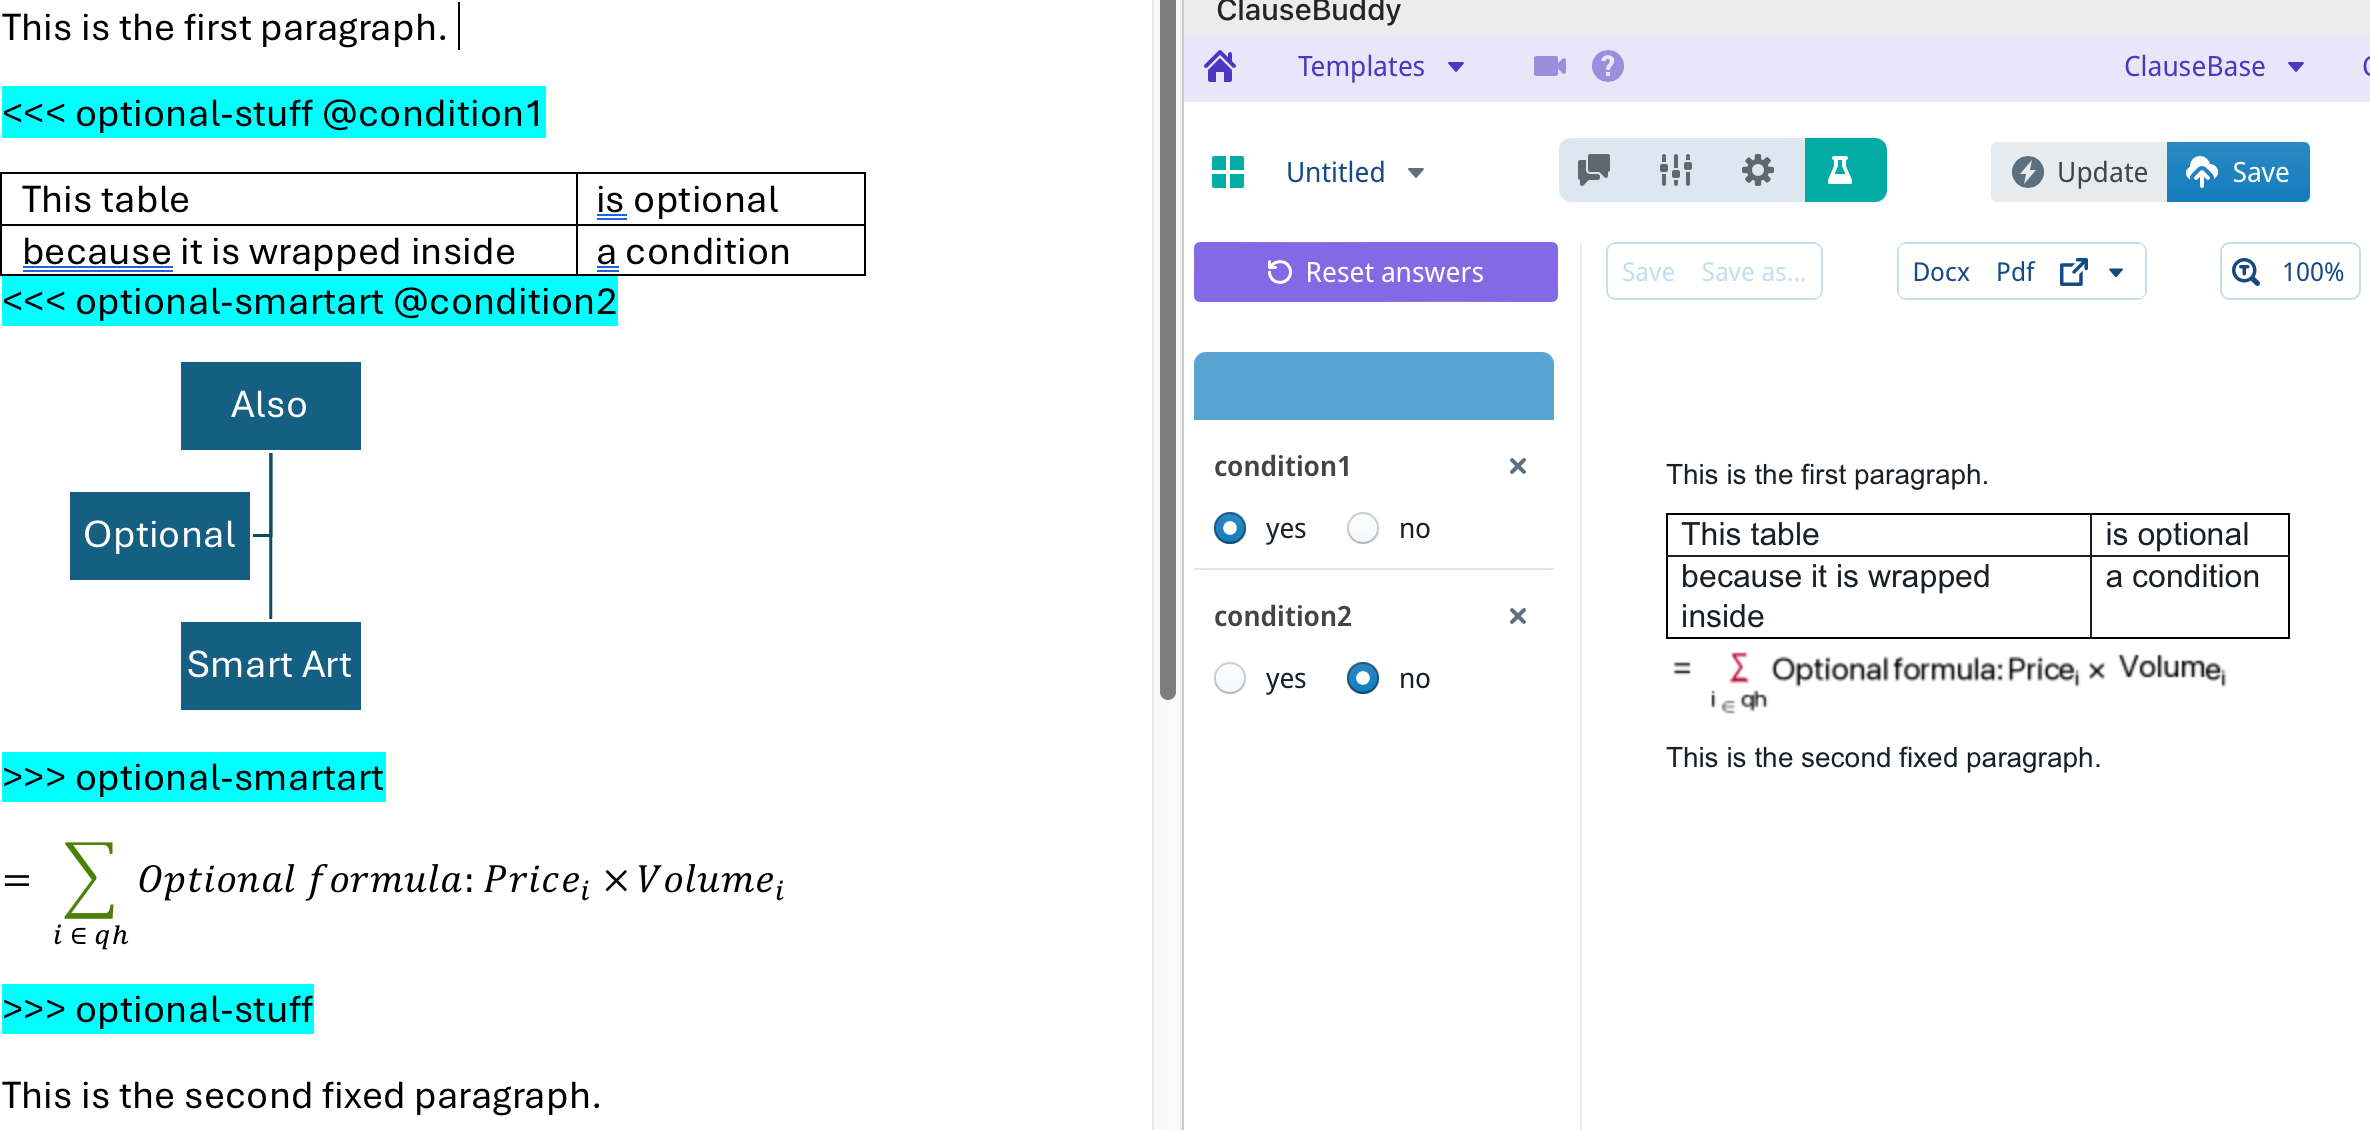
The identifier should be included in both the start (after the <<<) and the end (after the >>>). The idea is that you can nest identifiers, e.g. to have an optional table inside of an optional outer block. For example, in the screenshot below, you can see that the Smart Art is wrapped in an inner conditional block, which does not show up because that inner conditional block's *@condition2* is set to No.
{% hint style="danger" %}
Important: conditional blocks cannot cross MS Word sections, i.e. each conditional block will automatically end at the end of the MS Word section.
{% endhint %}
## Conditional text boxes
It is possible to make Word "text boxes" (which float above the page and can contain content of their own) conditional.
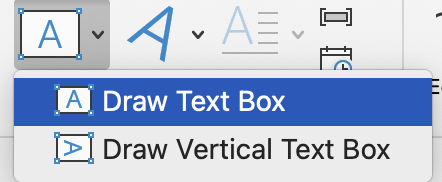
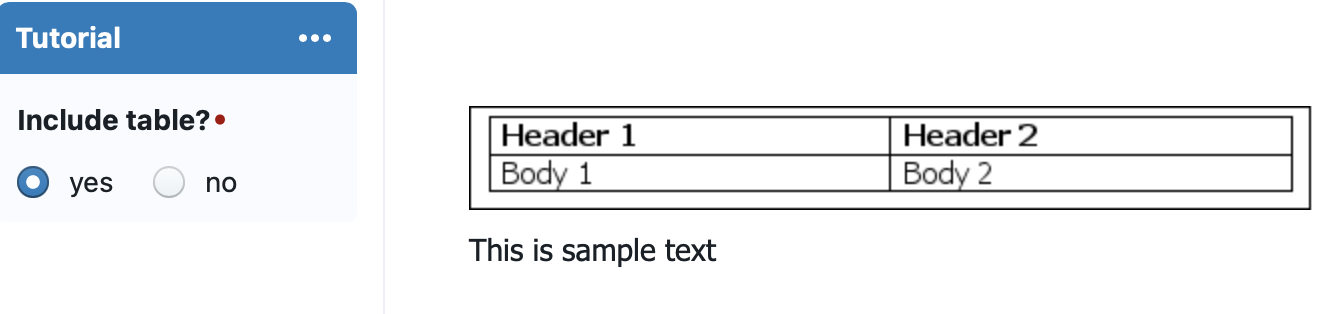
Navigate to the "Insert" tab in MS Word and select the "Text Box" option to draw a text box in which you will place your table.
Write your condition, then insert the text box and include your table inside of it. When you click the table, you should see an anchor appear next to your condition. This is important, as it decides the conditional logic that is applied to the text box/table.
By way of example, with a text box containing a table:
Then, right-click the text box and select "More Layout Options" >> "Text Wrapping" and activate the "Top and Bottom" wrapping style.
Update/Upload the document and set the question up to show or hide the frame as necessary.
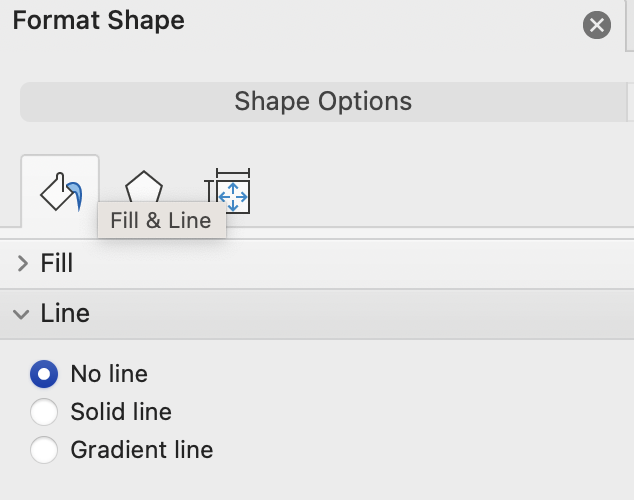
You may also consider hiding the text box itself, by right-clicking it, selecting "Format Shape" and under "Shape Options" >> "Line" selecting the option "No line".
## Conditional page breaks
Page breaks can also be conditional. As, technically speaking, page breaks are actual treated as *characters* inside of a paragraph, you can simply make a paragraph conditional by starting it with a condition and a colon.
Note that you will want to probably show the "Formatting marks" (the reverse P in the Word toolbar), otherwise the page break will not be visible.
---
# Agent Instructions
This documentation is published with GitBook. GitBook is the documentation platform designed so that both humans and AI agents can read, navigate, and reason over technical content effectively. Learn more at gitbook.com.
## Querying This Documentation
If you need additional information that is not directly available in this page, you can query the documentation dynamically by asking a question.
Perform an HTTP GET request on the current page URL with the `ask` query parameter, and the optional `goal` query parameter:
```
GET https://help.clausebuddy.com/smart-templates/how/in-depth/smart-templates-in-depth/conditional-rows-columns-sections-and-blocks.md?ask=&goal=
```
`ask` is the immediate question: it should be specific, self-contained, and written in natural language.
`goal` is optional and describes the broader end goal you are ultimately trying to accomplish on behalf of the user. GitBook uses it to tailor the answer towards what is most useful for that goal.
The response will contain a direct answer to the question and relevant excerpts and sources from the documentation.
Use this mechanism when the answer is not explicitly present in the current page, you need clarification or additional context, or you want to retrieve related documentation sections.