Drafting the body of a clause
Drafting legal content in ClauseBuddy is fairly straightforward, there are just a few things to know.
By way of example, the following clause — found in a random distribution contract — will be implemented:
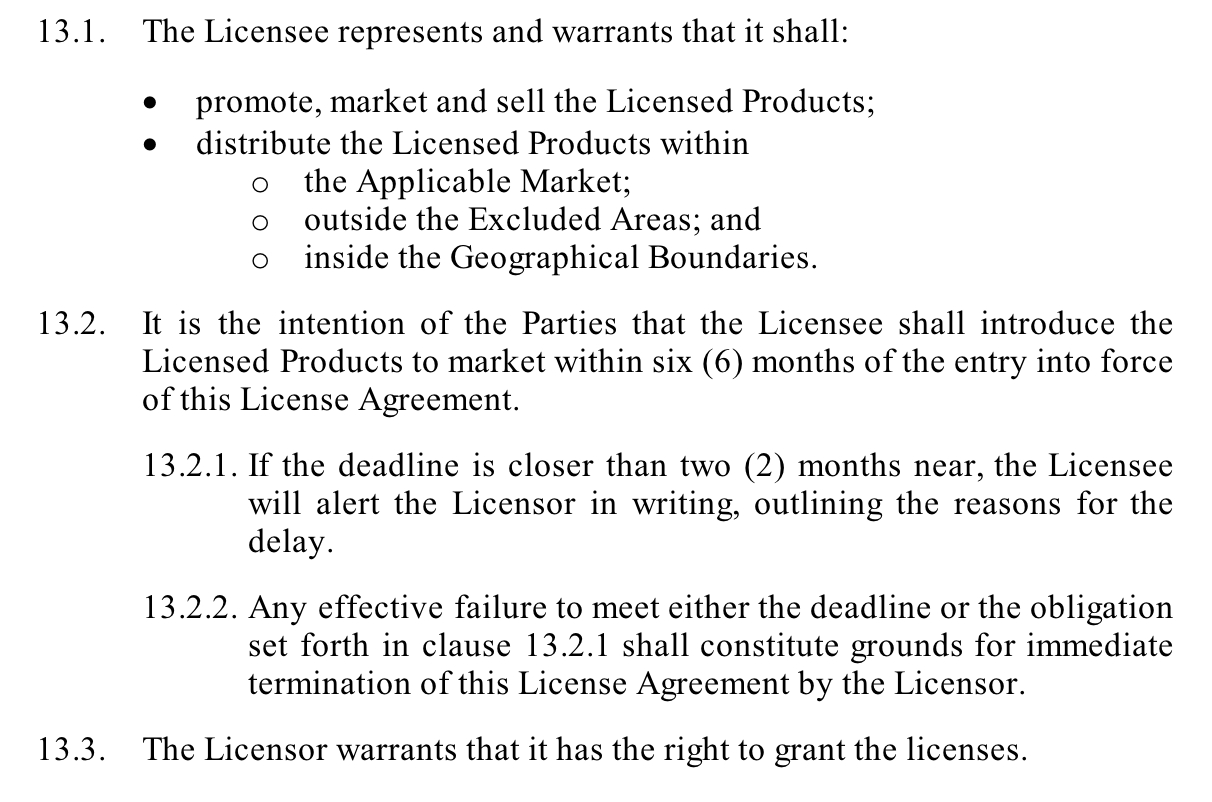
General structure
In ClauseBuddy, paragraphs can either start with a numberset (such as 1. or 1.2.3) or one or more asterisks(*, **, ***, etc).
When inserted in a Microsoft Word document, numbered paragraphs will by default get Heading 1/2/3/... style, while bulleted paragraphs will get Body 1/2/3/... style. If you have set up automatic numbering in your document, your inserted paragraps can adopt the automatic numbering. (You can, however, always request ClauseBuddy to remove the numbering before you actually insert the paragraphs into your document).
The example paragraphs above would thus become:
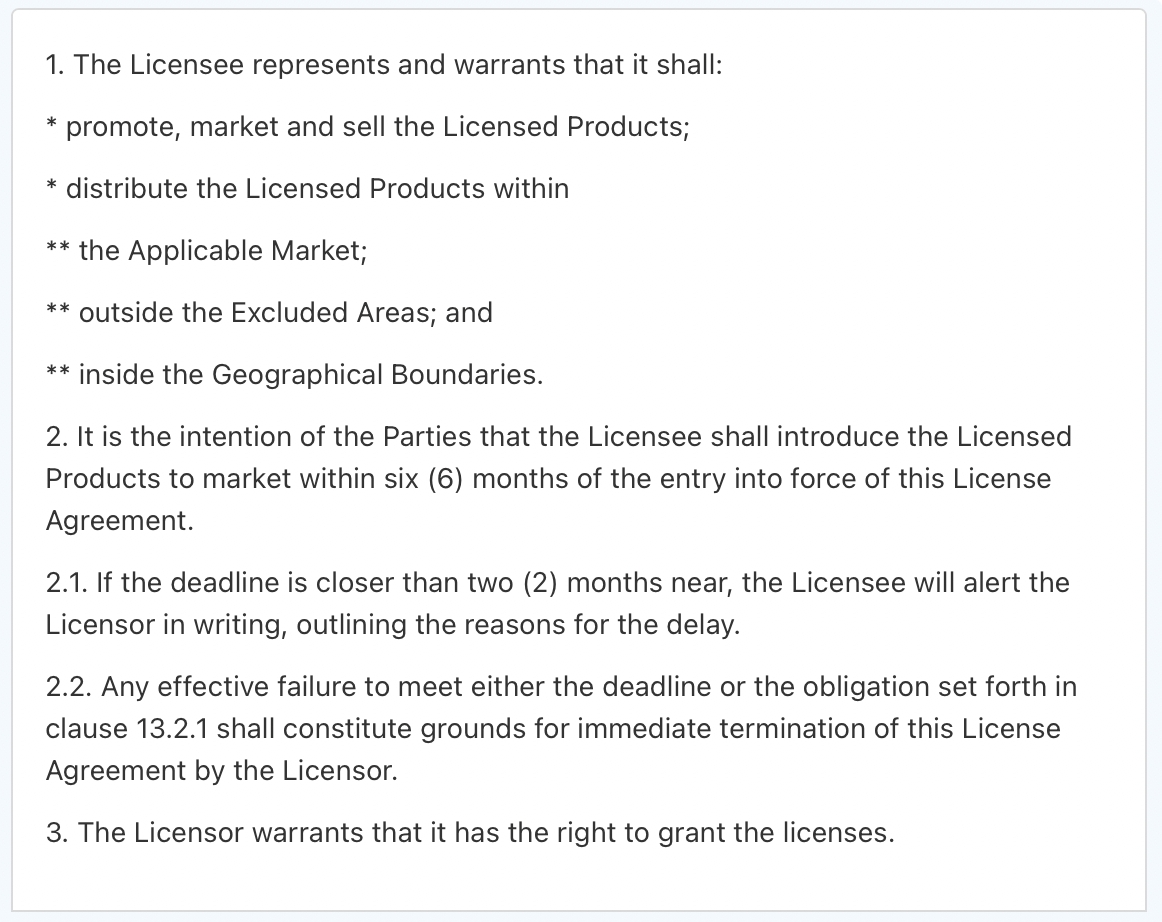
So notice that paragraph 13.1 simply becomes 1, while paragraph 13.2 becomes 2, and so on. Also notice that sub bullets start with a double asterisk.
ClauseBuddy can automatically detect most types of numberings, so when you pre-select content and hit the + button, ClauseBuddy will automatically convert existing numbering into 1/2/3 or asterisk-style.
Aligning with a previous paragraph
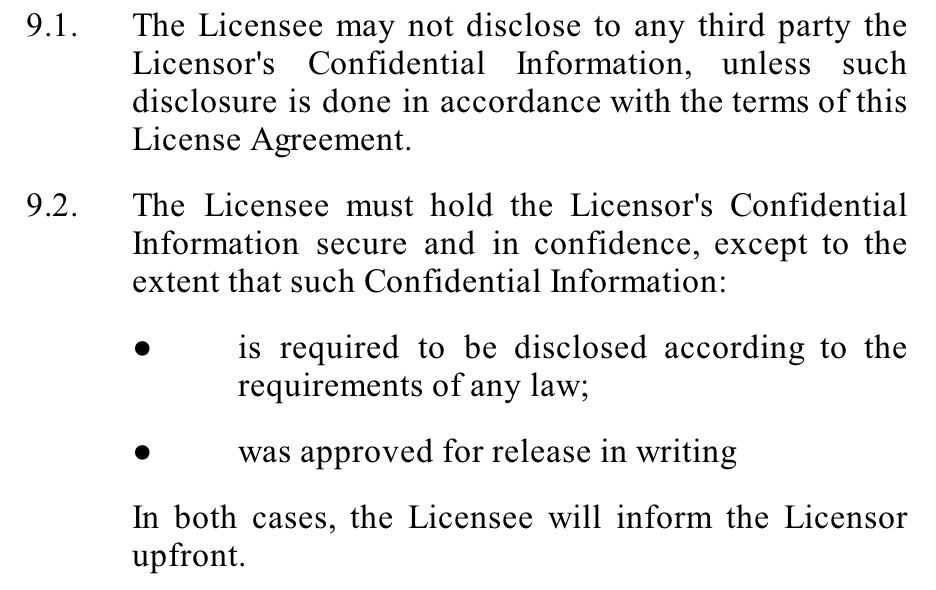
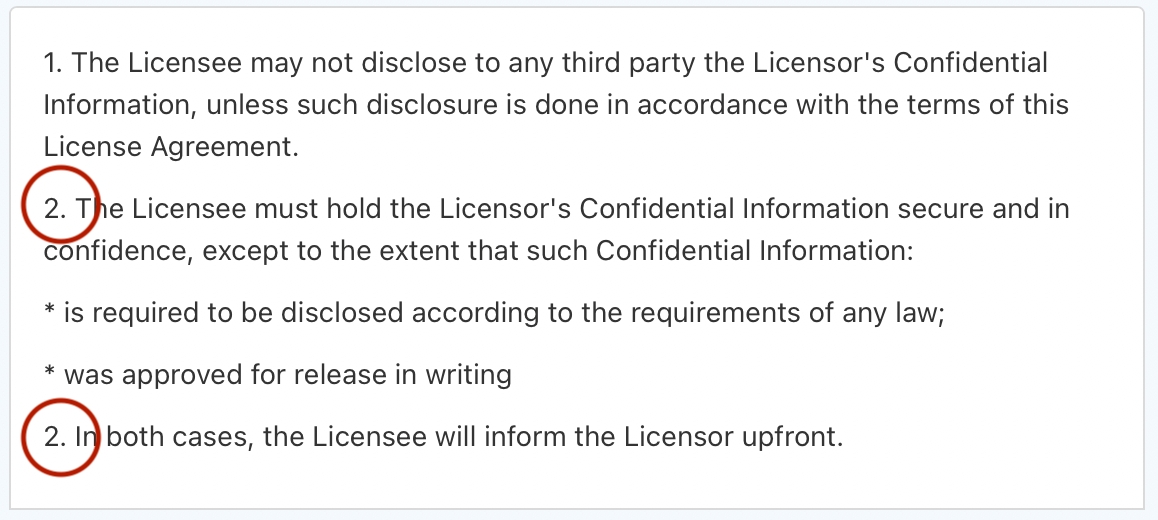
Sometimes you may want a paragraph to have the same indentation as a previous paragraph, while not receiving a certain number/bullet. For example, the last paragraph of 9.2 in the example below (In both cases...) is positioned at the same indentation level as the first paragraph of 9.2(The Licensee must hold...).
To store such structure in ClauseBuddy, you simply repeat the number of the first paragraph:
Changing numbering
When you insert your cursor into the body or title section of a clause, a toolbar will automatically appear that allows you to apply numbering and formatting.
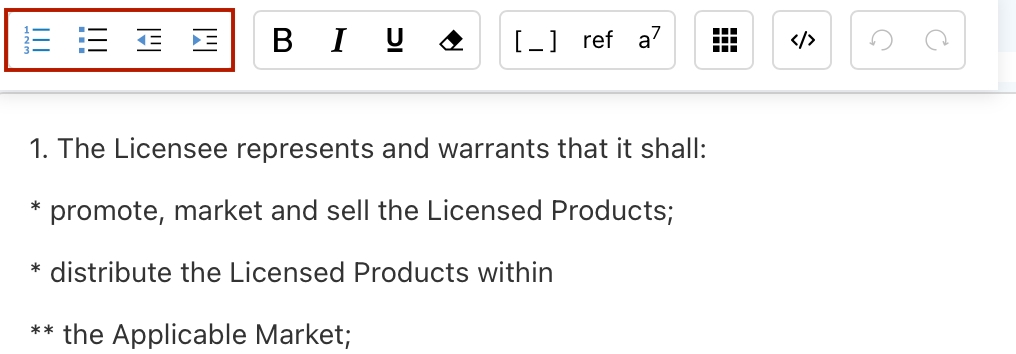
The leftmost button allows you to apply / unapply a number to a paragraph, while the second button allows you to apply / unapply bullets.
The third and fourth button cause paragraphs to be indented or unindented.
Unlike Microsoft Word, the paragraph(s) will not actually indent physically — instead, the numberset or the amount of bullets will change.
Placeholders
Inserting a placeholder is as simple as selecting some predefined text, and clicking on the placeholder button. For example, instead of "hard-coding" the duration of three years in the screenshot below...

... you can select the duration and click on the placeholder button. The text will then get a yellow background, indicating that it has been turned into a placeholder.

The placeholders can actually be configured in pretty cool ways, allowing you to select from predefined values. Checkout the dedicated page!
Cross-references
In a full-document automation context — such as in Clause9 — cross-references can be automatically kept up-to-date.
Conversely, in a clause-based product such as ClauseBuddy, cross-references will need to be manually changed by the user. In order to alert the user that references will need to be manually changed, you can mark the reference in pink by clicking on the ref button.

When inserted into a document, the text will also be printed with a pink/fuchsia background, to draw the user's attention.

Footnotes
You can insert footnotes by clicking on the dedicated button in the text toolbar. Footnotes should be positioned at the bottom of the clause within ClauseBuddy. Upon insertion in the MS Word document, they will get automatically inserted in the footnote section of the document.

Result in Microsoft Word:
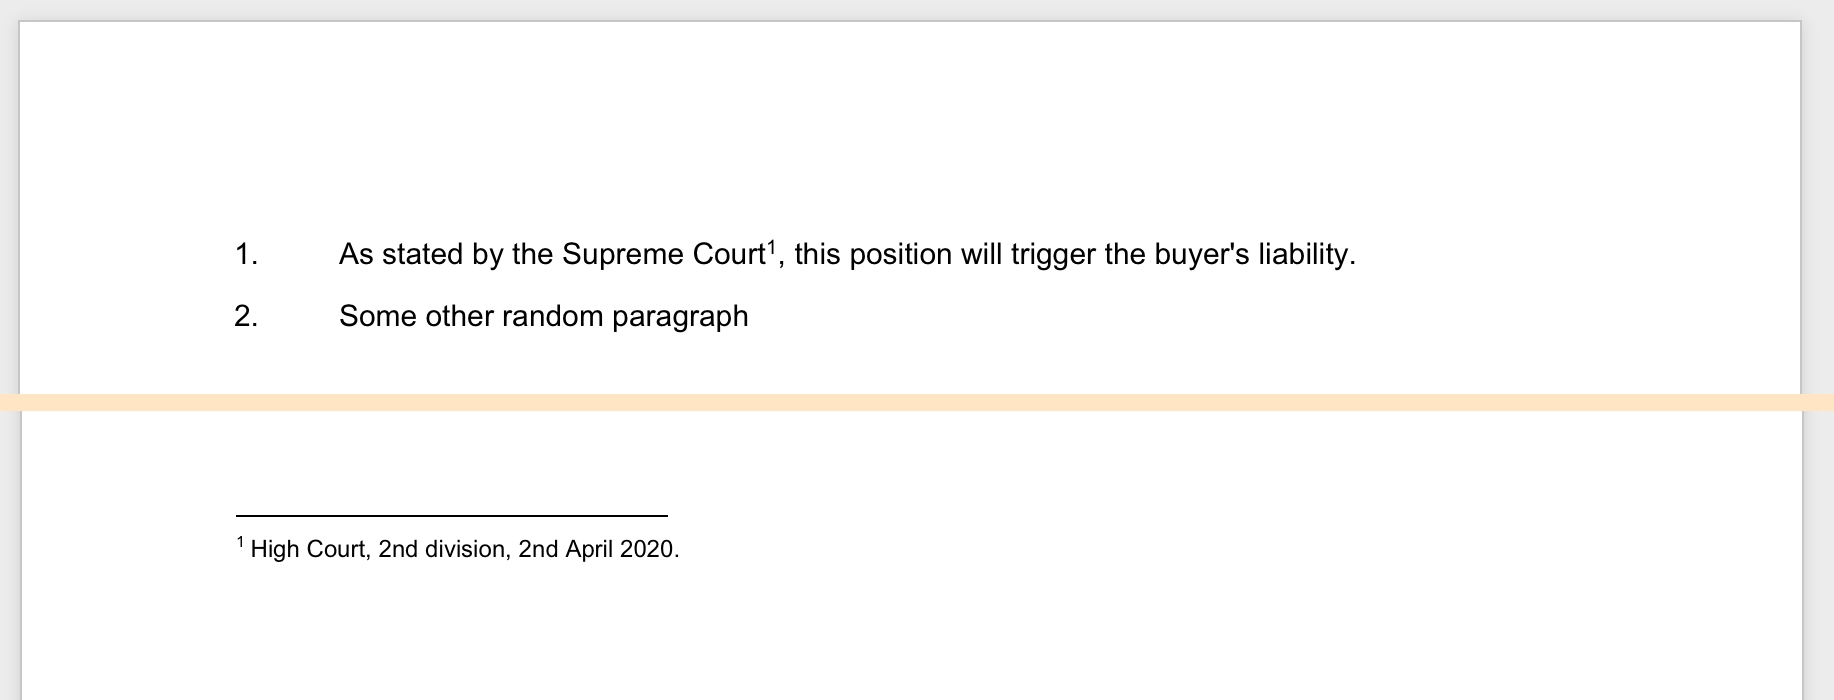
You can also insert footnotes without using the footnote button. Simply insert a number within square brackets in a paragraph, and repeat that same number at the bottom of the clause.
Tables
You can insert tables by clicking on the table button in the toolbar and choosing the number of rows and columns. After insertion, you can perform typical table-related operations (such as merging or splitting cells, inserting or deleting rows/columns, etc).

Last updated