
Sharing templates
Once you have prepared and saved a template, you can share it with anyone — colleagues, clients, family members or even counterparties.
Approach
When you share a template or document, you generate a unique hyperlink that will lead to your template, or to a specific document (e.g. https://app.clausebase.com/ml/qfVnNApNnjdR7v2C).
You can then send or publish this hyperlink any way you want — e.g., send it by email to a client, send it to your family members through WhatsApp, publish it on your intranet towards colleagues, or even publish it on your website. Other users can simply click on it (or copy/paste it in their browser) and fill out the template or change the document you shared; no separate username or password is required.
Prerequisites to share documents & templates
You must have a paid version of ClauseBuddy Pro account.
A template must be saved in one of your folders before you can share it.
Your administrator must have enabled the "Share templates & documents" right in your user settings (see the user management page).
At least one anonymous account must be present in your customer account (learn more about anonymous accounts on the user management page).
How to initiate sharing
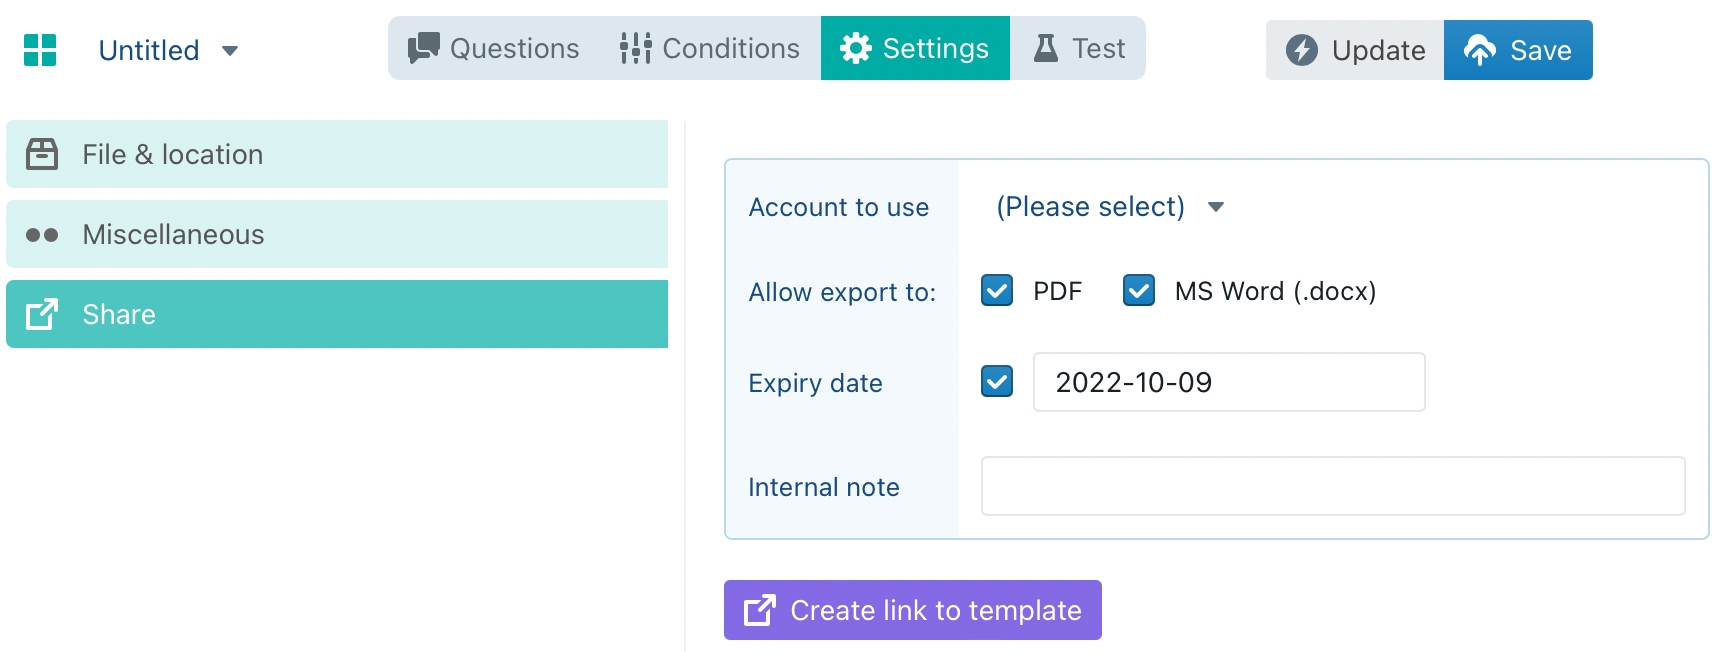
You can initiate the sharing by either going to Settings > Share ...
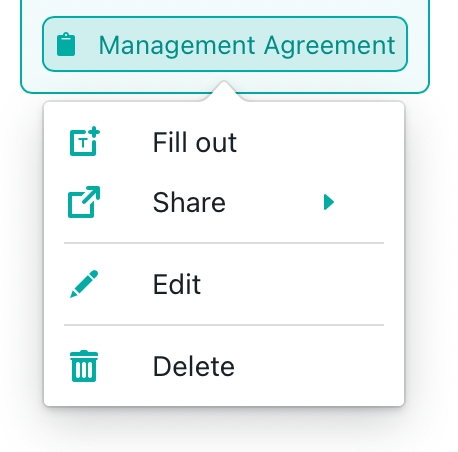
... or by visiting the Templates Overview panel and clicking on an existing template and going to the Share submenu item:
Configuration
Allow export to
This setting allows you to specify whether the recipient is allowed to export to PDF and/or to a DOCX file.
Expiry date
Sharing-links are anonymous and can be used by anyone, so you can never be sure whether a recipient of your link will on his/her turn send the link to someone else. It is therefore probably a good idea to set an expiry date on your link.
The default setting is an expiry date of one month.
Internal note
ClauseBuddy tracks the usage of your sharing-links. The usage reports (available at request) will show you the internal note you specified (e.g., "NDA for accounting department" vs. a different link with "NDA for sales"), so you can figure out who used your sharing-links.
Account to use
When multiple anonymous accounts exist in your customer account, you can specify which account should be used for the sharing-link you are about to create.
For most ClauseBuddy users, this setting can be ignored (most will probably not have multiple anonymous accounts anyway, so the setting would not even be shown). However, it does allow for interesting scenarios for advanced users, as they can for example create accounts with different settings (language, access rights, different connections to third party services, etc.).
Create link
Once you are done configuring the sharing-link, you can click on the purple button at the bottom, and subsequently copy the resulting link to your computer's clipboard.
Last updated