
Bracketeer
The Bracketeer module allows you to quickly go through all the [square brackets] and highlights in a legal document, by mostly clicking with the mouse. This is much fast and much more user-friendly than by doing this in the traditional way in Microsoft Word.
For example, instead of having to manually go through hundreds of square brackets such as the following...

... ClauseBuddy's Bracketeer offers a much nicer visual representation of all the options, by enabling you to click your way through all paragraphs, choosing and removing options with your mouse:

Benefits
On the one hand, Bracketeer qualifies as a kind of light full-document automation, because it requires very little preparation to be done within the documents (most templates can be used as-is), and can be learned in a few minutes.
On the other hand, Bracketeer complements traditional full-document automation, such as Clause9 and ClauseBuddy's Smart Templates. It allows legal teams to limit traditional full-document automation modules to structural parts that require intensive editing, and leave the numerous detailed changes to Bracketeer.
For example, corporate transaction documentation and finance documentation often consist of more than 50 pages, with hundreds if not thousands of options.
In a traditional full-document automation approach, template authors would have to create questions to cover all of those individual options. This easily leads to questionnaire fatigue with end-users. In addition, with traditional full-document automation, end-users may suffer from question dissonance, because a certain option may concern such a small detail that the associated question would be quite long or detailed.
Clause libraries, such as those found in ClauseBuddy, allow template authors to limit the number of questions, e.g. by deliberately not asking questions for parts of the documents that must only be occasionally changed. Instead, if changes must be made to such occasional parts, end-users can find relevant fallback/replacement clauses in the clause library.
When using Bracketeer, template authors can deliberately decide to leave square brackets and highlights within the document that is generated by the system. With the help of Bracketeer, end-users can easily implement hundreds detailed decisions, across the entire document, in a user-friendly way.
This avoids questionnaire fatigue, because users don't have to answer a question for each and every detail.
This also avoids question dissonance, because end-users can often immediately decide which option to choose when seeing that option within the context of the document, instead of as a separate question.
By way of a concrete example, have a look at the 30 calendar days highlighted below:

This option does not represent a major drafting decision that will affect many different paragraphs at once. Instead, it concerns details, of which hundreds can be found in a long legal document.
If you would have to formulate a question for it, you would probably have to give a lot of context to the end-user (e.g., "Number of days granted to the existing shareholders to submit a claim in case of misrepresentation or warranty breach that was notified by an investor?"). Such question easily takes up half a paragraph, while many legal practitioners will be able to immediately decide whether to change the default number when seeing the context.
Target audience
Any legal team that has templates with square brackets or highlights can benefit from Bracketeer. In practice, these documents are mostly found in finance, corporate and commercial teams. But Bracketeer is both jurisdiction-agnostic domain-agnostic, so anyone can benefit from it — even non-lawyers.
Obviously, Bracketeer assumes that end-users know what they are doing, i.e. are aware of the (legal) repercussions of the changes they make. If users cannot be sufficiently trusted, traditional question/answer based full-document automation must be used instead!
Getting started
Open a DOCX-file. Bracketeer works with any DOCX file that you can open in Microsoft Word, and which has either square brackets or colored highlights.
Open ClauseBuddy and click on the Bracketeer icon. (If it's not enabled, ask your administrator!)
Wait for a few seconds while ClauseBuddy's server analyses your documents, and converts each paragraph into visual Bracketeer-options.
In each paragraph:
Click on options (surrounded by dotted lines) to select them, or Alt-click (i.e. click with your mouse while holding down the Alt-key on your keyboard) to remove an option you don't want.
Click on one of the alternatives presented next to each other.
Click on highlighted text to change that text. Bracketeer remembers your last changes, so you can quickly make similar changes across the document.
Click on Apply changes to modify the corresponding paragraph in your document. Alternatively, you can skip this step, and apply all your changes in bulk (see the last step).
Go the next relevant paragraph by clicking on the up/down arrows; Bracketeer automatically skips paragraphs without brackets or highlights. Then repeat the previous step for that paragraph.
Instead of applying changes on a per-paragraph basis, you can click on the popup menu next to Apply Changes and choose Apply to entire document (= apply changes in bulk in your current document) or Apply to a new document (= apply changes in bulk within a copy of your current document).
Preparing your templates
Optional text parts
Bracketeer was designed to work with the square-brackets and placeholders that are most commonly found in legal documents.
Optional text parts are represented by square brackets. For example, the text below can either be "each resigning existing Director" or "each Director":
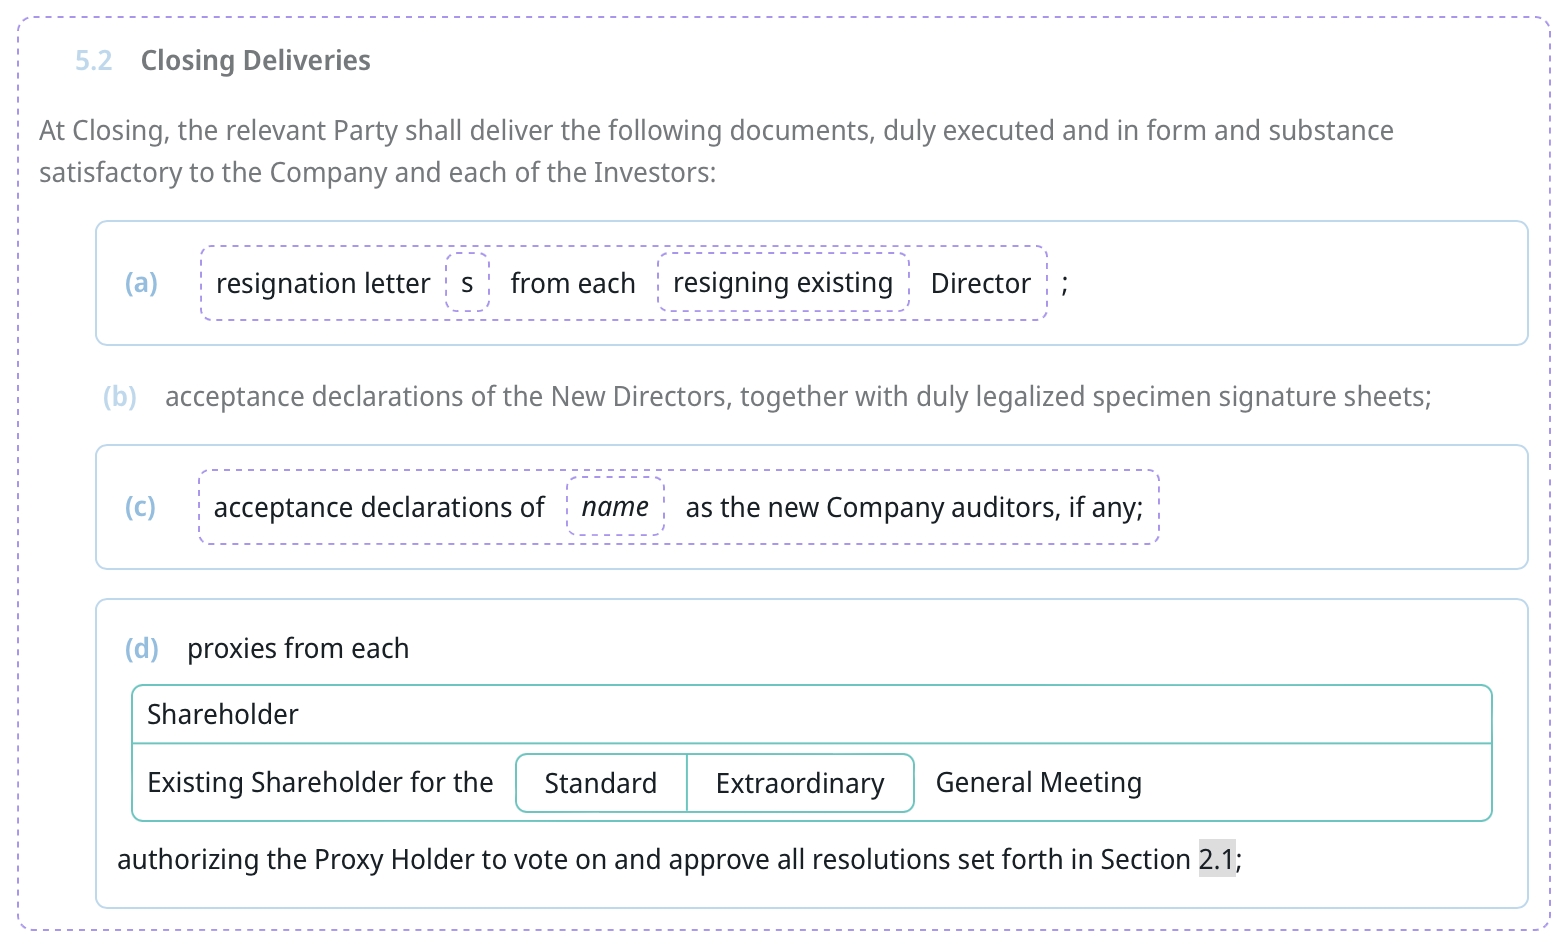
Options can also be nested within each other, typically two or three levels deep. For example, the following bullet is completely optional, because it is surrounded by square brackets. When the end-user would choose to keep this bullet, she can choose between (a) one or multiple resignation letters; and (b) "each Director" versus "each resigning existing Director".

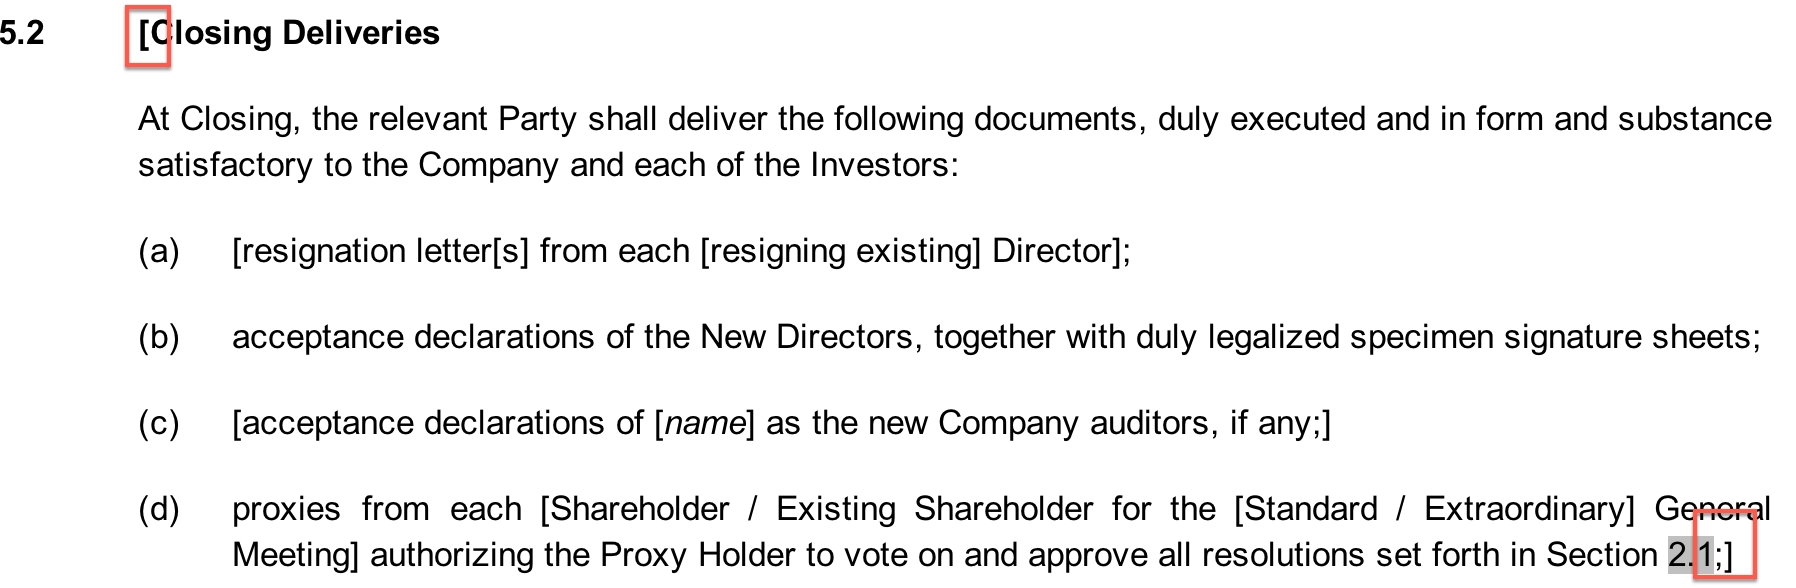
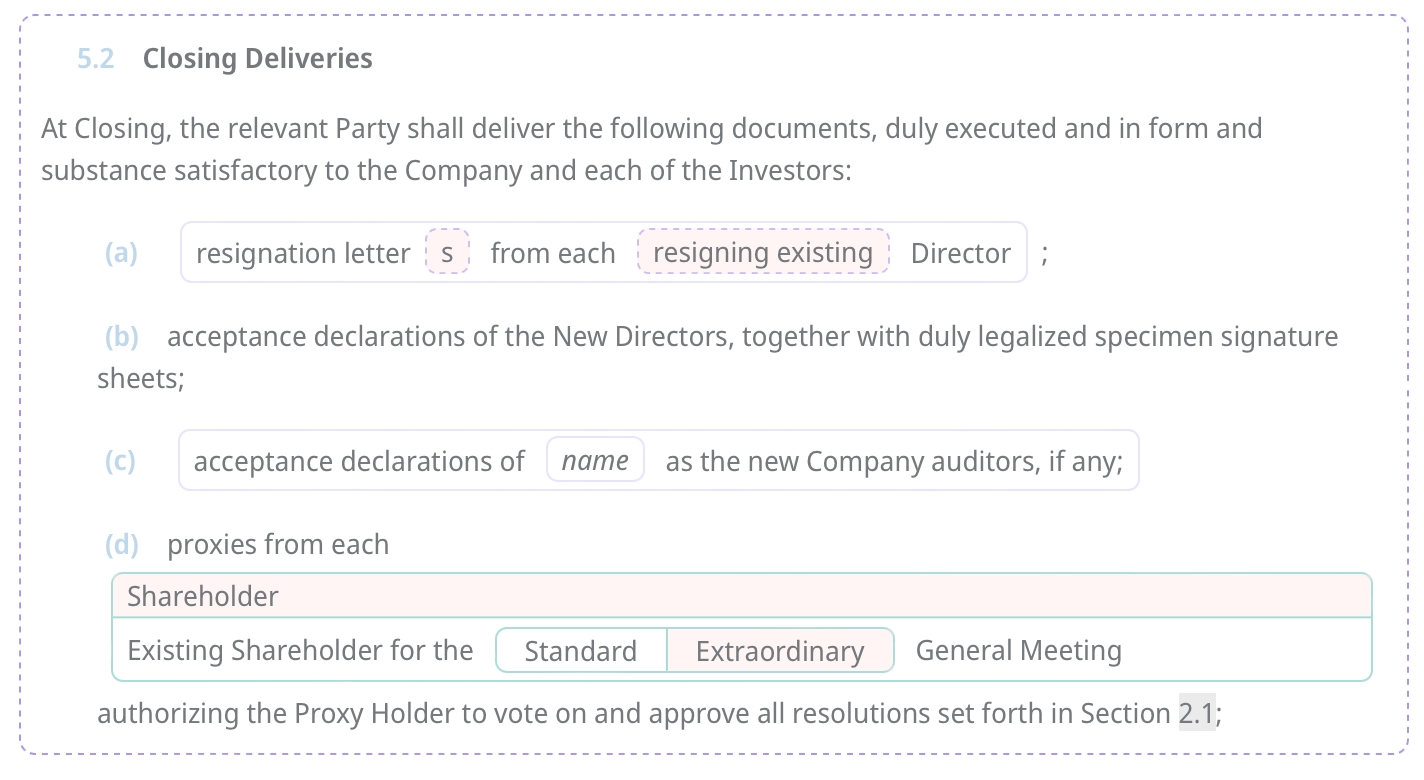
Options can even span across paragraphs, to indicate that entire blocks of text are optional. For example, the author of the following template designated the entire section 5.2 as optional through the opening square bracket at the very beginning of the first paragraph, and the closing square bracket at the very end:
Be careful when nesting square brackets, especially when spanning them across paragraphs. In practice, we very often see that beyond 2 or 3 levels, humans start making mistakes when keeping track of deeply embedded square brackets.
Bracketeer tries to be "forgiving" when missing a closing bracket, but nevertheless it will show you an error when it cannot make sense of a certain set of nested square brackets.
Bracketeer presents these optional parts in a user-friendly visual manner, through dotted lines.
Alternative text parts
Alternatives can be expressed in two ways: either through neighbouring square brackets, or by using slashes within square brackets.
Slashes within square brackets:

Neighbouring square brackets:

Whichever method you choose, Bracketeer presents the alternatives in a visual manner, inviting you to select one of three:

Placeholders
Placeholders can be inserted by highlighting text:

Any highlighting colour will work, although yellow is most common.

A commonly found style in legal templates is to use both square brackets and highlighted text:

Bracketeer will always show placeholders in yellow

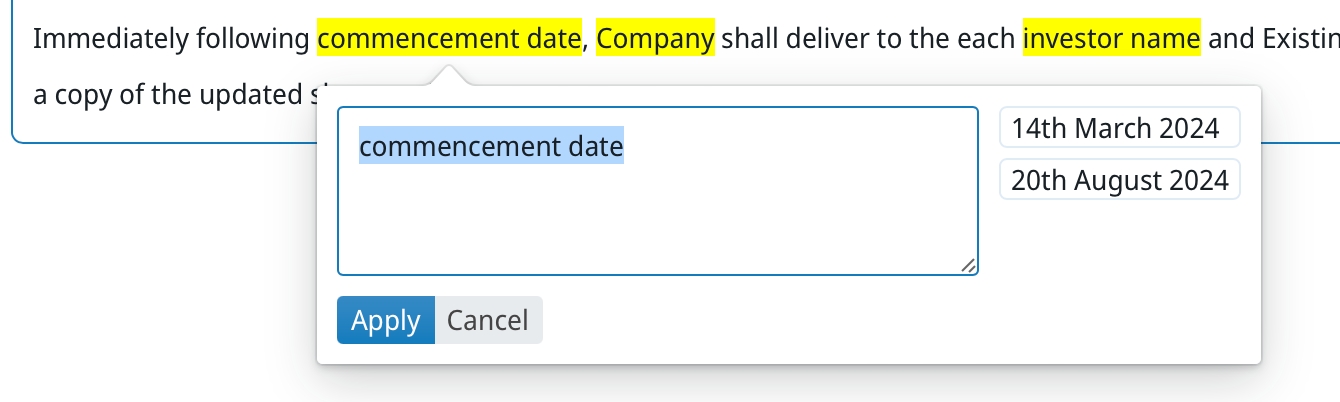
By simply clicking on a placeholder, end-users can replace the placeholder with an actual value. Bracketeer will remember your selections (in the screen below the dates in March & August), so you can quickly choose values by simply clicking with the mouse.
Inspecting modifications
You can click on the Inspect button at the top of the screen to get a kind of "X-Ray" of the modifications you applied.
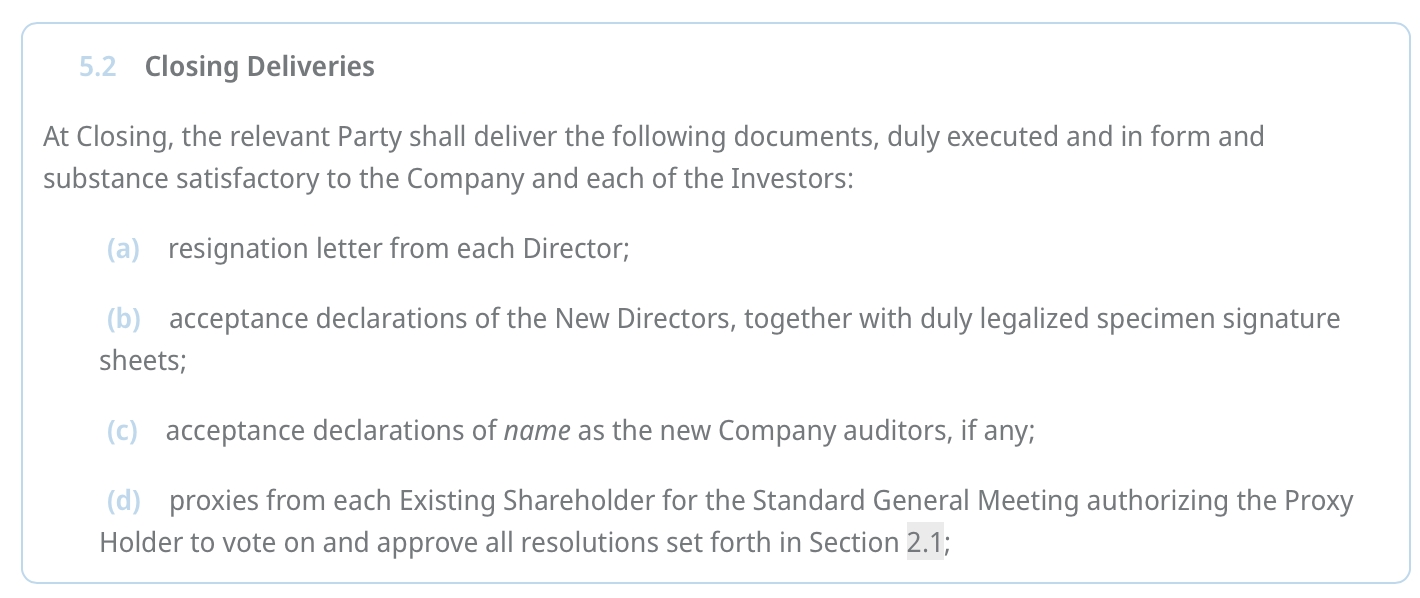
For example, after you clicked through all of the options, the following "finished" block of text will be shown:
You can modify see which modifications you had made, by clicking on the Inspect button. You can then still change everything by clicking with your mouse.
Stash
Through one of the following actions:
holding down Shift when selecting an optional text part or alternative
holding down Shift when clicking on Apply (or a recent text item) to change a placeholder
holding down both Shift and Alt when removing an optional text part
you can add that text / text part / alternative as a blueprint to the "stash".
When you then click on the Apply stash button at the bottom of screen, Bracketeer will go through all the placeholders, optional text parts and alternatives in the currently visible paragraphs, check whether they match with any of the blueprints, and then perform replacements in bulk. For example:
If your document contains 150 times "[reasonable]" across various paragraphs, you may want to add that word to the Stash by Shift + Alt clicking on it. In subsequent paragraphs, you can then simply click on Apply stash to remove that word.
If you have 20 different instances of the three alternatives "[Company / Shareholder / Person]", you can Shift-click on (for example) Shareholder once, and then cause that word to be selected everywhere by clicking on Apply stash.
Alternatively, if you want to apply only one or more items in the stash, click on the triangle
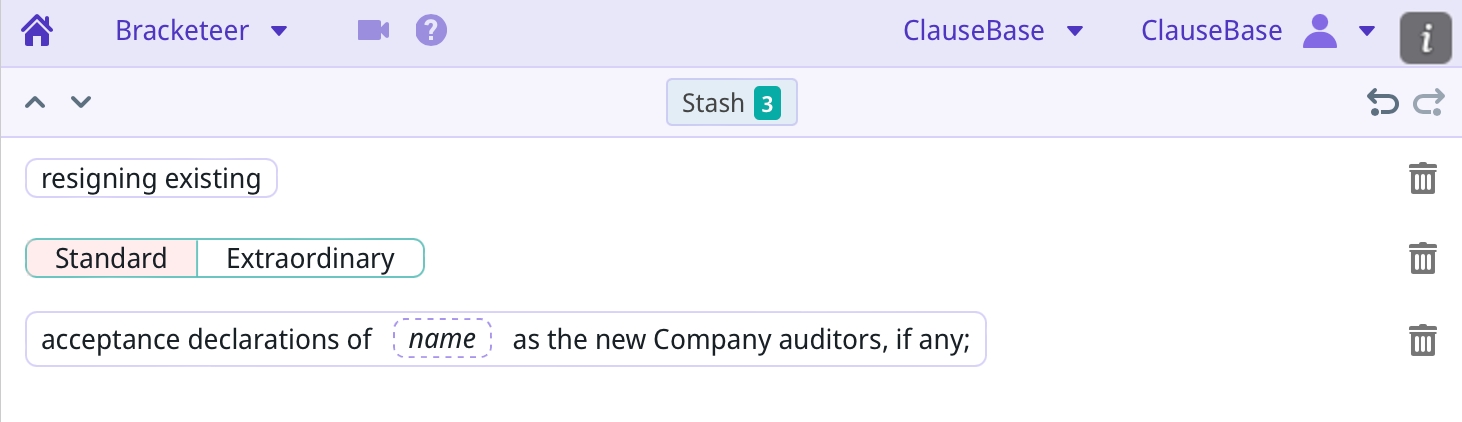
You can inspect your stash by clicking on the Stash button at the top of the screen. At any time you can remove an item (blueprint) from the Stash that you no longer need, by clicking on the trash can. Such removal will not affect instances of that blueprint that you previously applied; instead, it will only prevent that blueprint from applying in the future.
Applying changes one by one
When you click on the Apply changes button, Bracketeer will apply the changes of the currently visible paragraphs to the opened MS Word document. If you are not happy with the result, you can undo your changes inside of the DOCX file by clicking on MS Word's undo button (or pressing the Ctrl-Z keyboard shorcut).
This seems easy enough, but you should be aware of a few limitations:
Bracketeer assumes that you have not modified the paragraph in the DOCX-file. If you did, unexpected results will happen. Instead, when you have changed a paragraph in the DOCX-file, you need to hit the Refresh button at the top of the screen. You should, however, be aware that this may remove some changes you have made inside of Bracketeer.
When it loads your DOCX-file, Bracketeer associates each paragraph in the DOCX file with its own internal representation of that paragraph. When you then apply changes, various technical limitations inside of MS Word will cause that in-memory association to be gone, even when you would Undo your changes in the DOCX-file. While Bracketeer will nevertheless try to manually find back your paragraph, it may sometimes fail in doing so, e.g. when the paragraph was modified in the meantime, or when an identical paragraph exists at an earlier location in the DOCX-file.
Applying changes in bulk
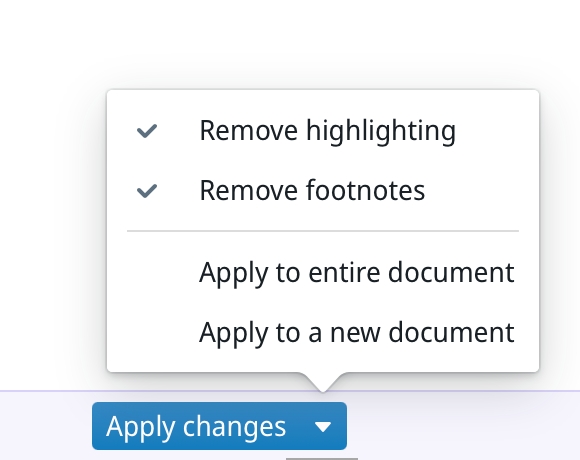
Instead of applying changes one by one, you can also apply changes in bulk. Instead of clicking on the Apply changes button, you instead click on the triangle next to Apply changes and choose:
Apply to entire document to apply all changes to the current DOCX file. Note that also here, Bracketeer assumes that you have not made changes in the DOCX-file to the paragraphs that you were modifying inside of Bracketeer.
Apply to a new document to apply all changes to a copy of the initial DOCX file. In this case, Bracketeer will apply all your modifications to a copy of the DOCX-file that was initially loaded by it, and then open the result in a new window inside of MS Word. So even if you would have made changes to the DOCX-file in the meantime, these changes would be ignored.
Tips & tricks
You can click on a paragraph inside of Bracketeer to highlight that same paragraph within MS Word.
You can undo & redo modifications within Bracketeer (separate from the Undo-function in MS Word) by using the undo/redo buttons in the right corners of the screen.
Bracketeer shows the number of not-yet-implemented brackets and highlights in the bottom left corner of the screen.
While highlighted text can be edited with a single mouse-click, you can change any text by double-clicking on it.
Limitations
Bracketeer subdivides your document into different sections, based on the numbering and/or titles it detects. If a certain subdivision does not contain any square brackets or highlights, it will completely ignore it — so it will never be shown when you navigate through your document from within Bracketeer.
Bracketeer currently mostly ignores text within tables. This will be changed in an upcoming release.
Bracketeer currently does not work in a browser: it currently only works as an add-in of MS Word.
Last updated