ClauseBuddy
Quality LibTruffle HuntSmart TemplatesDoc AnalysisCompareAdmin
  • Welcome!
  • Getting Started
    • Quick Start Videos
    • System Requirements
    • Installation
    • Accessing the app
    • Enterprise deployment
    • Logins
    • Frequently Asked Questions
    • Encountering problems?
    • Help & Support Center
  • Quality Library
    • Searching Clauses
      • Overview
      • Searching by keywords
      • Browsing Folders
      • Filtering clauses
      • Inspecting clauses
    • Using Clauses
      • Inserting clauses
      • Configuration
    • Drafting Clauses
      • Creating clauses
      • Drafting the body of a clause
      • Smart placeholders
    • Custom styling
      • ClauseBuddy layout structure
      • Heading pane
      • Body text pane
      • Document title pane
      • Template detection pane
    • FAQ
      • How to create a new folder when you add a new clause?
      • How do I fill out a placeholder when adding a clause to a document?
      • How do I change a folder name?
      • How can I change the location of a clause in the library?
      • How do I delete a folder?
      • What’s the difference between green and purple clauses?
      • Why are not all attributes visible as filters?
      • When do I apply a status to my clause instead of an attribute?
      • How can I create my own attributes?
      • What is the difference between the Quality Library and the Truffle Hunt?
      • How can I avoid duplicating clauses when adding to the library?
  • Inspiration
    • Introduction
    • Truffle Hunt: clauses
    • Truffle Hunt: documents
    • Managing Truffle Hunt baskets
    • Process results with AI
    • Compliance
    • Samples Hunt
    • AutoSuggest
    • FAQ
      • Samples Hunt
        • From which database does Samples Hunt get its info?
      • Truffle Hunt
        • Can ClauseBuddy read and retrieve clauses from scanned documents?
        • How do I go to the document containing the found clause?
        • What is the difference between the strict and non-strict option when searching for clauses?
        • What's the best way to search for clauses in Truffle Hunt?
        • Is a clause modification in Truffle Hunt permanent?
        • Can you search multiple baskets at once?
        • Can you edit properties of documents in bulk such as doc title or year?
        • Can I store multiple clauses from Truffle Hunt in the Quality Library at once?
        • Is there a quick way to upload an open document to Truffle Hunt?
        • How can I update party names in a clause without manually overwriting?
        • What happens when I upload a duplicate clause or duplicate document to Truffle Hunt?
      • AutoSuggest
  • Generative AI
    • Introduction to GenAI
    • Write & Rewrite
    • Smart Merge
    • Doc Chat
    • Multi-document Table
    • Semantic Search
    • Compose Document
    • Custom LLMs
    • FAQ
      • Doc Chat
      • Compose Document
      • Write & Rewrite
        • Where does the AI get its inspiration?
        • Can I train the AI to match our company's spelling and style?
        • Can I save frequently used prompts to apply them faster?
        • How do I write good AI prompts?
      • Summarise
  • Document Analysis
    • Definitions
    • Proofreading
    • Reviewing: introduction
    • Reviewing: building rules
    • Running reviews
    • Checklists
    • Bracketeer
    • FAQ
      • Proofreading
        • Can I add my own custom checks to Proofreading?
      • Definitions
      • Document Reviewing
        • How come the Review document feature is not visible in my overview?
        • What do I name my review category?
        • What exactly do the questions do and what are they for?
        • Do requirements within a review category affect each other?
  • Operations
    • Text Compare
    • Bulk Compare
    • Bulk Operations
    • Deep Compare
  • FAQ
    • Text Compare
    • Bulk Compare
    • Bulk Operations
  • Smart Templates
    • Quick Tutorial: Smart Templates
    • Smart Templates in depth
      • Highlighting Word documents
      • Creating cards and questions
      • Conditions for cards & questions
      • Conditional text
      • Conditional rows, columns, sections & blocks
      • Template settings
      • Sharing templates
      • Tips when using Word
      • Comparison with Clause9
      • Integrations
      • Bulk create
      • Advanced drafting techniques
    • FAQ
      • Why is it that some users cannot see the ‘Templates’ feature?
      • Are Templates cross-platform?
      • Can I insert conditional images?
      • How do I update a template?
      • Why does the interactive preview sometimes fail to show numbering correctly?
      • How can I make a clause with multiple paragraphs conditional more efficiently?
      • How can I change the type of a question when creating a Smart Template?
  • Administration
    • Preferences
    • Managing folders
    • Managing attributes
    • Managing users
    • Linked Accounts
    • Managing access-bundles
    • Write & Rewrite
    • Export templates
    • External subscriptions
    • Access Matrix
    • Consult ClauseBuddy Usage Statistics
    • FAQ
      • I lost my login code!
      • Can I set-up a personal library for an individual user?
      • How do I delete a user?
      • Can I give someone else access to the admin account?
      • If I add a subscription, can this person see it and is my subscription also added to him?
      • I have access to ClauseBuddy, do I also have access to Clause9?
      • Is there 2 factor authentication for ClauseBuddy?
      • Can we choose which LLM is applied in ClauseBuddy?
Powered by GitBook
On this page
  • Conditional table rows
  • Conditional table columns
  • Conditional sections
  • Conditional blocks
  • Conditional text boxes
  • Conditional page breaks
Export as PDF
  1. Smart Templates
  2. Smart Templates in depth

Conditional rows, columns, sections & blocks

PreviousConditional textNextTemplate settings

Last updated 9 months ago

Conditional table rows

You can make table rows conditional by preceding a condition with ROW anywhere in the row. For example:

When @condition1 is set to "no", the first row gets hidden.

The condition can be as complex as you like, invoking special-functions and combinations with AND/OR/NOT if necessary. But for the sake of simplicity, we'll stick to simple conditions on this web page.

It does not matter where the ROW condition is located. So the following would work equally well, as opposed to having the ROW condition in the beginning of the first cell of the row.

Note that you should differentiate between a row condition and a condition inside a row. For example, the second row in the first screenshot above contains a @condition2 within the row, not preceded by ROW. Such condition works in the normal way, disable the paragraph within the cell, but not removing the row. For example:

Conditional table columns

Making table columns conditional is similar to making rows condition: you prefix COLUMN or COL in some condition within the cell. For example:

When condition1 is set to "no", the column will disappear:

Similar to the rows, it does not matter in which cell you put the column-condition, so the following will work equally well:

Note that strange things may happen when your table contains merged/split cells. This is currently not supported.

Conditional sections

MS Word documents are subdivided into "sections", divided by section breaks. Each section can have its own page settings, numbering, and so on.

In practice, in legal documents, new sections are often created to host annexes, schedules and so on.

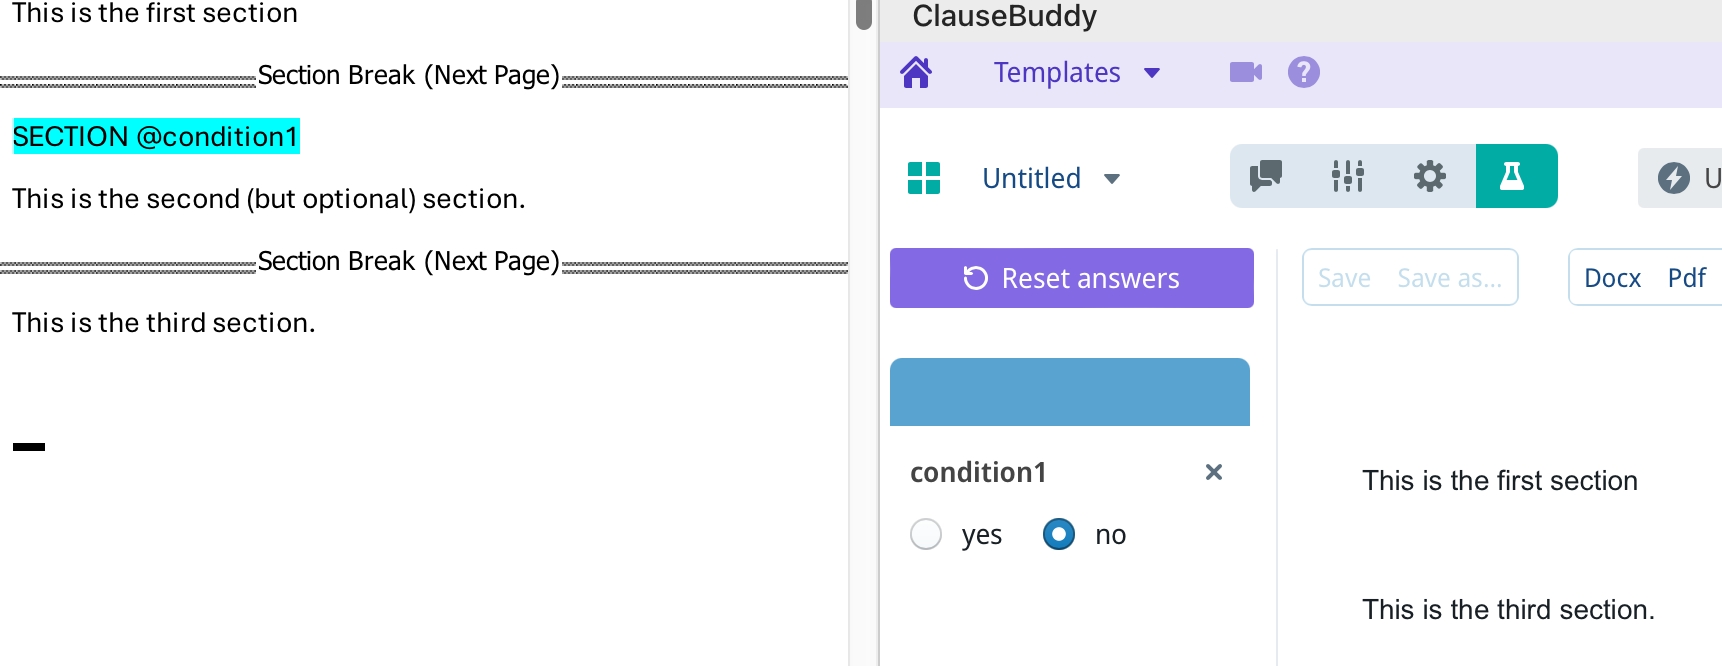
It is possible to make an entire section optional by prefixing a condition in one of the section's paragraphs with SECTION, e.g.
Conditional blocks

You can also make multiple document elements conditional by wrapping those elements within <<< and >>>. For example, in the screenshot below, you can see that a table, some "Smart Art" and a mathematical formula are wrapped inside of a conditional block.
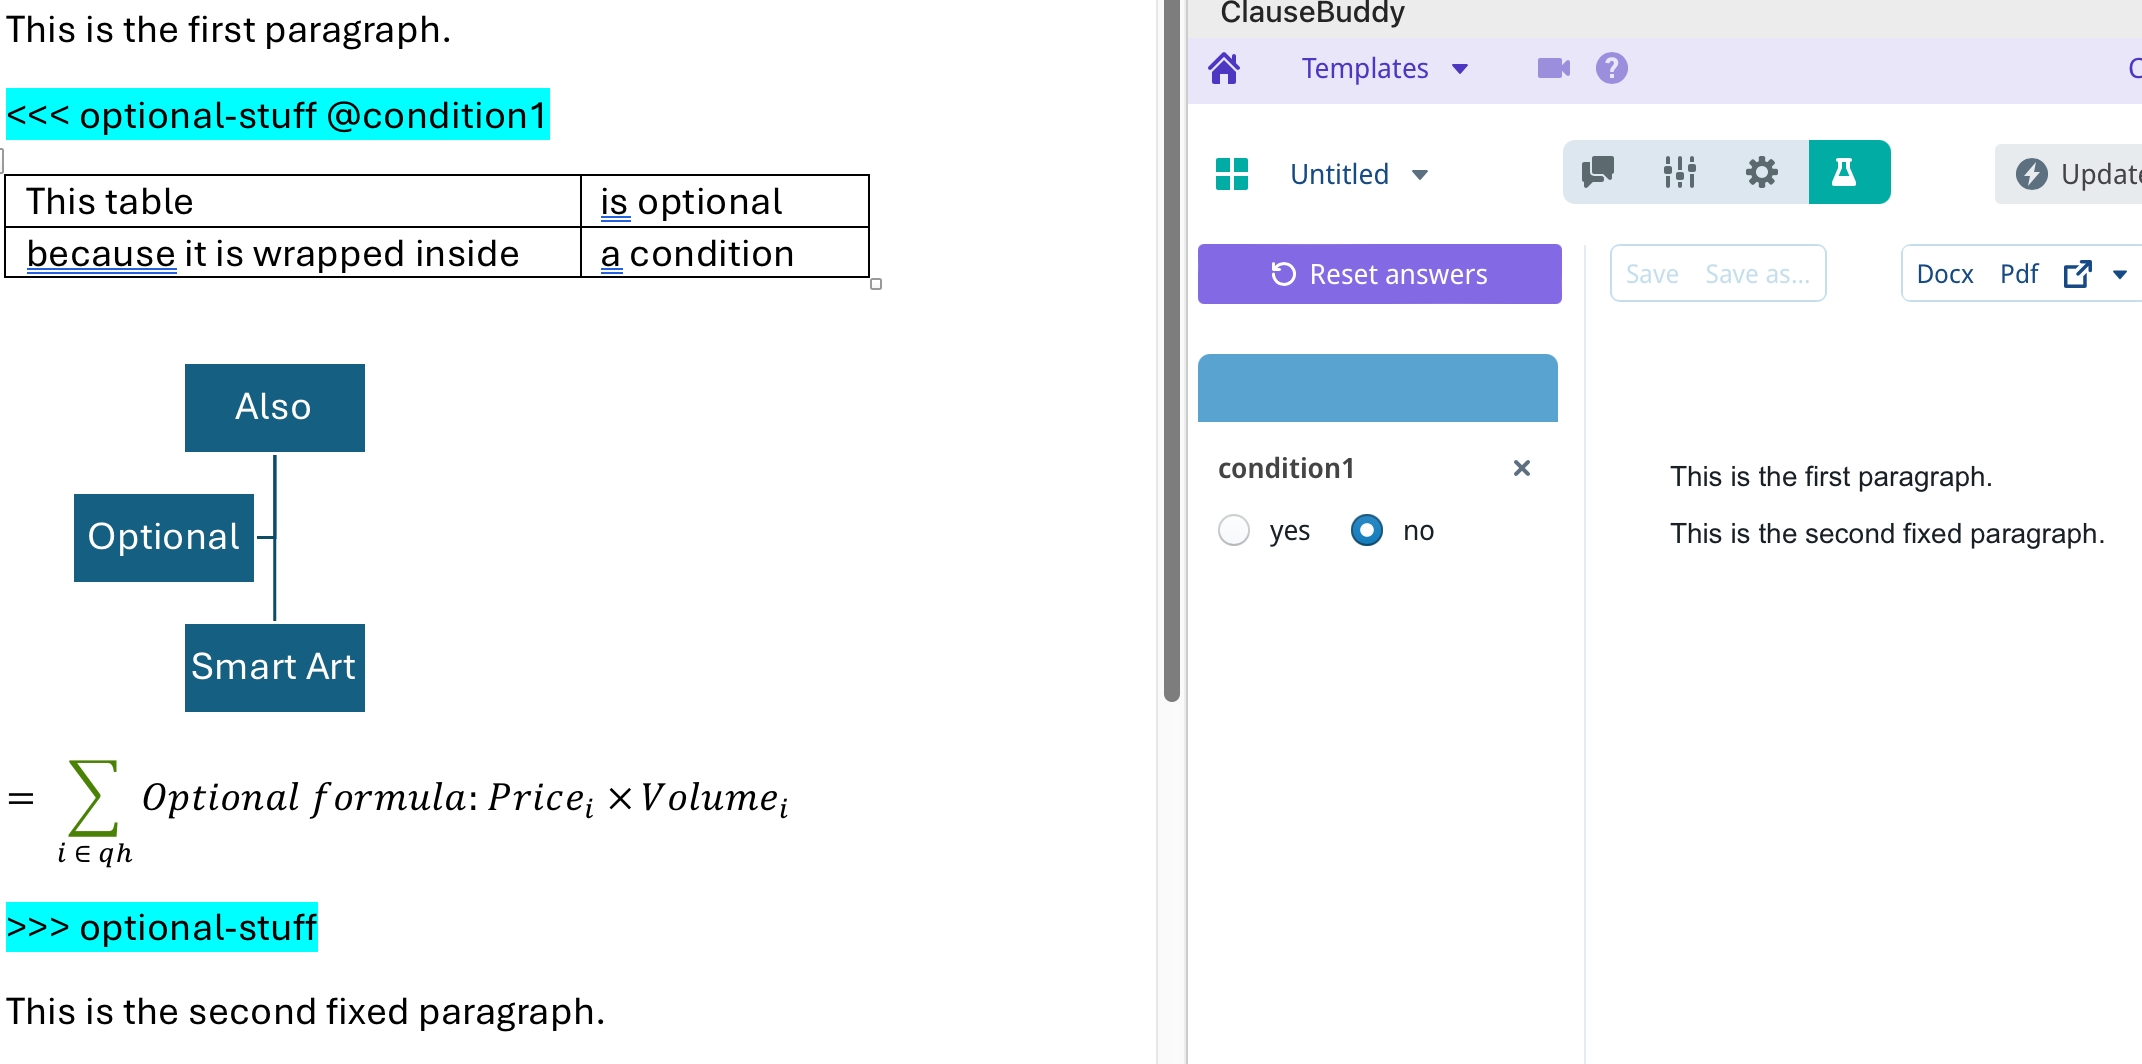
Each conditional block must have an identifier, right after the <<< and >>> (in the screenshot below, the identifier is optional-stuff). The identifier must not contain a space, but can contain hyphens, numbers, etc.

Importantly, the <<< and >>> and their respective identifiers and conditions should be included as a separate line, with no text before or after them.

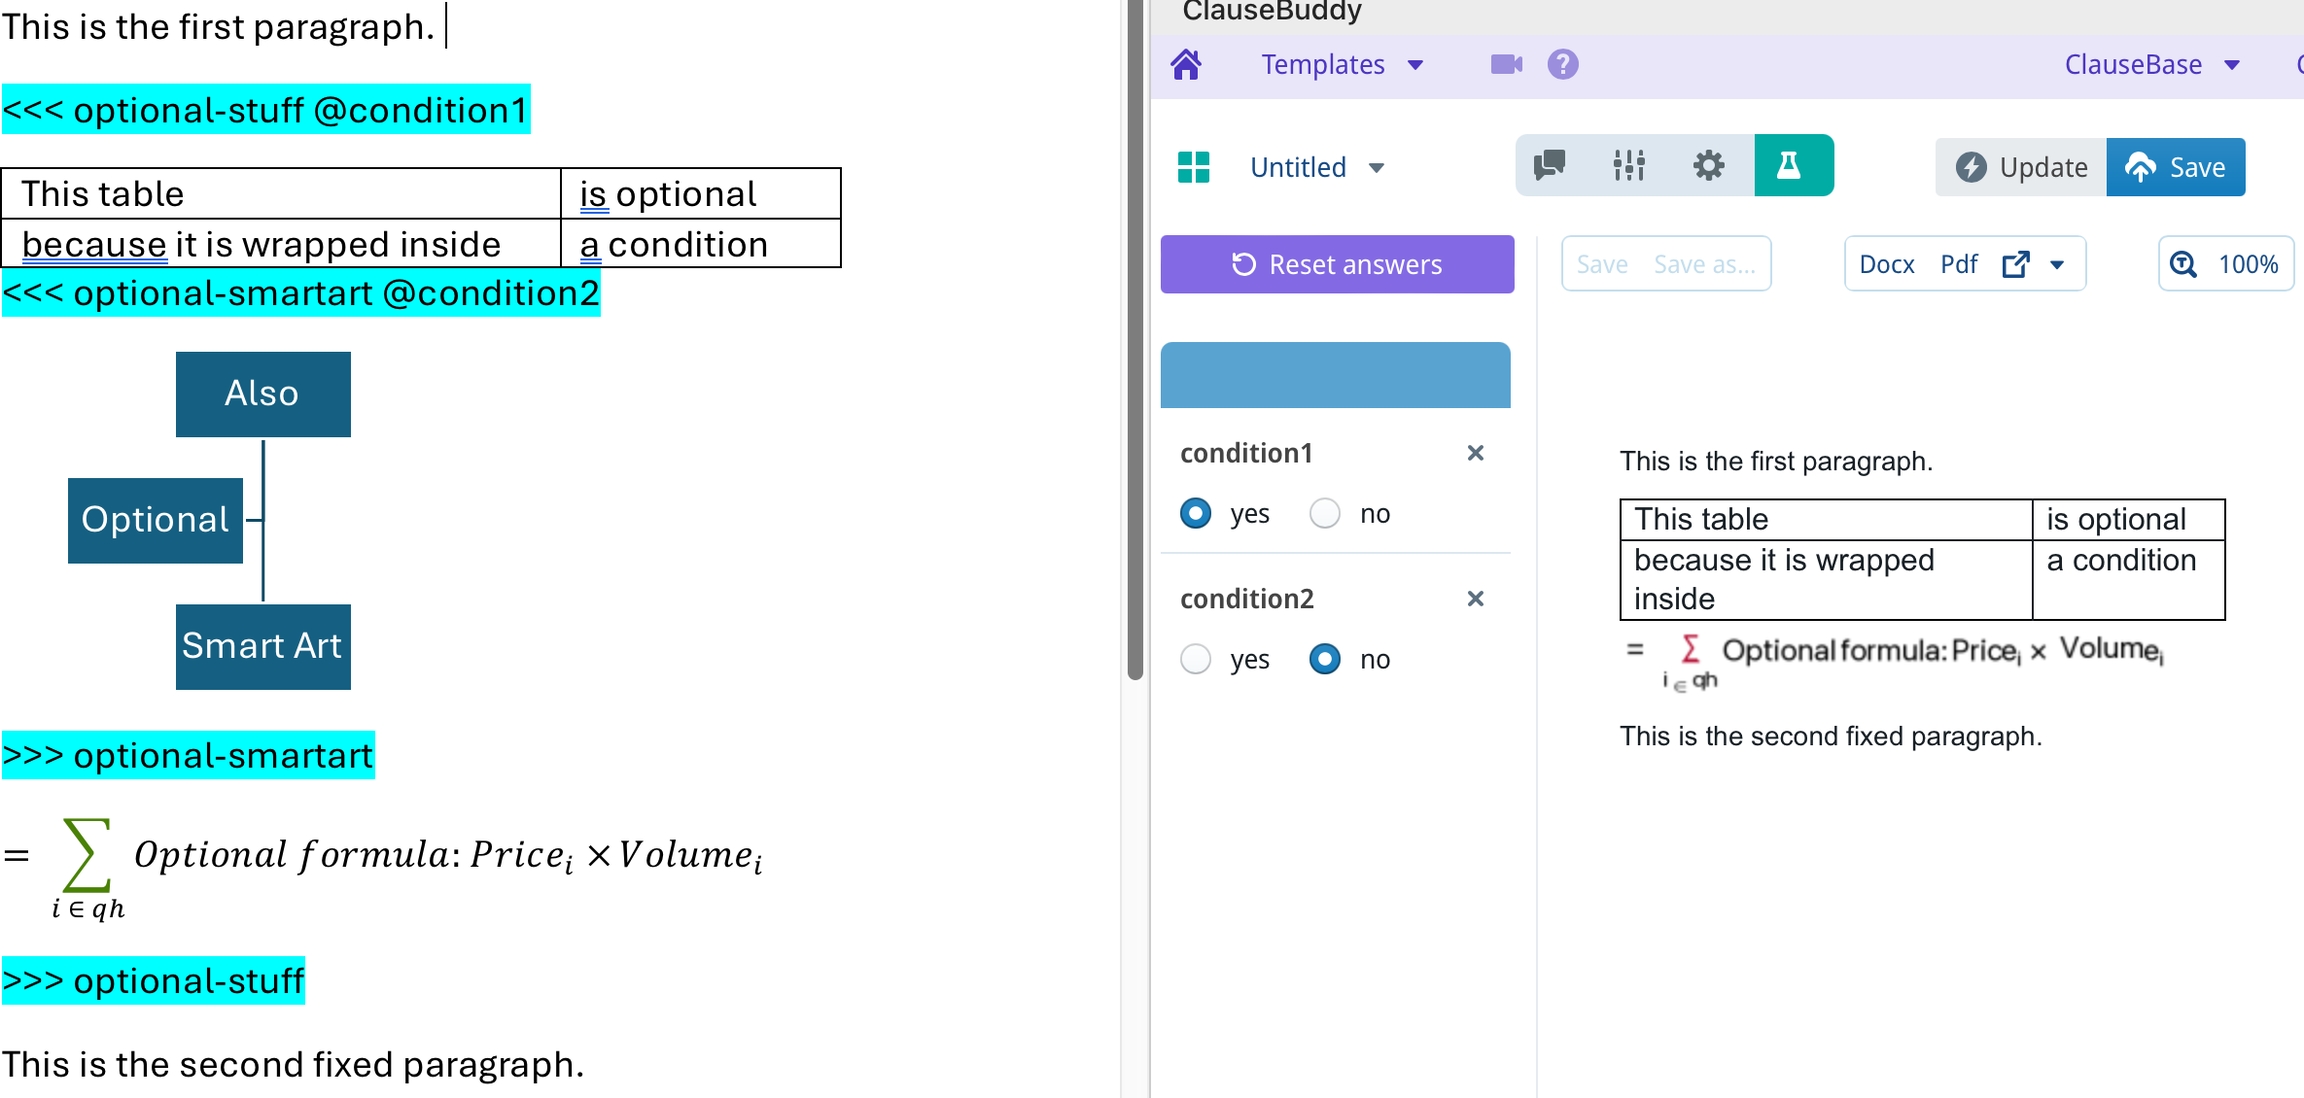
The identifier should be included in both the start (after the <<<) and the end (after the >>>). The idea is that you can nest identifiers, e.g. to have an optional table inside of an optional outer block. For example, in the screenshot below, you can see that the Smart Art is wrapped in an inner conditional block, which does not show up because that inner conditional block's @condition2 is set to No.
Important: conditional blocks cannot cross MS Word sections, i.e. each conditional block will automatically end at the end of the MS Word section.

Conditional text boxes

It is possible to make Word "text boxes" (which float above the page and can contain content of their own) conditional.

Navigate to the "Insert" tab in MS Word and select the "Text Box" option to draw a text box in which you will place your table.
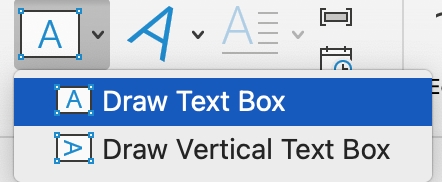
Write your condition, then insert the text box and include your table inside of it. When you click the table, you should see an anchor appear next to your condition. This is important, as it decides the conditional logic that is applied to the text box/table.

By way of example, with a text box containing a table:

Then, right-click the text box and select "More Layout Options" >> "Text Wrapping" and activate the "Top and Bottom" wrapping style.
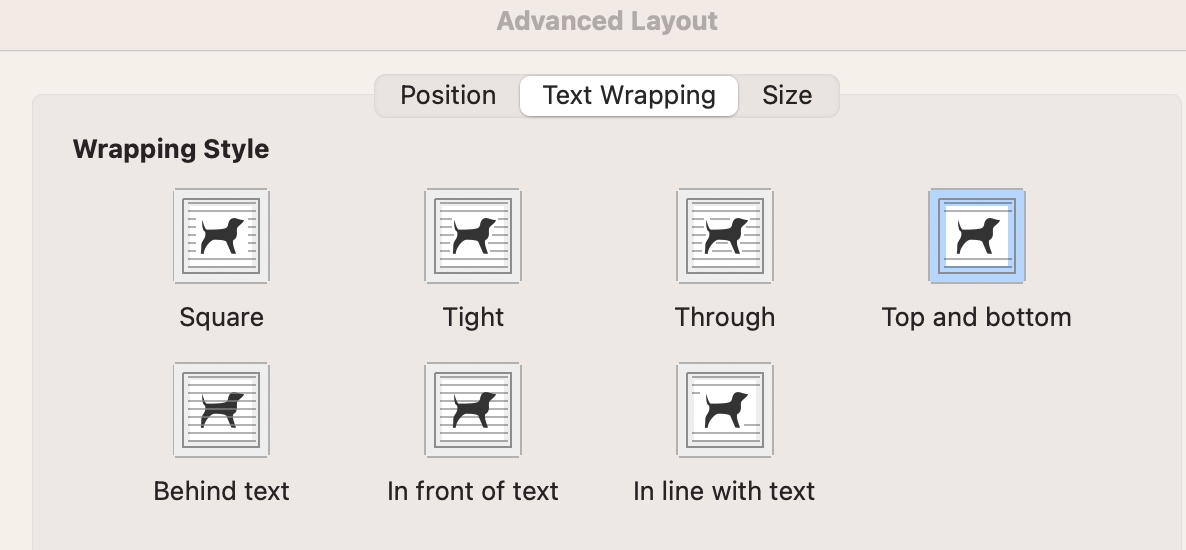
Update/Upload the document and set the question up to show or hide the frame as necessary.

You may also consider hiding the text box itself, by right-clicking it, selecting "Format Shape" and under "Shape Options" >> "Line" selecting the option "No line".
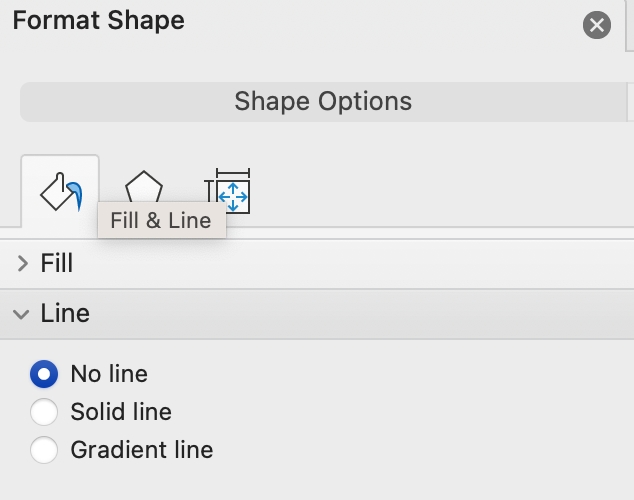
Conditional page breaks

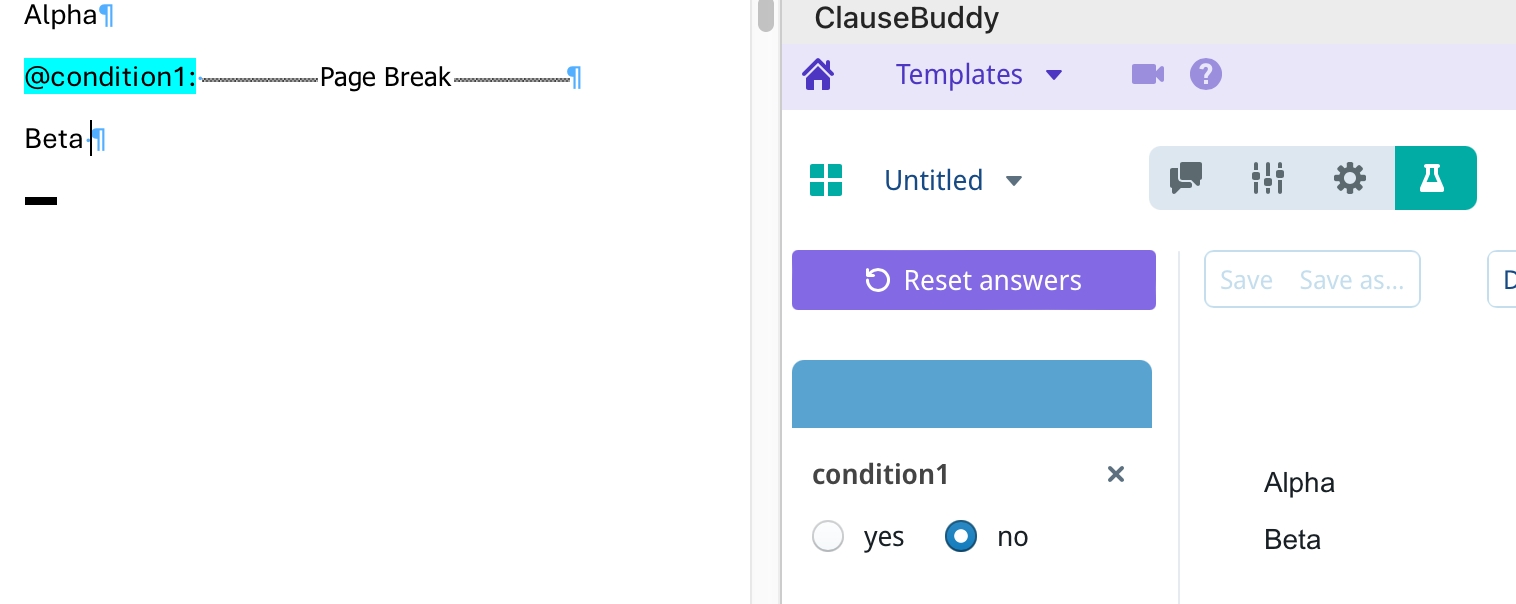
Page breaks can also be conditional. As, technically speaking, page breaks are actual treated as characters inside of a paragraph, you can simply make a paragraph conditional by starting it with a condition and a colon.

Note that you will want to probably show the "Formatting marks" (the reverse P in the Word toolbar), otherwise the page break will not be visible.