
Bulk create
ClauseBuddy allows you to generate a large amount of documents based on a single Smart Template. This is similar to the "mail merge" functionality of MS Word, but as you can use all the conditions and fields you want, you can effectively create intelligent documents in bulk.
Examples include:
customised annual bonus letters for all your employees, containing subtle differences in the type & calculation of each bonus
shareholder documents to be signed by a large number of shareholders
data breach notifications to be sent to many recipients
Approach
Once you have created a Smart Template, you can request ClauseBuddy to generate an Excel sheet containing all the questions. You then fill out this Excel sheet, where each row will become a separate document that will be generated.
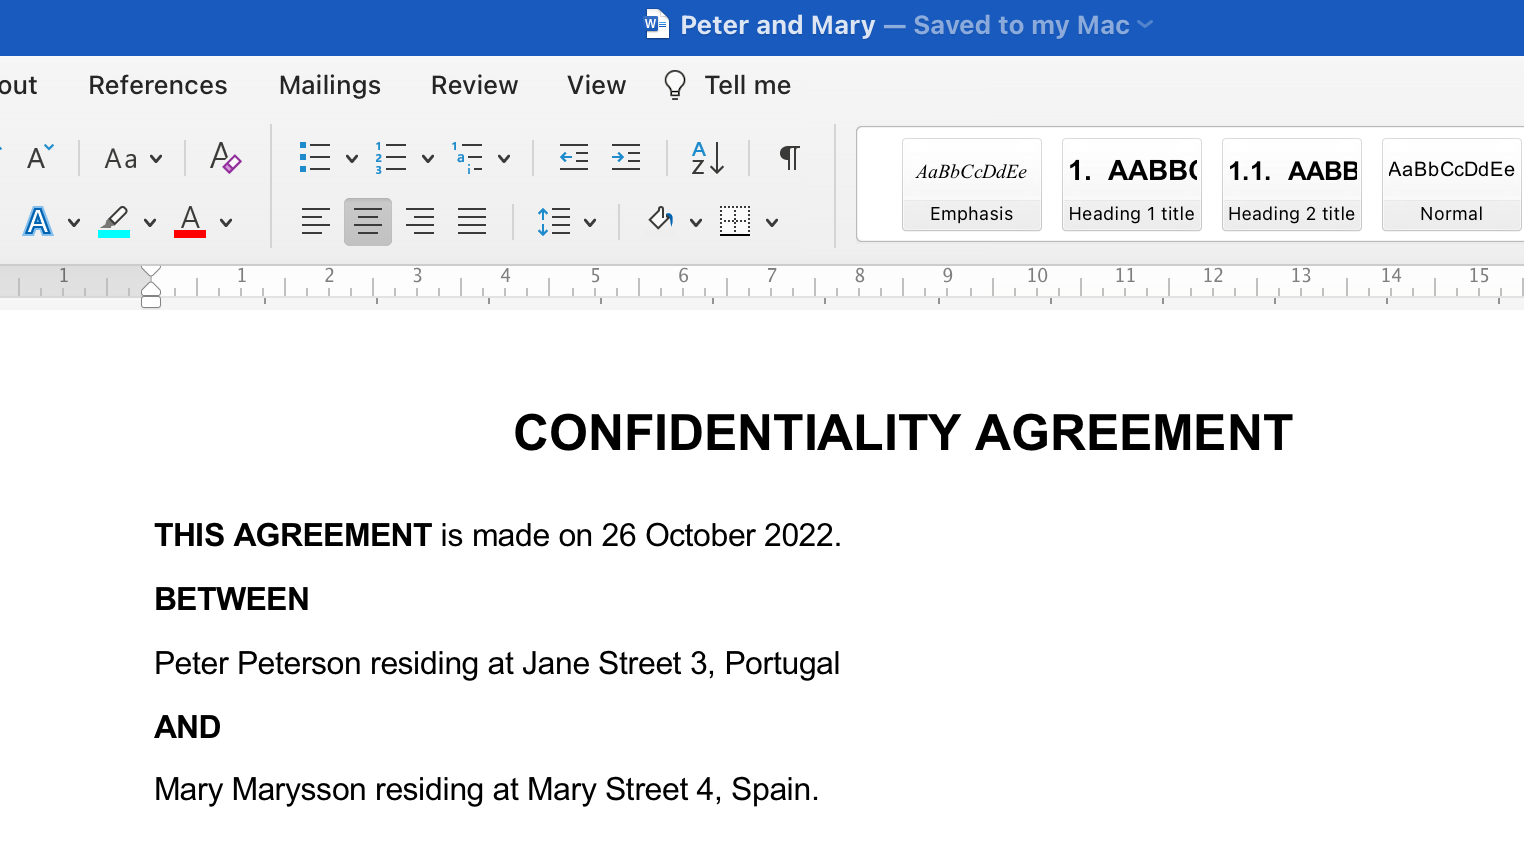
For example, the following Smart Template:
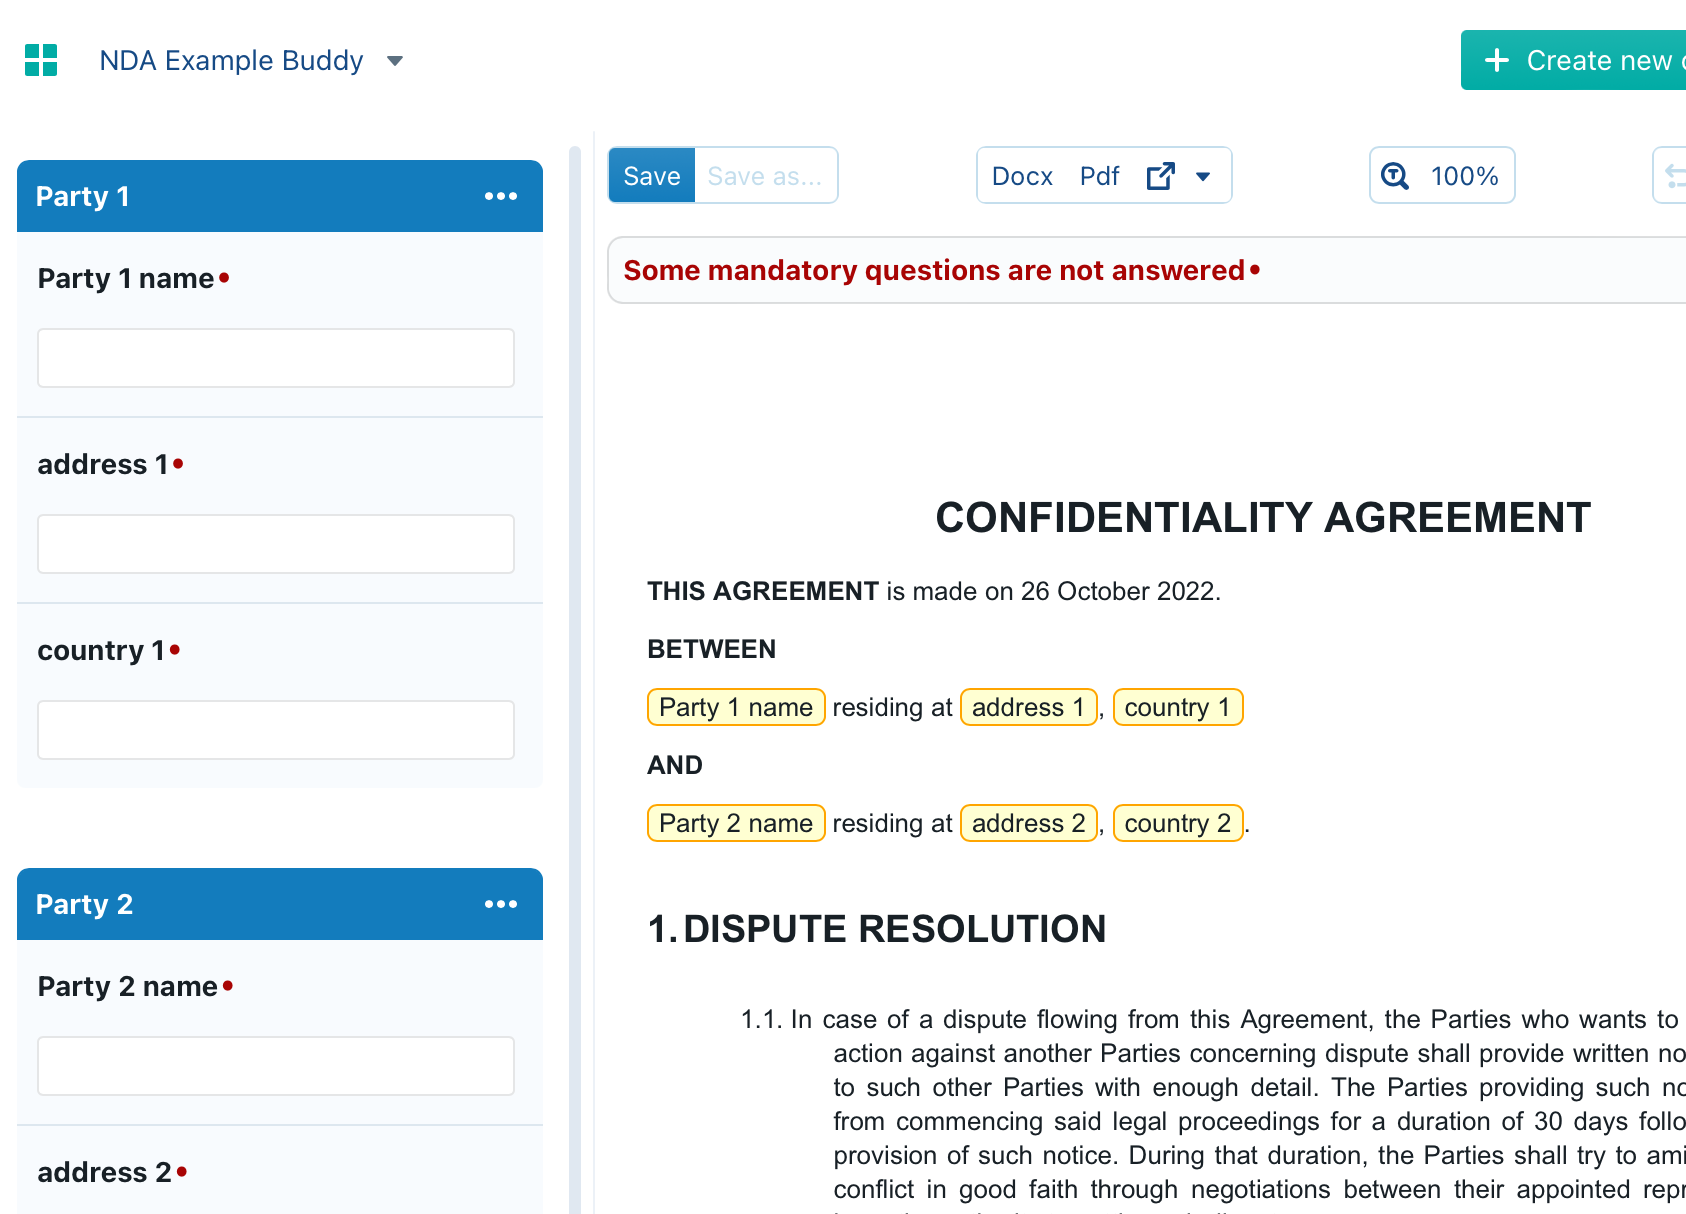
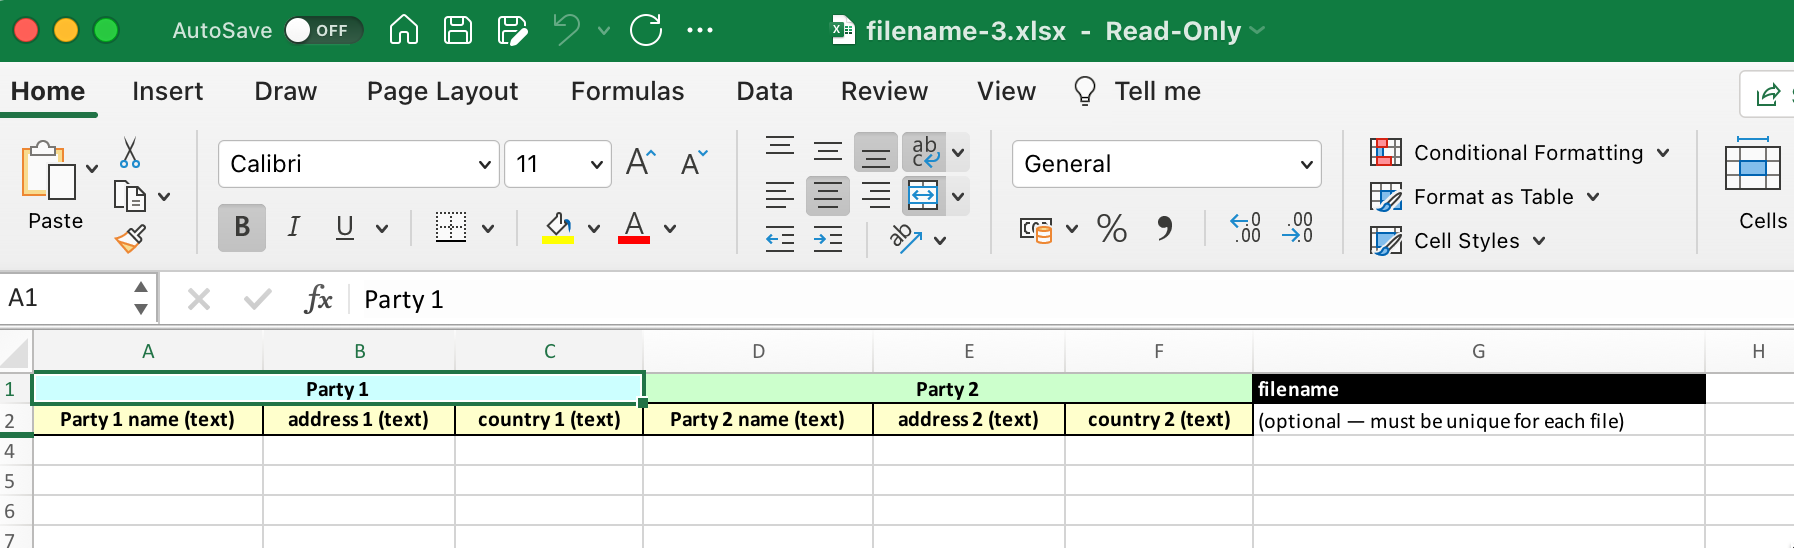
will be exported as follows:
When you then fill in two rows and upload the Excel file back to ClauseBuddy...
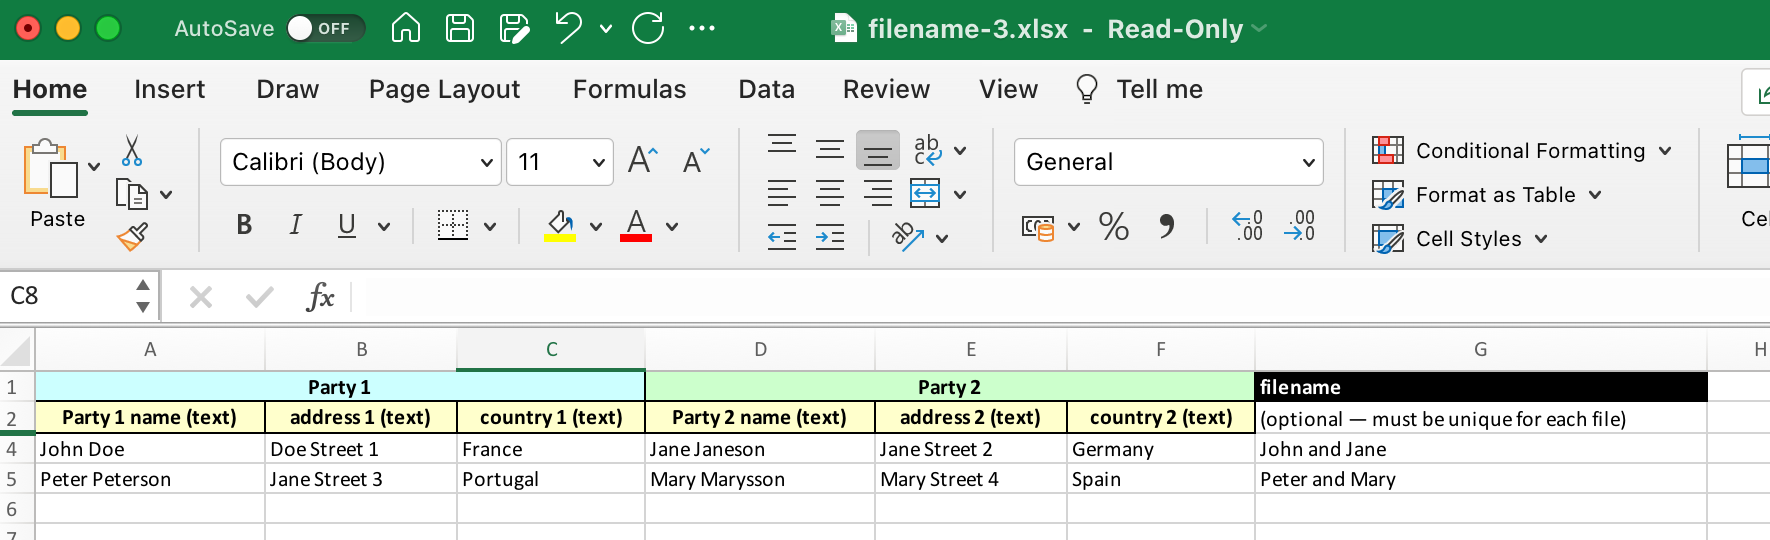
You get a ZIP-file containing the following contracts:
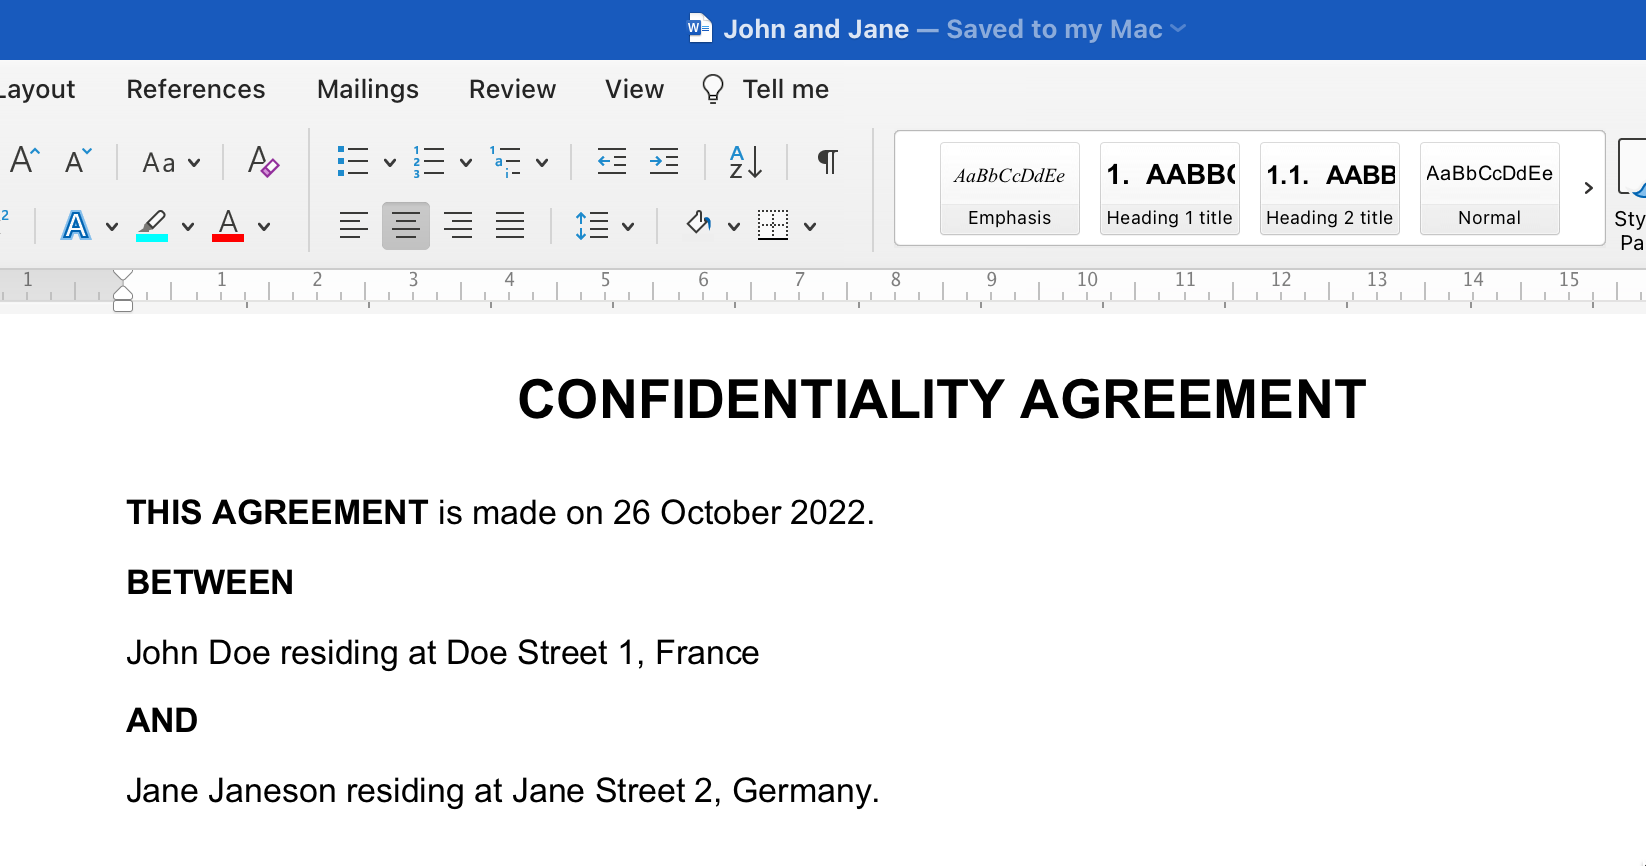
Of course, the benefits of merely two contracts are limited. But imagine the time savings when you export 67 documents in one go!
Caveats
Be aware that, even though Excel certainly provides an easy way to quickly fill out large amounts of information, it is a fairly primitive way to complete forms — as anyone who had to fill in administrative forms in Excel would know.
Generating documents in ClauseBuddy itself should be preferred whenever possible, because there are dozens of facilities offered in ClauseBuddy that Excel simply cannot match (e.g., auto-hiding questions to comments, warnings, smooth predefined options, and so on; not to mention the interactive preview of your document at the right side!).
All the (paragraph & text snippet) conditions that are present in the Smart Template will continue to work, so two documents generated from an Excel file based on the same Smart Template may in fact look very different from each other. Nevertheless, due to the lack of interactive document preview within Excel, it may become difficult for users to truly know how questions interact with each other and with the Smart Template.
Step-by-step instructions
First, you need to create a Smart Template.
Make sure every question you have added to your Smart Template has been saved (otherwise you get a warning inviting you to save first).
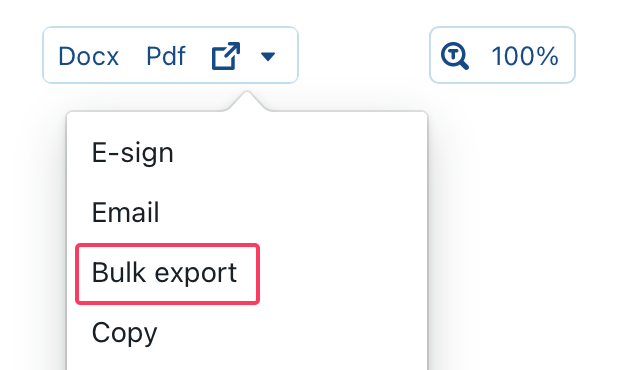
Next — either from within the Test mode of the template editor, or while filling out the template — click on the Bulk Export menu item within the toolbar:
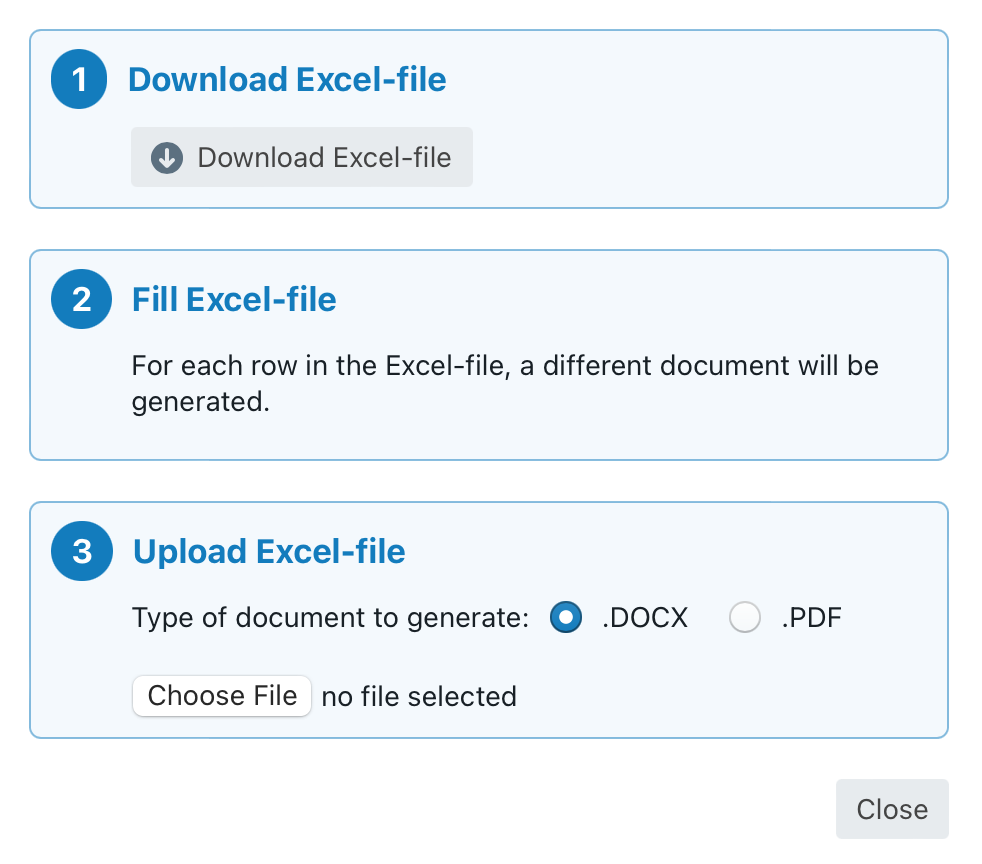
The following dialog appears that explains the next steps to take:
Filling out the Excel-file
The Excel-file shows all card titles in the first row, and question titles in the second row. (A hidden third row contains internal reference numbers — more on that below).
ClauseBuddy will only include questions for whom the title or identifier corresponds to some cyan-highlighted text. In other words, questions that do not have a direct impact on your document will be omitted.
Dealing with different types of questions
Depending on the question type, different data types will need to be completed. As Excel is quite bare-bones in its approach, as compared to the user-interface of ClauseBuddy, you may want to check the following table for some caveats:
Text
A simple text value should be included here.
True/false
The word "true"/"yes" or "false"/"no" (its capitalisation does not matter) should be filled out here.
Note that this is language-sensitive so that you may also fill the equivalent in your own language out. (English is always accepted, however.)
For example:
French: "vrai"/"oui" or "faux"/"non"
Dutch: "juist"/"ja" or "fout"/"nee"
German: "wahr"/"ja" or "falsch"/"nein"
Lithuanian: "teisingai"/"taip" or "neteisingai"/"ne"
Number
A number should be filled here. For example: "3" (but not "three").
Date
A date can be filled out here in any (Excel-legible) format you prefer. For example: "1 October 2021" or "2021-10-01". Excel will automatically configure the appropriate date notation format based on your input.
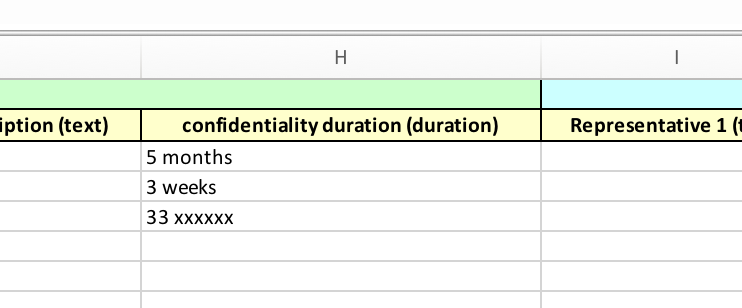
Duration
Here you should fill out a number along with the duration value of your choice. For example: 3 months, 5 years, etc.
Note that this is language-sensitive so that you may also fill the equivalent in your own language out.
As a reminder, ClauseBuddy uses 5 duration values to choose from: years, quarters, months, weeks, and days.
Floating point number
A number with any amount of numbers after the comma can be filled out here. Excel will automatically configure the appropriate notation format based on your input.
Currency
A number should be filled out here, without the currency symbol.
You can can configure the cell formatting directly in Excel to choose the currency you would like to apply (e.g. USD, EUR, GBP, etc.)
Multiple text answers
A simple text value should be included here.
Note that in Excel you can fill out multiple text values by separating each answer with a line break (using Alt + Enter (Windows) or Cmd + Enter (Mac)).
Predefined values
For text, number and currency fields, the software will present the user the predefined values at the bottom of row 2 in the Excel file.
For example, for the following question:
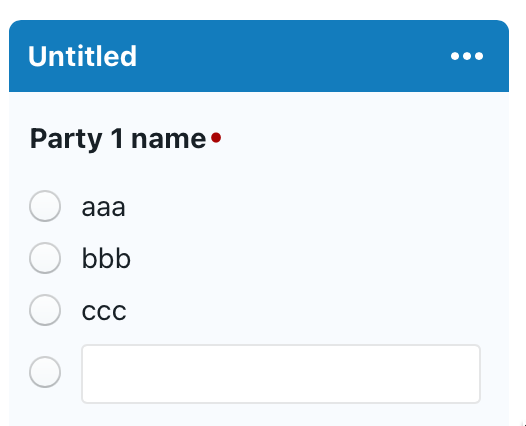
... the resulting Excel-file will indicate the three possible options on row 2:

Reordering the Excel-file
If you want, you can change several parts of the structure of the Excel-file, e.g. to make it more suitable for other departments to complete it. You should however respect the following ground rules:
You can remove row 1 containing the card titles to which the questions or datafields belong.
Row 2 (containing the question titles) should however always be present, either as the first or as the second row. You are allowed to rephrase it — however, for currency-based datafields, the cell should somewhere mention the currency between parentheses (e.g., "(EUR)" or "(USD)").
Row 3 is hidden. That row should not be removed or altered, as it contains the internal question number, that will be used by the software to match input with each question upon upload.
You can change the order of the columns in any way you like. For example, the questions should not necessarily stay together, as they are matched on the basis of the hidden question number in hidden row 3).
You can include a second Excel worksheet in the document explaining how the information should be filled out. However, the first worksheet should always contain the questions themselves, so make sure any additional information is included in the second or subsequent worksheet.
You can remove certain questions if you do not want them to be filled out. This will cause that information to simply be omitted from the final documents, but does not prevent the documents from being generated.
You can add comments to a cell to assist users in filling out the Excel sheet. These will have no effect on the final output from ClauseBuddy.
You can add an optional filename in the very last column (coloured in black & white). If such filename is not included, a default one (using an incrementing number) will be added by the software . Do not add the filename extension (.PDF or .DOCX), because that extension will be automatically generated.
Uploading the Excel-data
Once you are done filling out the Excel-file, you should upload it again into ClauseBuddy (e.g., by dragging or clicking on the upload button).
When there are any errors that cannot be resolved, you will get a red warning box. For example, the following invalid date in cell H6 would trigger an error:

Last updated