
Repositories
You can create a new repository by clicking on the Green "+ Repository" icon, when inside the "Edit repositories" part.
The title of the repository will only be shown internally to those users who have the right to edit a repository.
The access bundle allows you to define which (presumably internal) users are allowed to edit items within the repository.

Once you have saved a repository for the first time, you can add items to it.
Editing Items
To create a new item to a repository, click on the green "+ Add Item" button in the relevant repository.
You are then presented with a dialog box that allows you to edit the contents of the item.
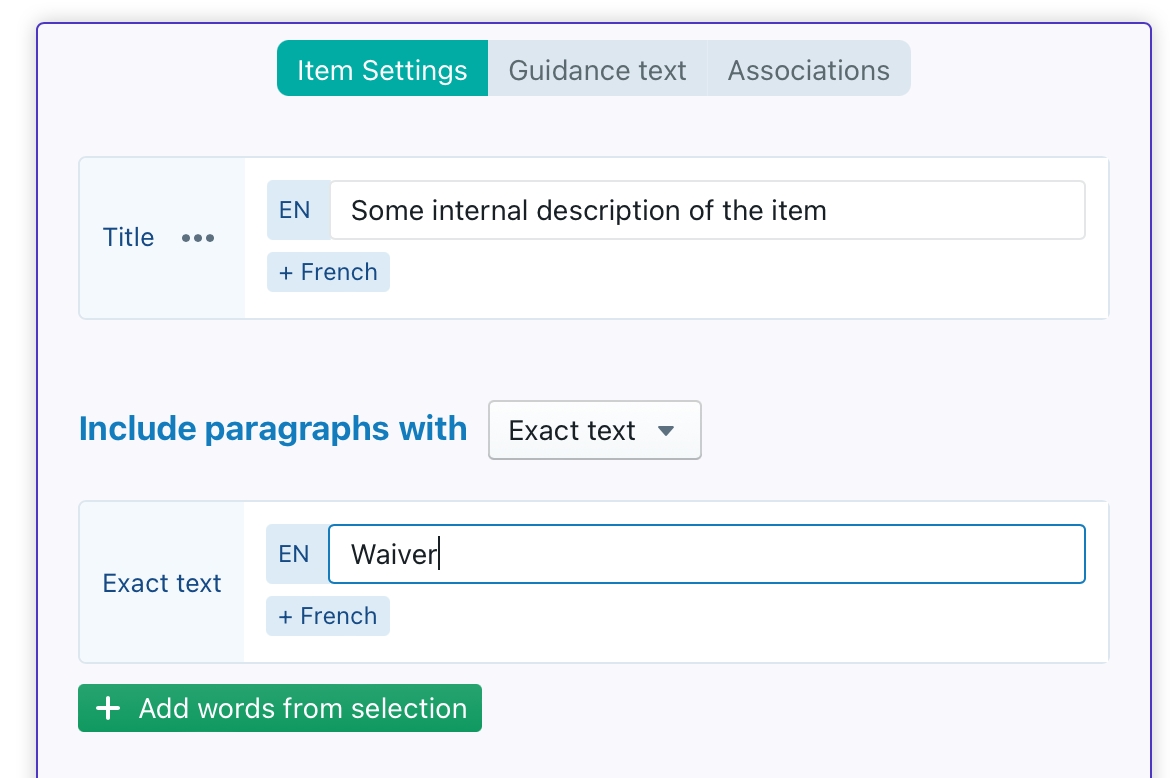
The title of the item will be shown both internally and towards end-users (at the top of the ClauseBuddy panel when a matching paragraph is found).
The Include paragraphs with part allows you to identify a clause within the end-user's document. You essentially have two options, as described below.
Matching paragraphs
With exact matching, the entire paragraph in the end-user's document must exactly match the text you enter (ignoring spaces at the beginning & end, and ignoring capitalisation) in order to be matched. Typically, you will want to enter the title of a specific clause here.
With fragment matching, you can enter one or more text fragments that will be used during the matching process. If at least one of the text fragments is included within the end-user's paragraph, it will get matched — unless any of the words in the "None of the words" part would be present.
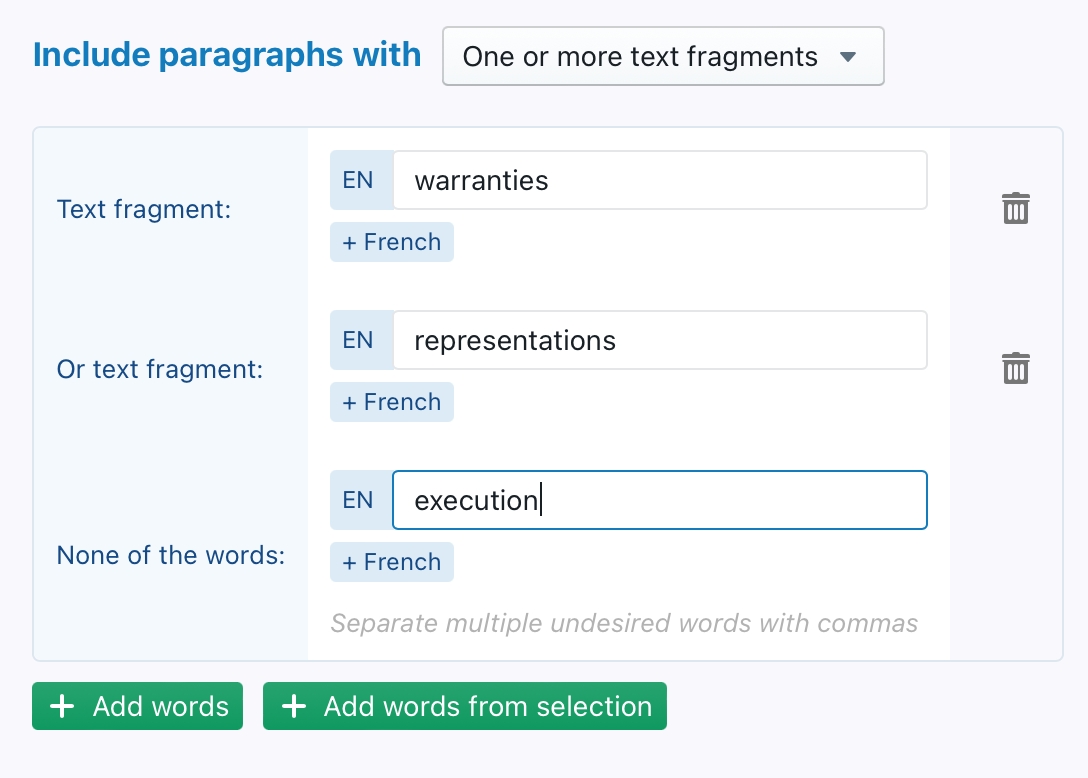
While usually you will want to go for exact matching, fragment matching can be useful when you want to use the same item for matching paragraphs containing specific keywords.
Another possible use is fragment matching is to include internal codes. For example, if a contract template would include internal code [AS123] at the beginning or end of a paragraph, you could use that code to identify a paragraph.
Tip: You could envisage to make such internal code hidden. The recognition can then still take place, but end-users will not see the code, unless the invisible characters are enabled in Word.
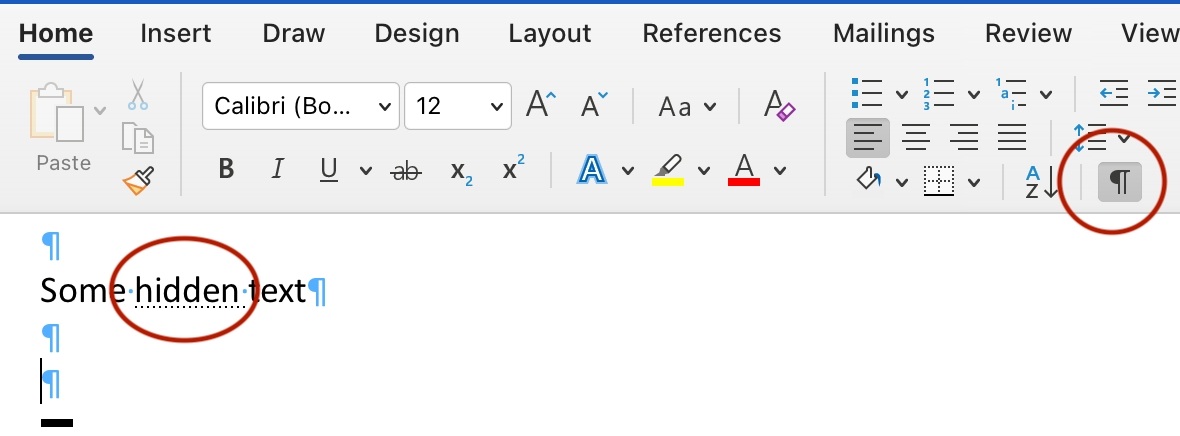
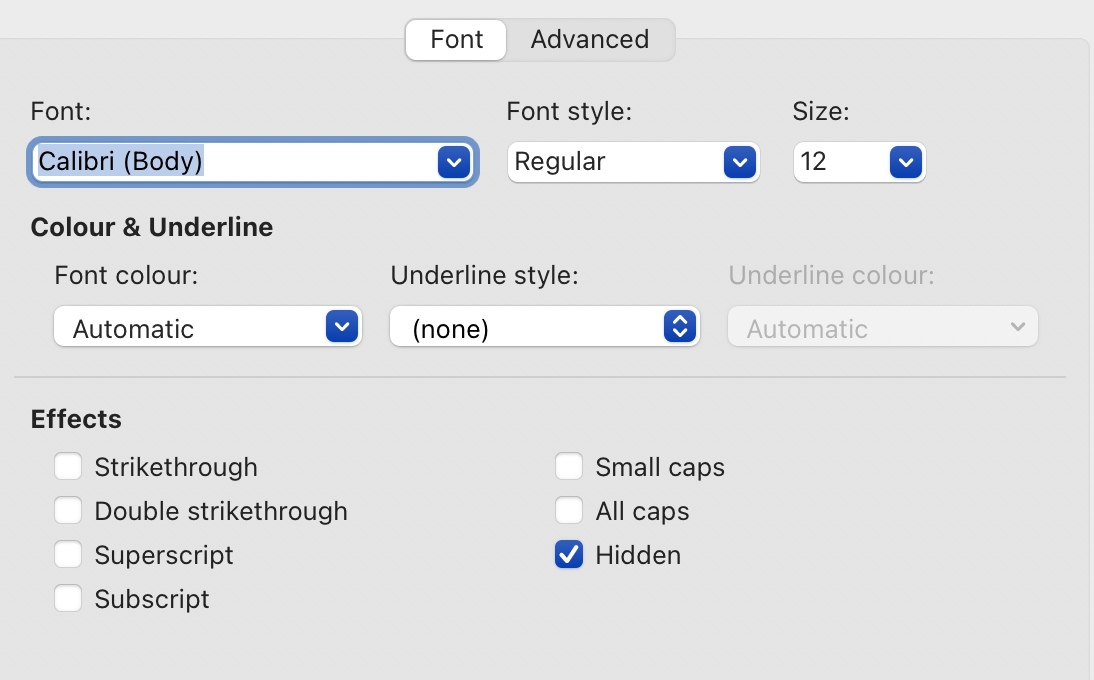
You can make text invisible by selecting it and then changing the font settings:
If you feel that the matching options are not sufficient — e.g. you want to do some fuzzy matching or semantic matching — then you're probably in the wrong place.
As described in the introduction, the Legal Guides are meant for internal documents that you have under your control, perhaps even to the extent that if this would make everyone's life easier, that you slightly modify your internal document (e.g., add the hidden code described above) to cooperate better with the Legal Guides.
Do not use Legal Guides for documents from counterparties, because the matching algorithm is deliberately very exact and would result in either too many false positives or false negatives.
Adding guidance text
When a paragraph in an end-user's document is matched, its guidance text will automatically be shown within ClauseBuddy when the user positions her cursor within the paragraph.
The guidance text will typically contain an explanation what a clause is — legally speaking — all about, but other information elements are also interesting, e.g.:
References to case law and legal doctrine
Tips & tricks on how (not) to use the clause
References to internal rules
Hyperlinks to intranet sites or websites on the internet

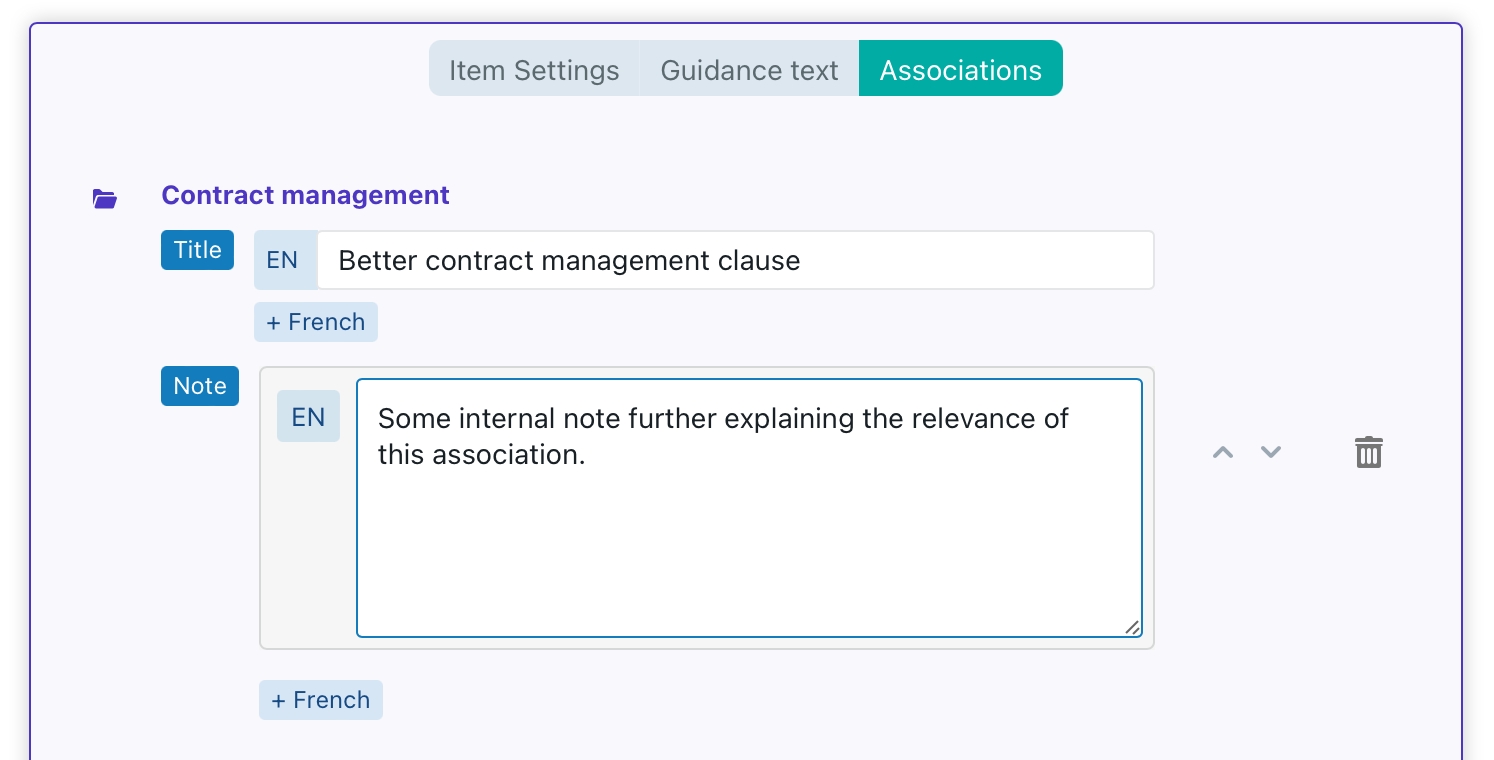
Associations
Associations allow you to add one or more specific clauses or folders to the item.
You can add an optional title that will be shown towards the end-user instead of the clause/folder's filename. This can for example be interesting when the filename contains internal information that you do not want to expose to external users, or when the filename is too "legalese".
The note allows you to add an optional note to the association, e.g. explaining what the clause is all about, or when to (not) use it.
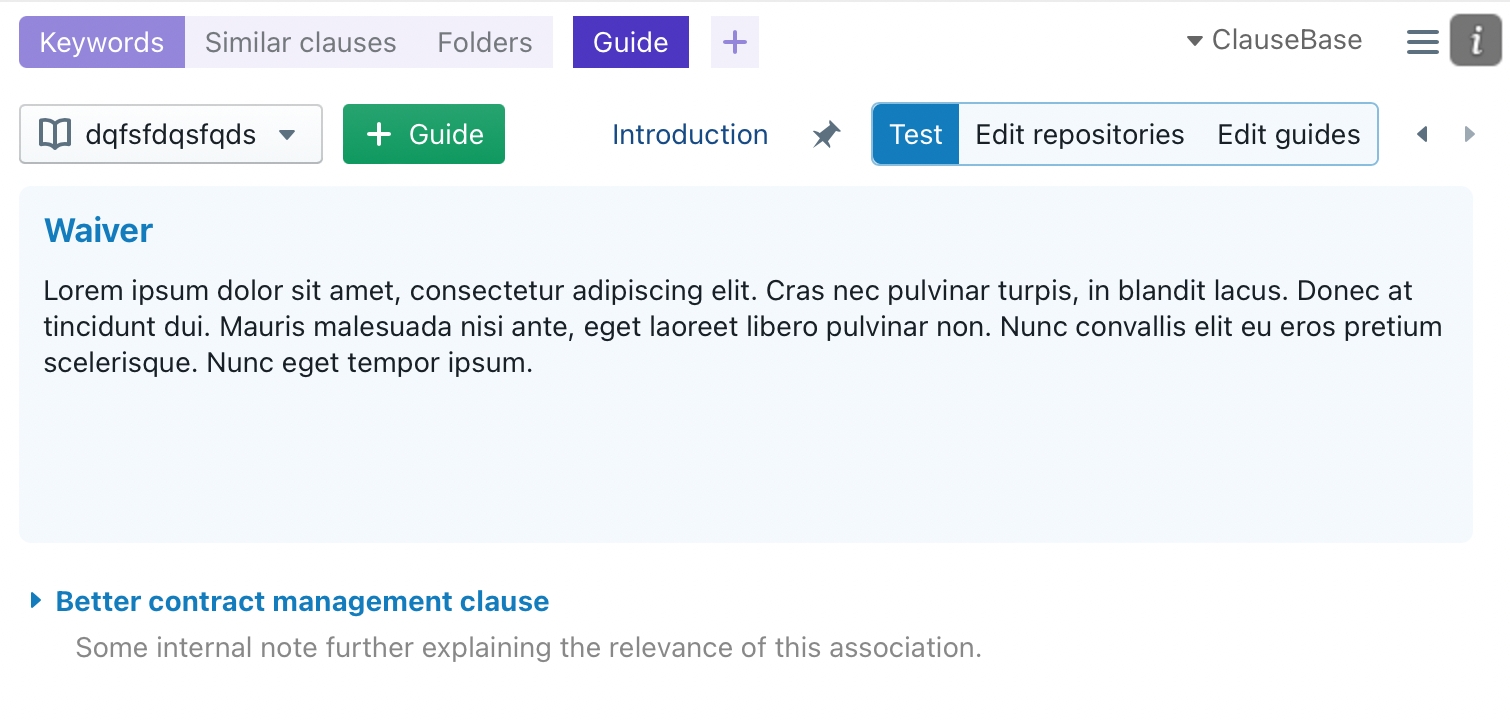
... is shown as follows towards the end-user:
To add an association, you have to navigate to other parts of ClauseBuddy (while the item's dialog box is still opened) in order to find the relevant clause or folder, and then simply click on the target icon (two circles). For example, when navigating to the keyword search panel, the following would be displayed:
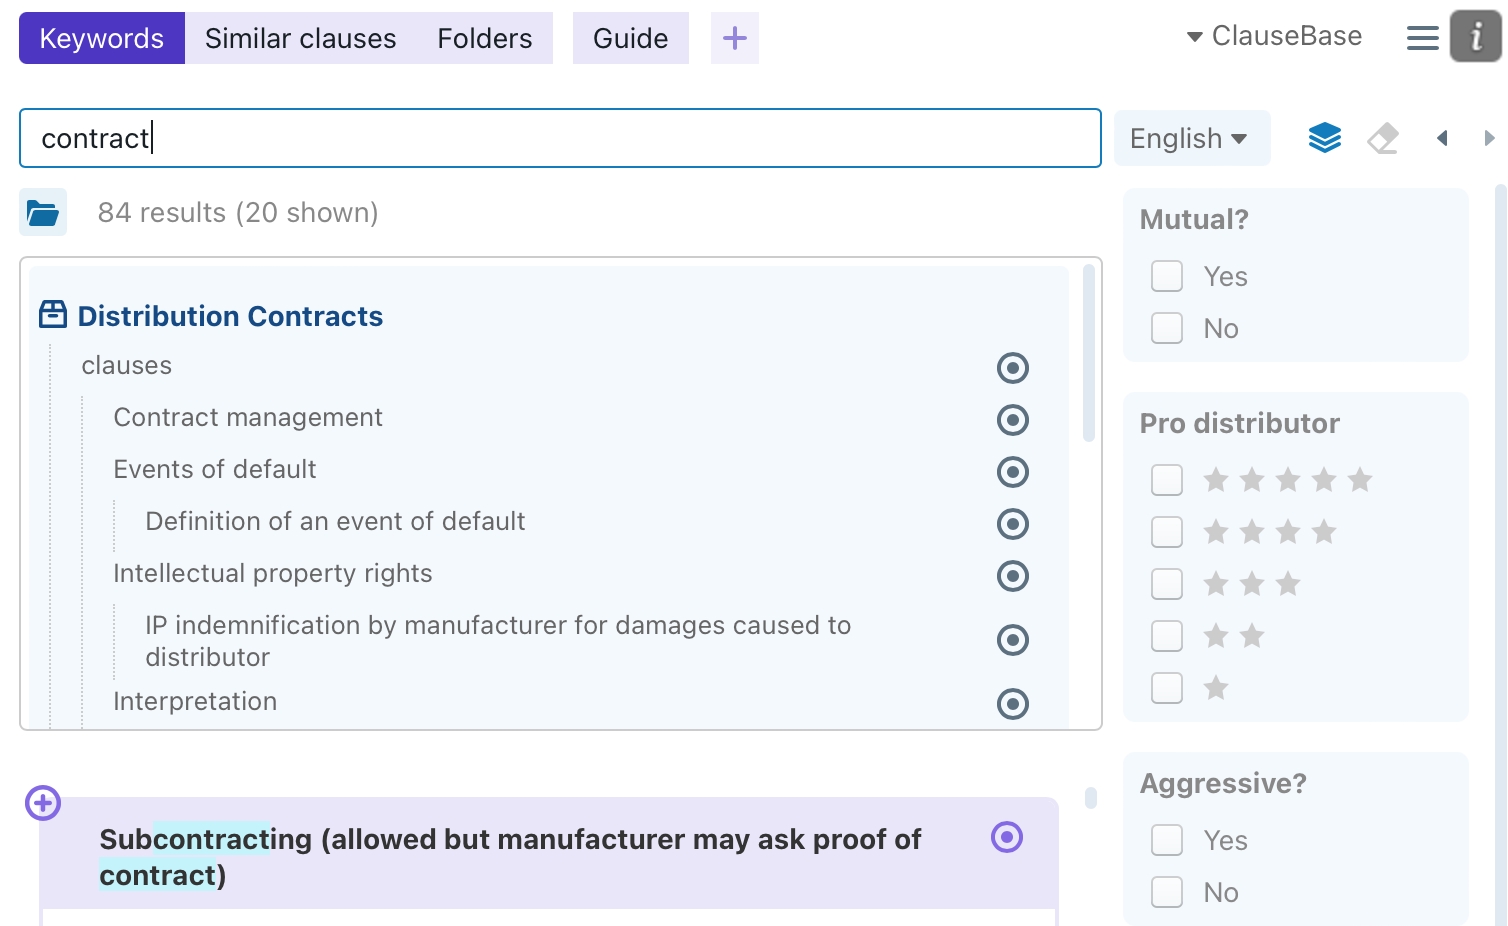
The association will then be added to the repository.
Any number of associations can be added to an item.
Last updated