
Highlighting Word documents
Creating templates in ClauseBuddy starts with highlighting words in an existing DOCX (Word) document. While very easy to get started with, there are few details you may want to be aware of.
If you are using ClauseBuddy from within ClauseBuddy, you may not have enough space on your screen if you do not have a large monitor. If so, you may want to put Microsoft Word in Web Layout View instead of the default Print Layout. You can do so by visiting the View tab in Word's ribbon, or by clicking on the relevant button in Word's status bar at the bottom of the window.
You can then make your document panel at the left side smaller, and Word will wrap the document's text in the available window. This allows you to make more room for ClauseBuddy.
Highlighting in cyan
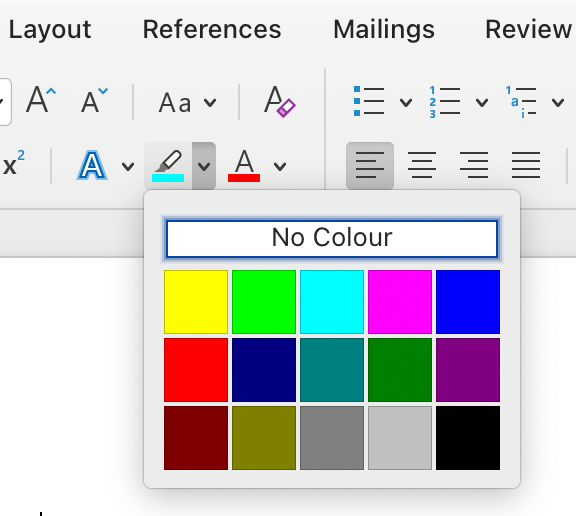
In ClauseBuddy, placeholders must be highlighted in cyan (light blue).
This color was deliberately selected, because most legal experts tend to already use yellow for various purposes (such as internal comments, temporary internal notes, and — admittedly — also placeholders).
You can switch to cyan highlighting by clicking the down-triangle within the Microsoft Word toolbar:
Speeding up the highlighting process
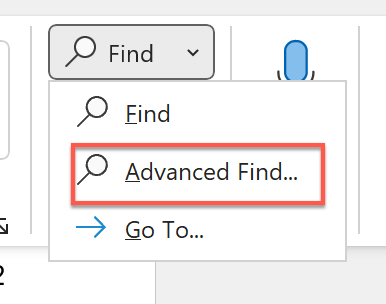
Microsoft Word contains many advanced search-and-replace options that can help you speed up the highlighting process. You may want to read all the details (alternative, somewhat lighter explanation), but let's recap the most important parts below.
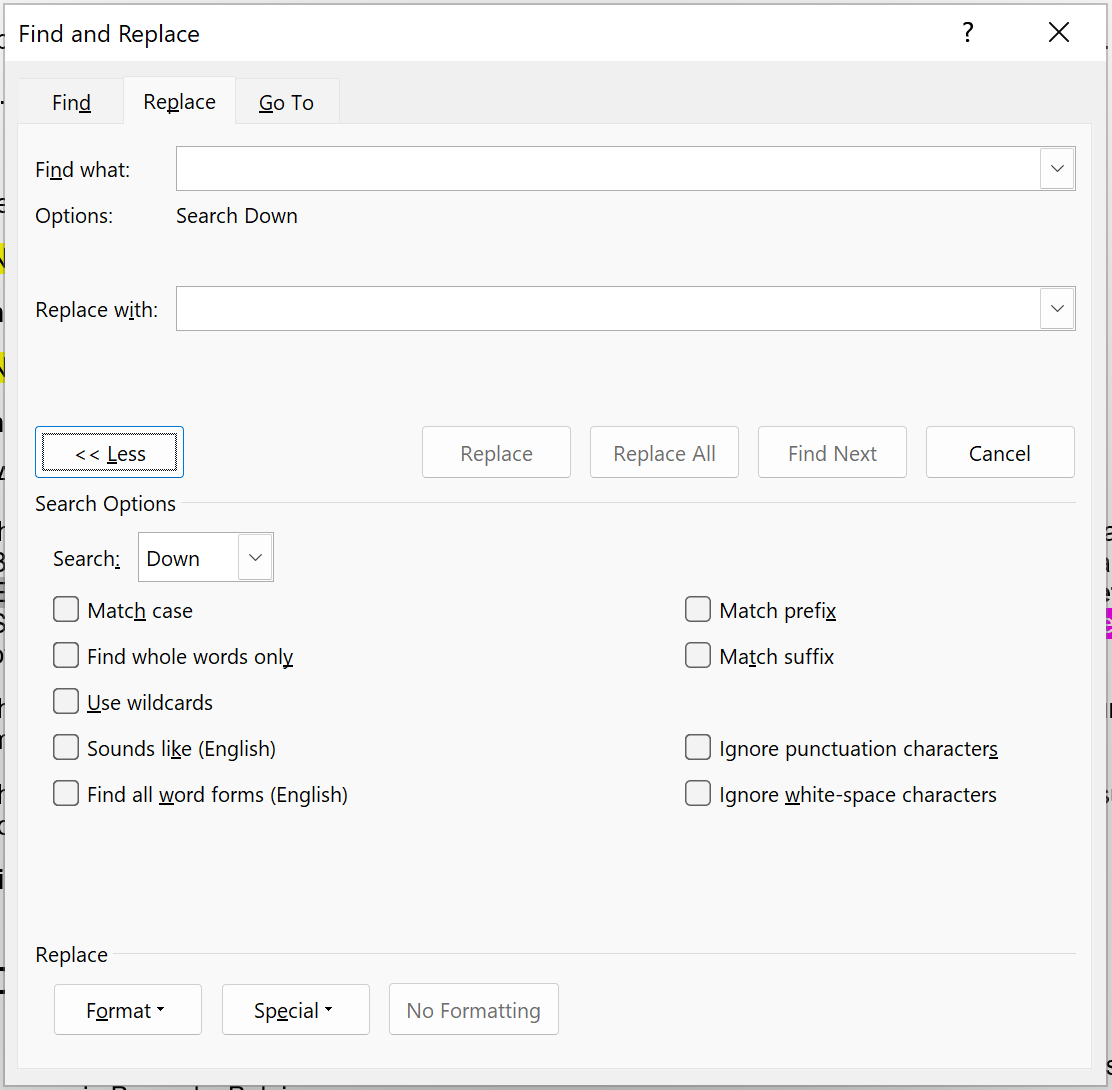
First off: you want to open the Advanced Find dialog box through Word's toolbar, navigate to the Replace part, and clock on >> More to show the entire dialog box.
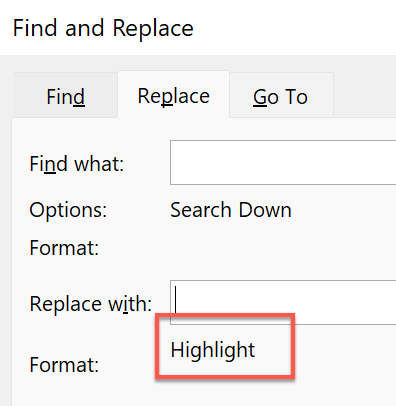
Next, you probably want to assign a cyan highlight to whatever you find. To make this happen, you have to insert your cursor on the Replace with part, click on the Format button at the bottom of the dialog box and activate Highlight. Your dialog box will then indicate that the highlighting is activated:
Unfortunately, Word does not allow you to choose the highlighting color during these replacement operations. You therefore need to make sure that you applied a cyan highlight as the last highlighting color before performing any replacement operations.
You can also narrow down your searches by assigning the Highlight format to your Find what box. For example, if you would like to automatically replace all yellow highlights with cyan highlights, you can simply assign Highlight to both the Find what and the Replace with boxes — this way, Word will limit its searches to text containing highlighting, and replacing it with exactly the same text, containing the highlighting color that you last used (i.e., presumably cyan).
The next part is a bit more difficult: learning the special "wildcard" codes that Word makes available. With these special wildcards, you can find text with variable parts — e.g., to find all text between square brackets.
You first have to active the wildcard-mode by enabling the Use wildcards option in the bottom part of the dialog box.
There are many types of wildcards, e.g. to search for parts of word, specific characters, and so on. Furthermore, you can search for special special characters — e.g. page breaks or tab characters, by clicking on the Special button at the bottom of the dialog box.
However, specifically for our highlighting purposes, let's look at the most interesting ones:
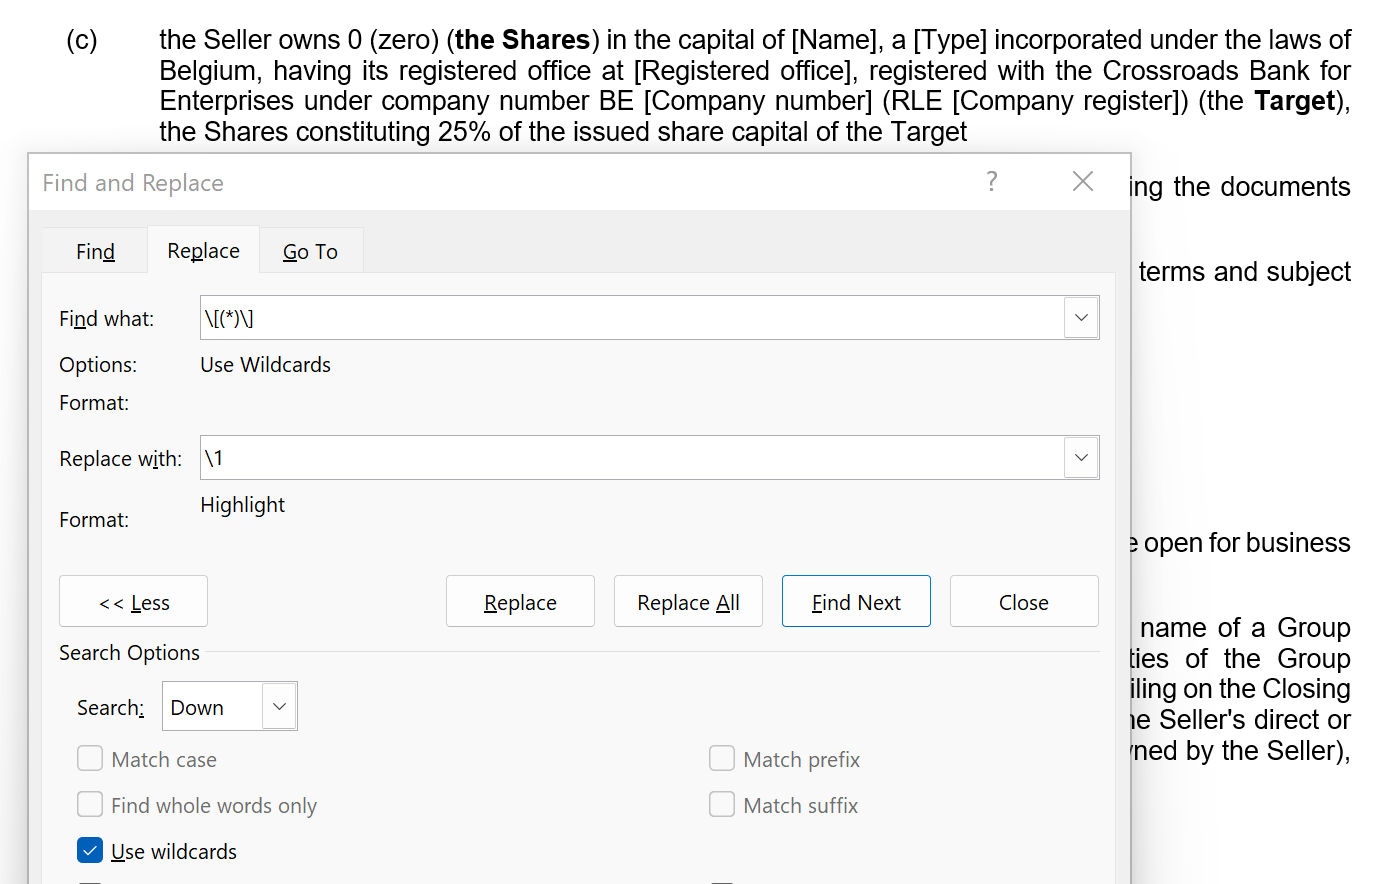
Highlighting text between square brackets
Find what:
\[(*)\]
Replace with:
\1
Yes, this looks like gibberish, but let's break it down step by step.
In the Find what part, you are looking for any kind of text between square brackets. The asterisk symbol * represents this "any kind" of text".
By using parentheses (round brackets), you tell word that you want to remember a certain part, so that you can reuse it during the replacement operation. You therefore have to wrap the asterisk in round brackets.
Finally, you want to only find stuff between square brackets. You therefore have to insert square brackets. But there's a catch: within the Find what box, the square brackets have a special meaning to Word (they allow you to search for character ranges, e.g. lowercase letters a-z), while we want to literally search for square brackets. You therefore have to prefix the square bracket with a backspace.
Note the \1 part in the Replace with box: this means "I actually want to insert the characters you remembered in the first pair of round brackets". (If you would happen to have multiple parts between round brackets in your Find what box, then you can recall them by using \1 and then \2 and \3 and so on.)
Also note that we did not insert any square brackets in the Replace with: part. For ClauseBuddy, you do not need anything to be surrounded with square brackets.
Example:
becomes the following when pressing Replace All (or multiple Replace operations):
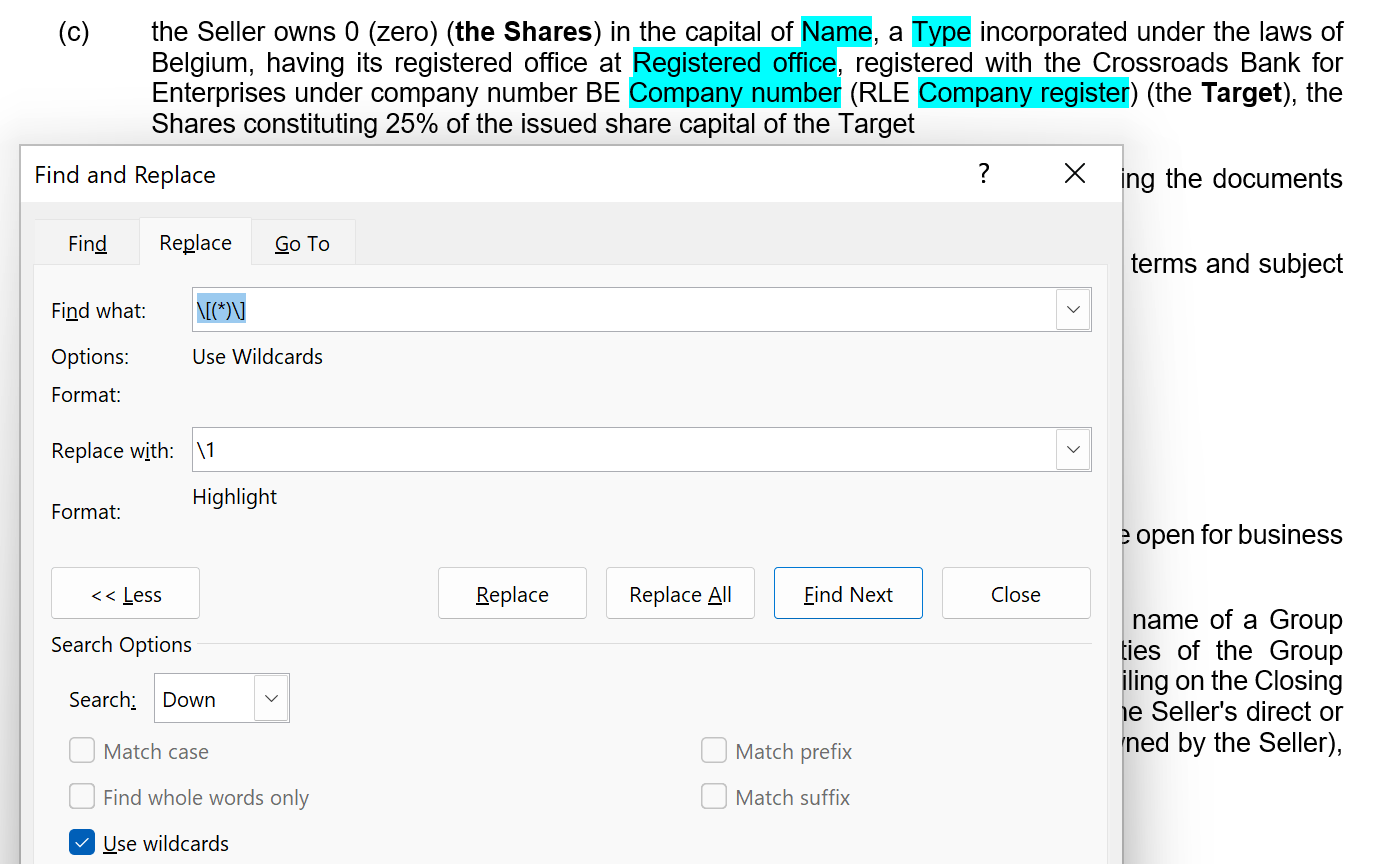
You probably want to use the Find next and Replace operations, instead of doing a Replace All. This way, for each found result, you can judge whether you indeed want to perform the replacement, or whether you want to skip it or manually change it. Time and again we see that a Replace All leads to unexpected results with users.
Highlighting text between double curly braces
Some templates use double curly braces {{text}} to indicate variable parts:
Find what:
\{\{(*)\}\}
Replace with:
\1
This probably looks even funnier due to all the backslashes, but the principle is the same:
find all text (asterisk) between curly braces
precede each opening/closing curly brace with a backslash, because — similar to the square brackets — the curly braces have a special meaning
remember the stuff that was found by putting \1 between round parentheses
For example:
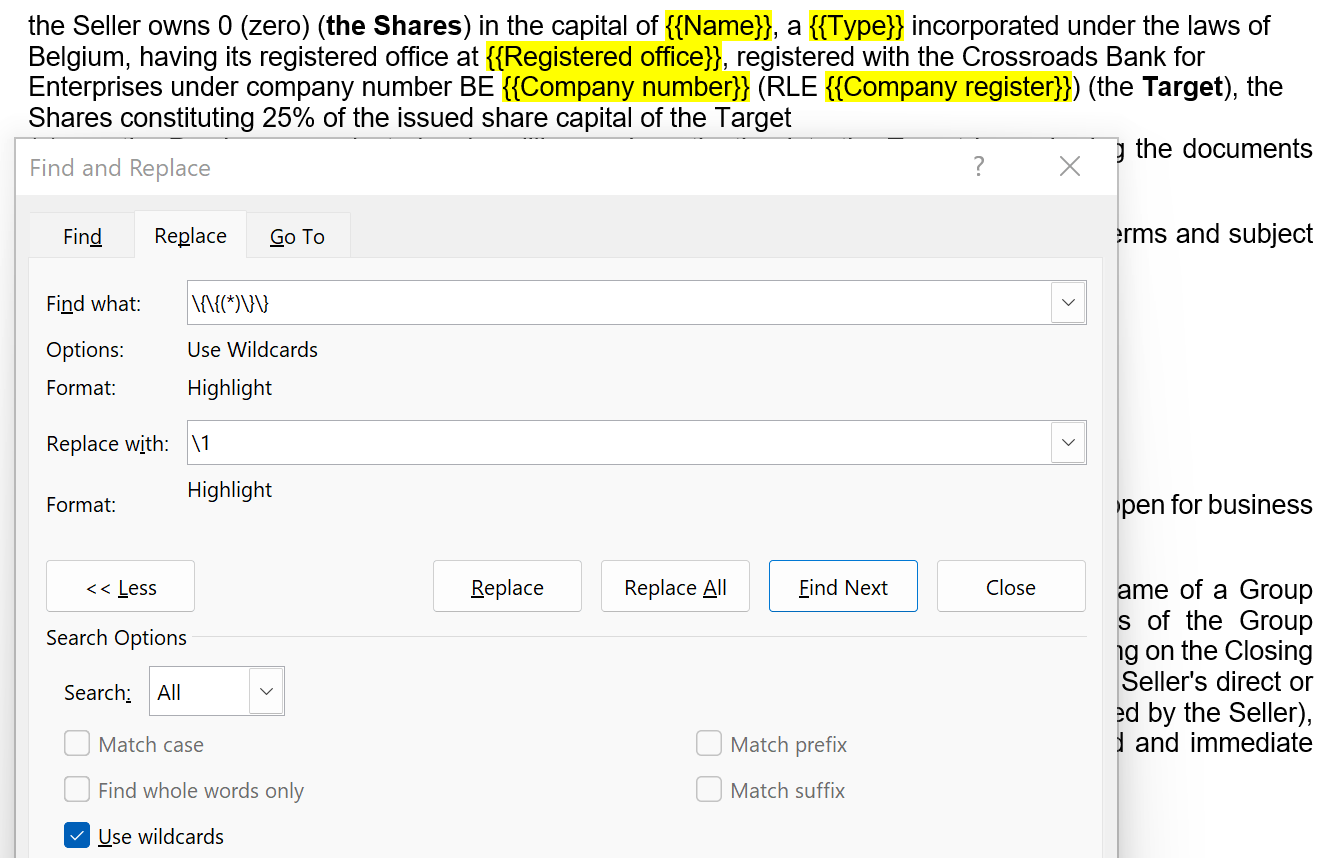
becomes:

Note that in the above example we actually limited our search to only text that was already highlighted. This was probably not strictly necessary (because in the example the text between double curly braces was always highlighted), but mostly for educational purposes.
Highlighting text between parentheses and some blob
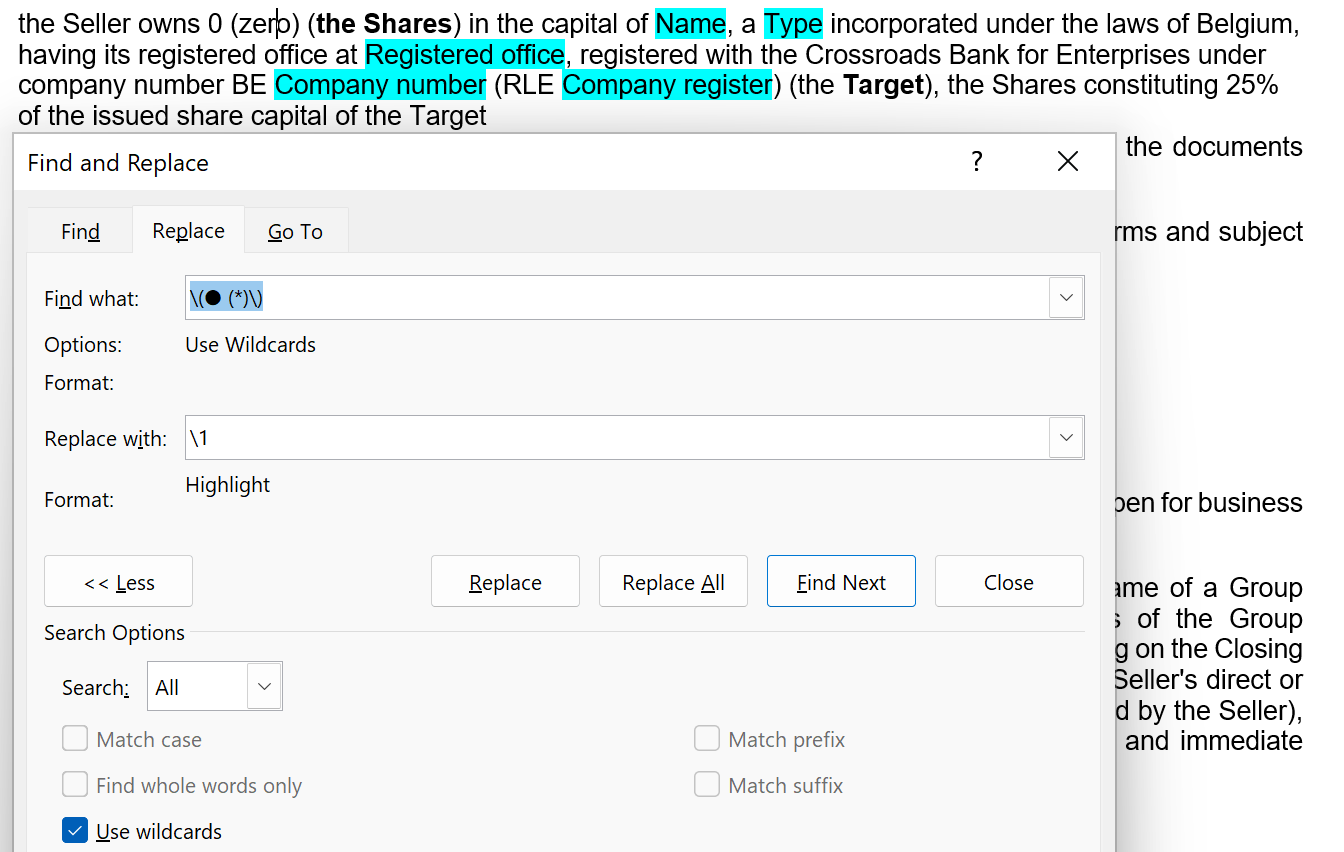
As a final example, let's look at templates that happen to use (● text) to indicate variable parts.
Find what:
\(● (*)\)
Replace with:
\1
Once again: backspaces before a character with special meaning to Word (i.e., the outer round brackets), round brackets around text you want to remember, and an asterisk to indicate "any text".
Example:
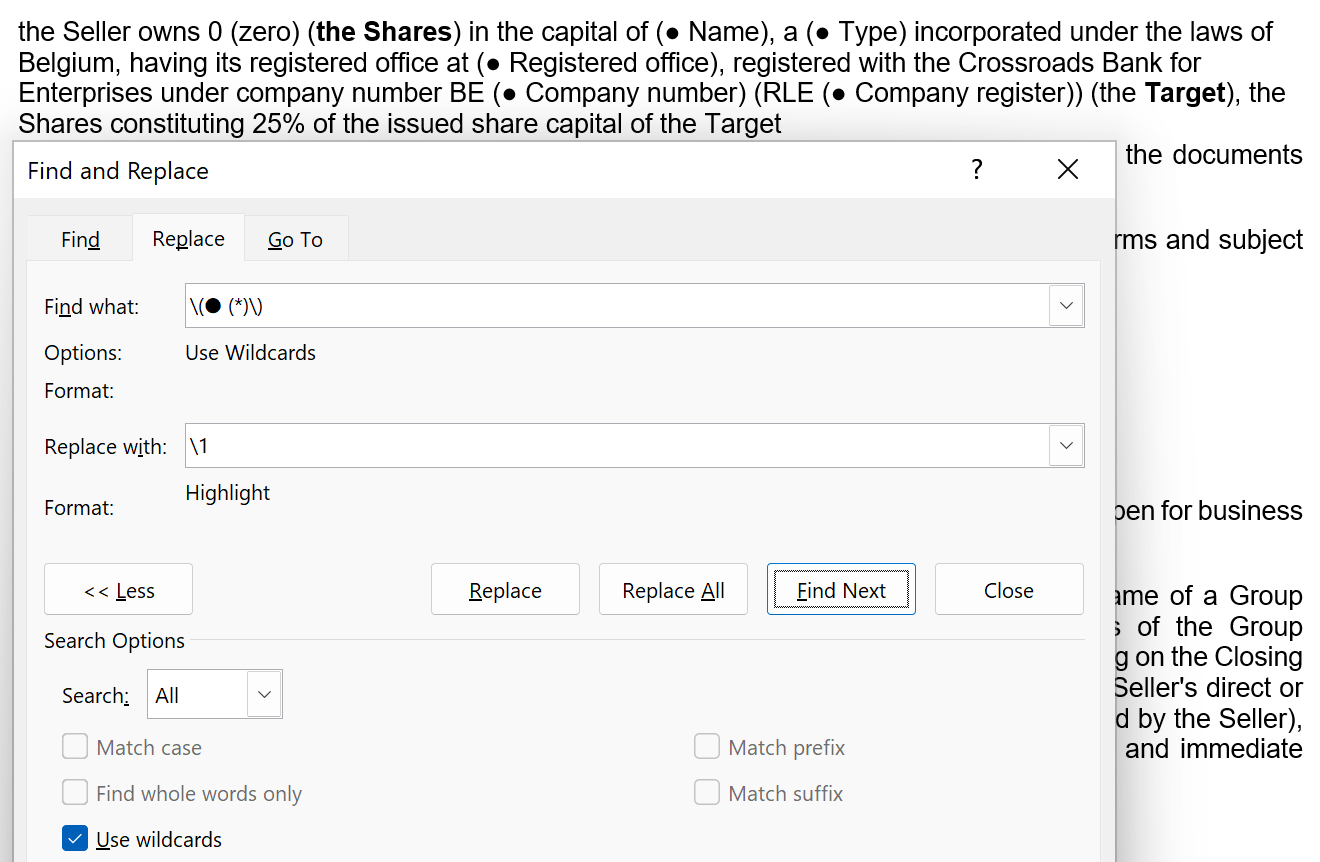
Becomes:
Use keyboard shortcuts!
Another very helpful way to speed up the highlighting process, is by assigning keyboard shortcuts to the add highlight and remove highlight operations in MS Word. You can do so as follows:
Go to File > Options > Customize Ribbon
At the bottom of the Customize the Ribbon and keyboard shortcuts pane, click on the Customize button.
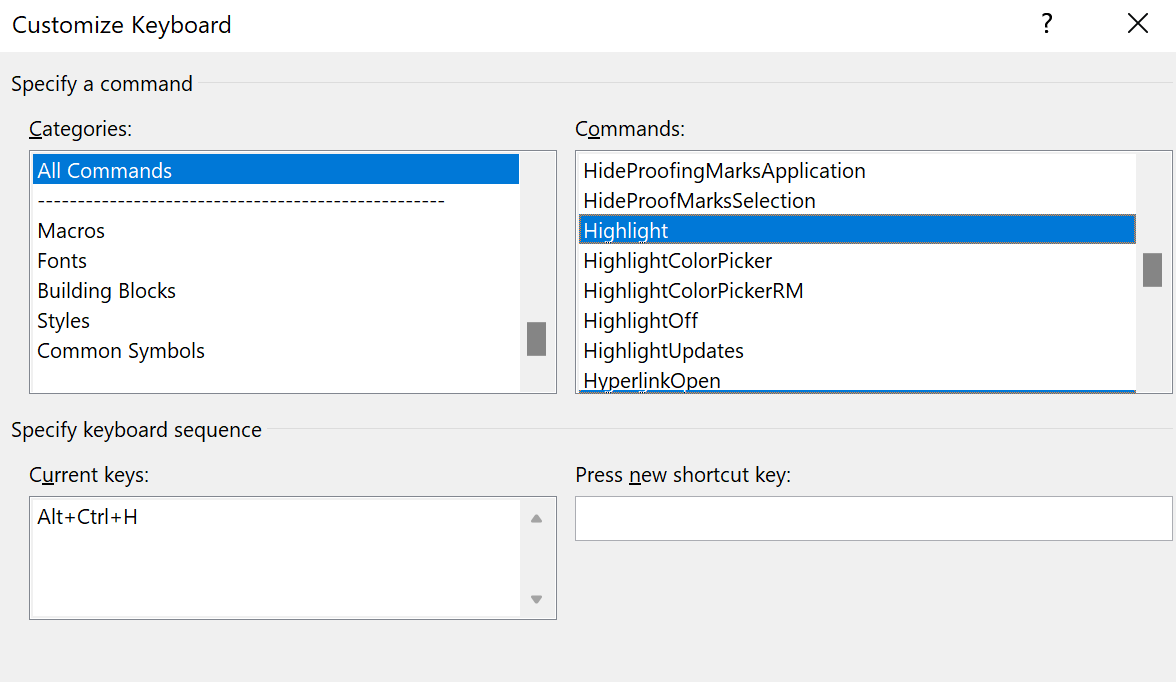
In the upper left box, navigate to All Commands.
In the upper right box, navigate to the Highlight command.
Position your cursor within Press new shortcut key and press a relevant shortcut — e.g., Ctrl + Alt + H, and next press the Assign button.
Do the same with the HighlightOff command, e.g. assign it shortcut Ctrl+Alt+Shift+H, or any other that works for you.
Close the dialog boxes and go back to your document.
Now, when you select text, you can press the relevant shortcut to add or remove highlighting.
MS Word will use the last highlighting color you manually used. So if you previously highlighted something in yellow, make sure your first manually highlight in cyan before invoking the shortcuts.
For more details, see Microsoft's web page.
Conditional text
Conditional text is created by highlighting a condition + colon + conditional text. In the following example, the text "taking into account Customer's preferred delivery schedule" will only be shown when condition "softened" is met.

You can "chain" multiple conditions by inserting the vertical pipe symbol. For example, instead of writing

...you can also write the following, which more clearly expresses the author's intent that one of several options will need to be chosen. ClauseBuddy will then insert the first text for which the associated condition is met:

If each of the conditions has a structure similar "x = y", you can also write this more concisely:

Another advantage of using the pipe operator is that you can easily insert a final "catch all" part — using else: — which will apply when none of the previous conditions was met.

Conditional paragraphs
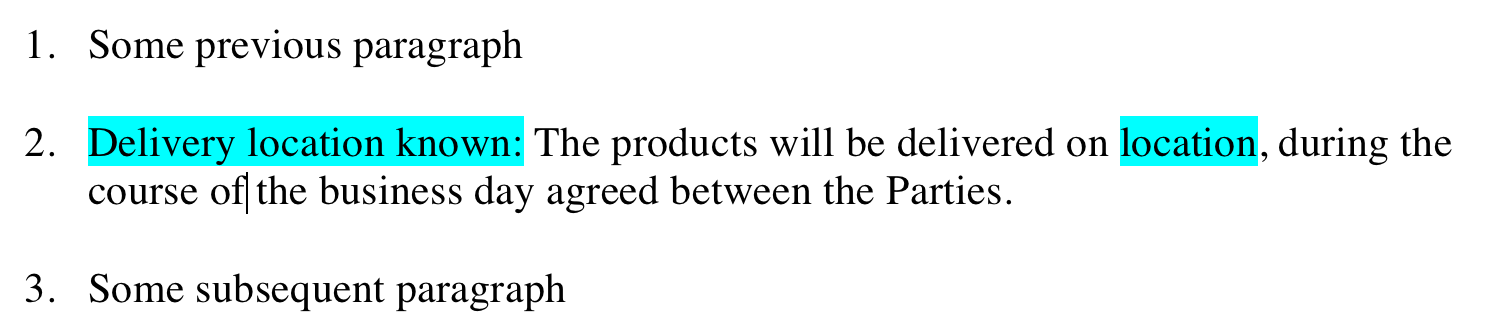
An entire paragraph can be subjected to a condition by positioning that condition at the start of the paragraph. For example, the following paragraph will only be shown when the delivery location is known (also note the "location" placeholder, which will be replaced by the actual location, as answered by the end-user):

There are many different ways to express conditions, as further explained in the separate article on conditions.
Dealing with automatic numbering
The question arises what happens to the numbering of subsequent paragraphs when an entire paragraph is dropped because some condition is not met.
For example, assume that the delivery location is not known, so that the second paragraph will get dropped in the next example. When the end-user creates a PDF or DOCX file, ClauseBuddy will automatically update the numbering, so that the last paragraph ("Some subsequent paragraph") will get number 2.
However, this only functions correctly when you are properly using Microsoft Word's automatic numbering features. When, instead, you would "hardcode" numbers — i.e., explicitly type in the number of each paragraph — your document will get stuck on incorrect numbering.
This is yet another reason to use automatic numbering and MS Word "styles" to format your documents. We are aware that "in the wild" many legal documents do not yet use automatic numbering (or, even worse, use a mix of automatic and manual numbering).
However, there are countless benefits (e.g., automatic TOCs, automatically updating cross-references, easy layouts, etc.) to learning and applying such automatic numbering.
Do note that — due to the complexity involved — the automatic changes in the numbering will not be shown interactively on the screen. You can rest assured, however, that everything will be correct when you ask ClauseBuddy to create a DOCX or PDF file.
Spaces
ClauseBuddy will automatically remove multiple consecutive spaces that happen to get inserted due to conditional text.
In the following example, the condition "softened" will cause softening language to get inserted. If that condition is not met (so that the ", acting reasonably," gets removed), you would end up with two consecutive spaces (one space exists after Supplier and one exists before will). In such scenarios, ClauseBuddy will automatically remove the double space.

Note that ClauseBuddy will never insert additional spacing: it will only remove multiple consecutive spaces caused by conditional text.
Placeholders
A placeholder is a piece of text that will get replaced by an answer to an associated question within the questionnaire. For example, in the following sentence, the order amount and the delivery date are placeholders, highlighted in cyan.

When you then create two questions corresponding to those placeholders, ClauseBuddy will automatically replace the cyan words with placeholders. When you click on the blue placeholder at the right, you will automatically select the corresponding question at the left.

When the answer to the question is filled, the placeholders will instead be replaced by the relevant value:

This seems simple as a start, but there several other possibilities you need to be aware of.
First, it is possible to put the placeholder within a conditional body. For example:

It is also possible to put the placeholder among mere body text, but you then need to be careful to prefix the answer with an @, otherwise it will not be recognised by ClauseBuddy.

When you use the answer inside the condition itself (i.e., before the colon), then no placeholder will be shown.

The reason is that, within a condition, you often deliberately want to check whether a certain question is answered or not, and then show different answers depending on the situation. For example:

If you refer to the answer inside of a special function (either within the body, or a priori within the condition), then no placeholder will be shown either.
The summary is that a placeholder will (only) be shown if some cyan-highlighted directly embedded within the body refers to an unanswered question. If you instead refer to an unanswered question in a condition or inside a special function, then the value will be considered undefined. Refer to the Clause9 help pages to understand how these undefined values will be treated.
If you want to prevent a placeholder from appearing inside the body text, then refer to the question from within a special function, e.g. @if-value.
Examples using placeholders and conditions
Show the name, address, city and country. Require each value to be filled in, otherwise a placeholder will be shown:

Alternatively, you can also highlight the entire line (instead of having separate highlights) and use @-prefixes:

Suppose the country is optional, because most of the companies will be situated in France anyway. Accordingly, you want to show France when the country is not filled in:

Suppose you want to only show the country when it's filled in (not replace it by some default value such as France), and not show a placeholder when the country is missing:

Suppose you want to show all the effectively filled in parts of an address, separated by spaces, and don't want to show placeholders:

If you want to separate them by comma's:

If you want to automatically use "and" before the penultimate item:

If you want to show a warning towards the end-user when the city would be missing:

If you want to invite the end-user to click on the missing value on the right side to go to the city-question at the left side:

If you want to show the name of the entity in uppercase, but invite the user to click on the name box when it's missing:

Alternatively, you can also use an "if this - then that - else" structure between curly braces. Note that the @name does not need to be put inside a @placeholder, because the part after the else: is considered body text.

If you want to show the name of the entity in uppercase when it's filled in, and otherwise the text "MISSING NAME":

Last updated