
Quick Tutorial: Smart Templates
The tutorial above uses the example of an Employment Agreement.
Automating documents with ClauseBuddy essentially involves highlighting words in a template, and then creating questions to answer the placeholders within the highlights, or modify the conditions imposed by the highlights.
Grammar sheet
When automating documents in ClauseBuddy, there are many options to take into account. To prevent the options from becoming overwhelming, we’ve created a handy one-pager that serves as a guide to help you construct and amend all the content in your Smart Templates.
Keep this one-pager nearby—it's your trusty (and totally legitimate) cheat sheet!
Step 1: Highlighting placeholders
The first step involves opening a template in MS Word and highlighting placeholders in cyan. You can drop any square brackets, blobs and similar elements that legal experts tend to insert in manual templates.)
For example, the following clause from a manual template:

would be converted into:

Step 2: Inserting conditions
Cyan highlight that end on a colon ( : ) are treated as conditions that "guard" the visibility of other text.
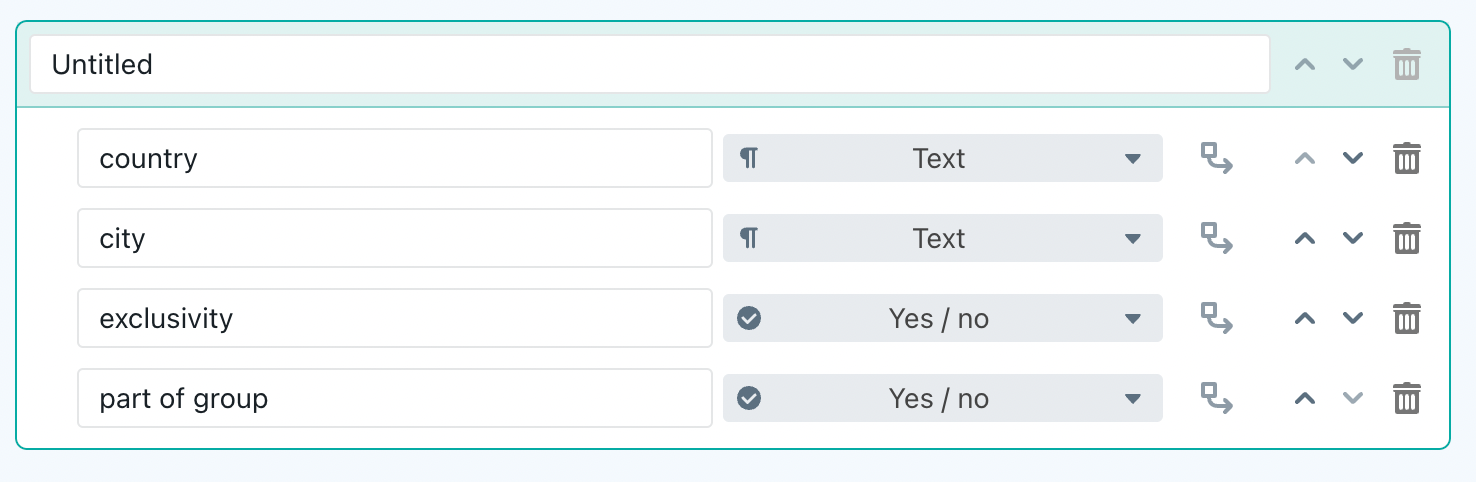
A first possibility is to insert a condition for a few selected words. In the following example, the words "and the employees of its associated entities" only need to be inserted when the supplier is part of a group of companes. A condition called "part of group" therefore guards the visibility of those words.

A second possibility is to insert a condition for an entire paragraph, by putting that condition at the start of the paragraph. The rest of the paragraph does not need to be highlighted in such case.
In the following example, the entire paragraph will be dropped if no exclusivity applies:

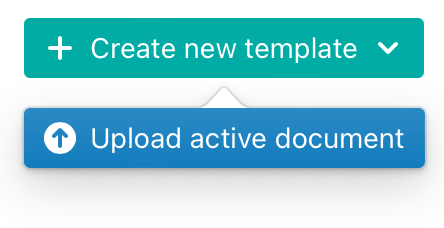
Step 3: Uploading the template
Next, you upload the template to ClauseBuddy.
In case you are using the plugin-version of ClauseBuddy, you can simply open ClauseBuddy, navigating to the templates section and clicking on Upload active document; in the browser-version of ClauseBuddy you should select or drag the relevant DOCX-file.
If you do not have a large monitor, you may want to put Microsoft Word in Web Layout View instead of the default Print Layout (you can do so by visiting the View tab in Word's ribbon, or by clicking on the relevant button in Word's status bar at the bottom of the window).
You can then make your document panel at the left side smaller, while Word will wrap the document's text in the available window. This allows you to make more room for ClauseBuddy.
Step 4: Creating questions
ClauseBuddy allows you to create any number of questions, grouped into different sections ("cards"). As a template author, you can define how questions can interact with each other — e.g., to only ask for details when a main question has been positively answered.
The easiest way to quickly create new questions, is by clicking on Add questions from document in the template editor's toolbar.
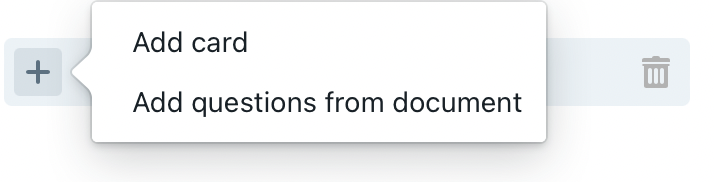
ClauseBuddy will then extract all the cyan-highlighted sections from your Word-document. (You may need to adapt the type of question, e.g. turn it into a Yes/no question instead of a question that expects a textual answer.)
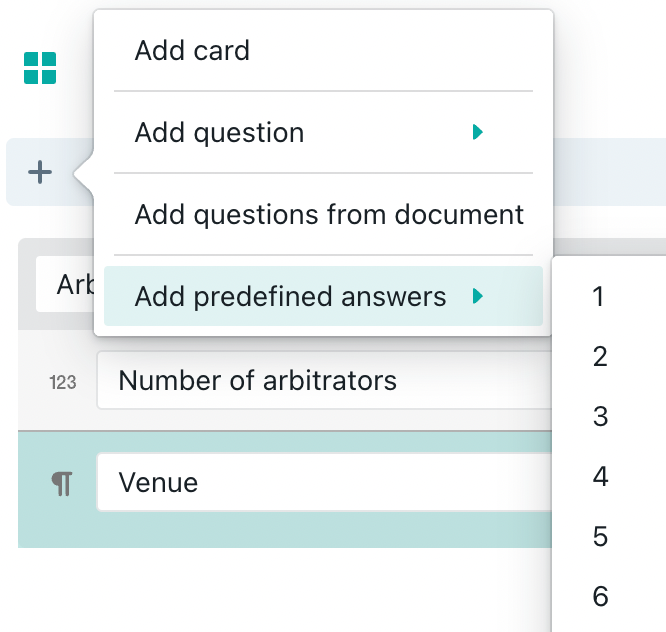
Optionally, you may want to assign predefined answers to certain questions. For example, for an arbitration clause, you may want to predefine a few typical venues, such as Amsterdam, Paris and New York.
You can do so by selecting a question and choosing the amount of predefined answers you want:
Step 5: Configuring questions
There is a wide range of options you can configure for each question, by clicking on a question and inspecting the panel at the right side.
Answering guidance
A few settings allow you to assist your end-users to complete the questionnaire:
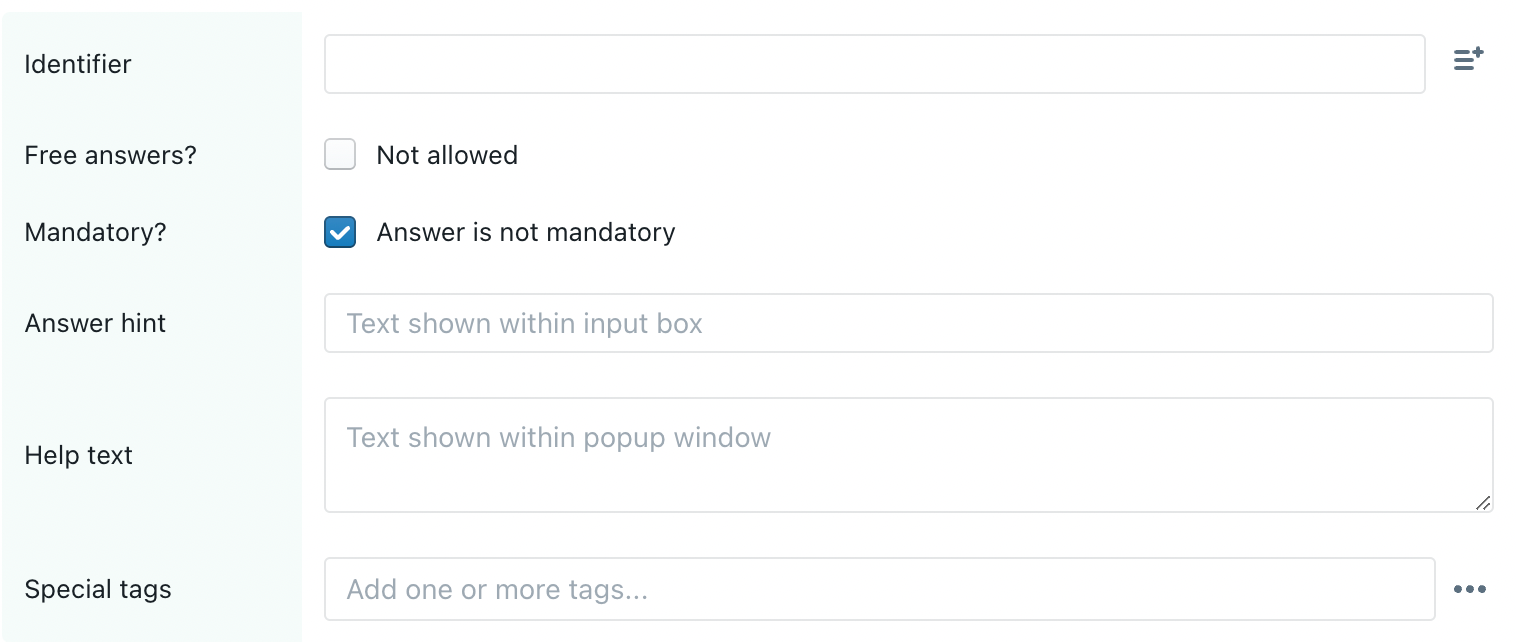
If an answer is not strictly required, you can check the "Answer is not mandatory" setting.
An answer hint will be shown in an empty answer box. For example, if you want to nudge the end-user to insert phone numbers with a country prefix, you could type in "e.g. +33 456 789 846".
A help text can consist of a few words with extra guidance or warnings. It will be shown in a popup balloon towards the end-user:

Identifier
Using the answer to a long question (e.g. "Will the goods be shipped with special insurance coverage?") in a cyan-highlighted condition is not only tedious due to the typing work involved, but will also be error-prone because each change in the question will also require a change in the cyan-highlighted text.
For such questions, it's probably a better idea to assign a short identifier (e.g. "shipping-insurance") to the question, and use that identifier in the cyan-highlighted text.
Conditions
To avoid questionnaire-fatigue, you will probably want to hide questions that become irrelevant based on previous answers.
For example, if a contractual party can be both a natural person and a legal entity, then a question about the day of birth should be hidden when the contractual party was described as a legal entity. A question about the company registry number should instead be shown.

Step 6: Testing your smart template
At any moment you can click on the Test button and interactively try your template, to see whether the intelligence you inserted into your document through all the questions and conditions is correctly reflected.
Step 7: Save & share
Choose a filename and a storage folder, and save your template when you're done.
If you have a paid subscription, you can also share your template with colleagues, clients or even counterparties. To do so, click on the Share button within the Settings panel, or click on a template within the templates overview panel. Your recipients only require the final link in order to fill in your template.

Last updated