
Heading pane
In the Headings pane, you can map ClauseBuddy's nine levels of "Heading x" and "Heading x Title" styles to your own style.
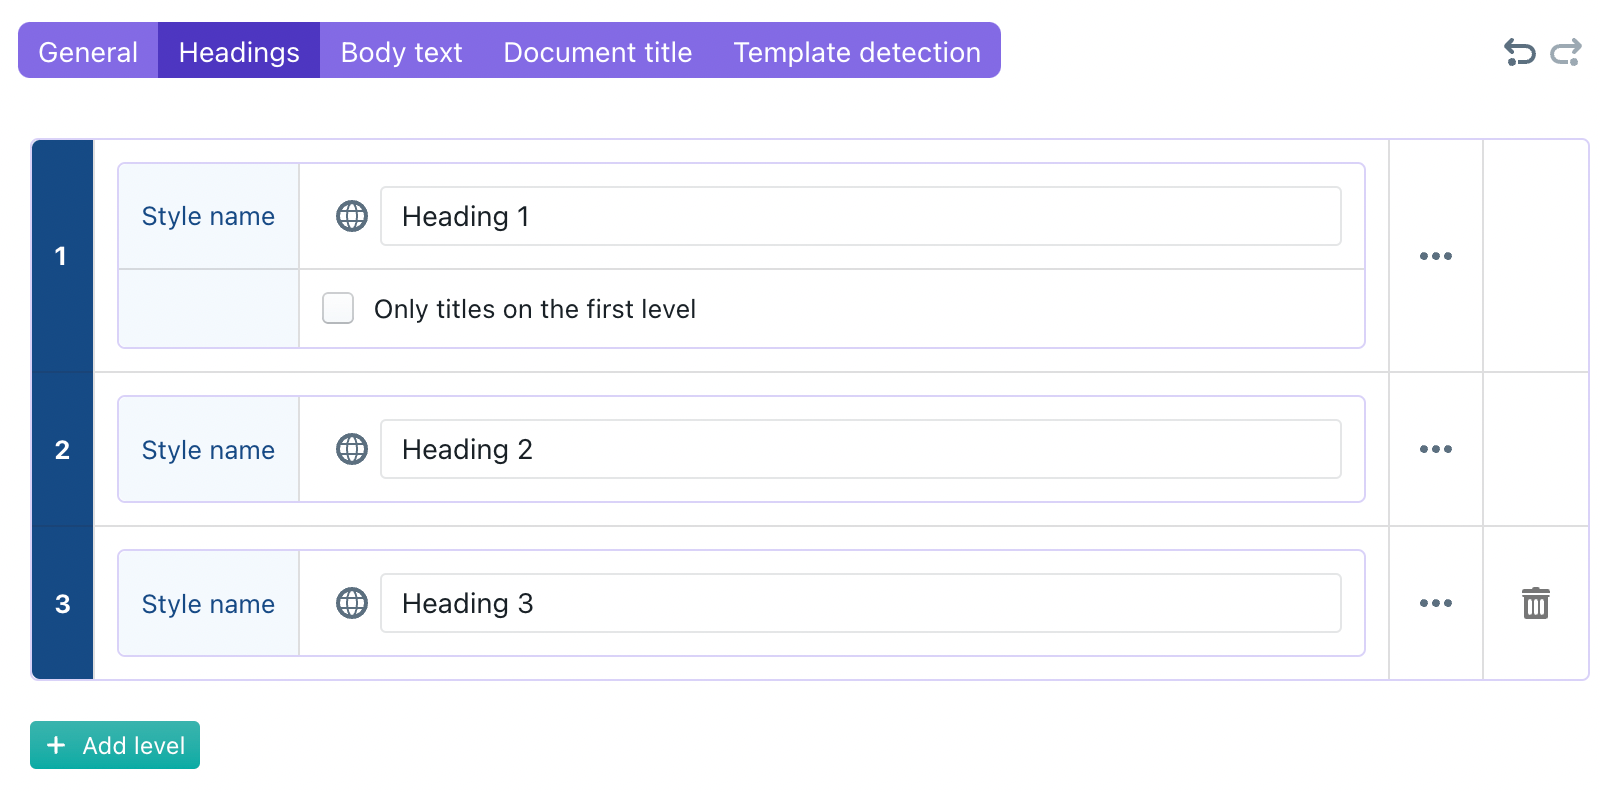
You can add a new level by clicking on the green "+ Add level" button.
You can delete the last level by clicking on the trash can icon at the right/
Many different house styles will always have a style that looks like a title on the top level (i.e., they don't allow plain heading styles at that top level). If such is the case then, check the "Only titles on the first level" option: it will only allow clauses with titles at the first level, and will force clauses without a title to use the style at the second level (Heading 2 in the screenshot).
When you click on the "..." button at the right, you can show additional options for ach level
For each level, you can optionally assign a different MS Word style name for the title style. (If such separate title style name is missing, then the same MS Word style will be used for headings and heading titles on that level.)
For each level, you can assign up to nine different MS Word styles for body paragraphs (bulleted or not) below that level. If no such separate body styles are assigned, then ClauseBuddy will use the general MS Word styles for body paragraphs that are assigned in the Body text pane discussed below.

Last updated